


Guide to Photography Flash Units

Photography is a dynamic and evolving art form, and one of the key elements that contribute to its success is lighting. While natural light can create stunning images, there are situations where it falls short. This is where photography flash units come into play, offering photographers the ability to control and manipulate light to achieve the desired results. In this comprehensive guide, we’ll delve into the world of photography flash units, exploring their types, features, and tips for effective usage.
Illuminating the World of Photography Flash Units
1. Types of Flash Units:
Built-in Flash: Convenience with Constraints
Built-in flashes are the unsung heroes of many cameras, providing an instant solution for low-light scenarios. Nestled seamlessly within the camera body, these flashes are a go-to for spontaneous shots, ensuring photographers capture the moment even in challenging lighting conditions. However, beneath their convenience lies a set of limitations that keen photographers should be aware of.
Power and Reach:
Built-in flashes are designed with portability in mind, but this comes at the cost of power. While sufficient for close-quarters shots, their limited reach becomes apparent when faced with expansive scenes or subjects at a distance. Photographers aiming to illuminate larger spaces or capture distant subjects may find the built-in flash lacking the necessary intensity.
Flexibility Matters:
Fixed in position near the camera lens, built-in flashes have a tendency to create unflattering, direct light. Shadows can appear harsh, and the overall effect may lack the depth and dimension achieved with external flashes. The inability to adjust the flash’s position hampers creative control over lighting setups, limiting a photographer’s ability to craft visually compelling images.
Red-Eye Challenges:
Proximity to the lens also introduces the common issue of red-eye. This occurs when the flash reflects off the blood vessels in the eyes, resulting in an undesirable red glow in portraits. While red-eye reduction features are often present, they may not completely eliminate this effect, especially in candid or rapid-fire shooting scenarios.
Artistic Expression Restrained:
Photography is an art form that thrives on creative expression. Built-in flashes, while efficient for basic illumination, may fall short when it comes to fulfilling the nuanced demands of artistic photography. Advanced techniques that require intricate lighting setups may be challenging to execute with the built-in flash, limiting the photographer’s ability to push creative boundaries.
Battery Dependency:
Built-in flashes draw power directly from the camera’s battery. While this design ensures a seamless power source, it also contributes to quicker battery depletion. In situations demanding prolonged shooting sessions without immediate access to spare batteries, photographers may find themselves constrained by the built-in flash’s rapid drain on the camera’s power.
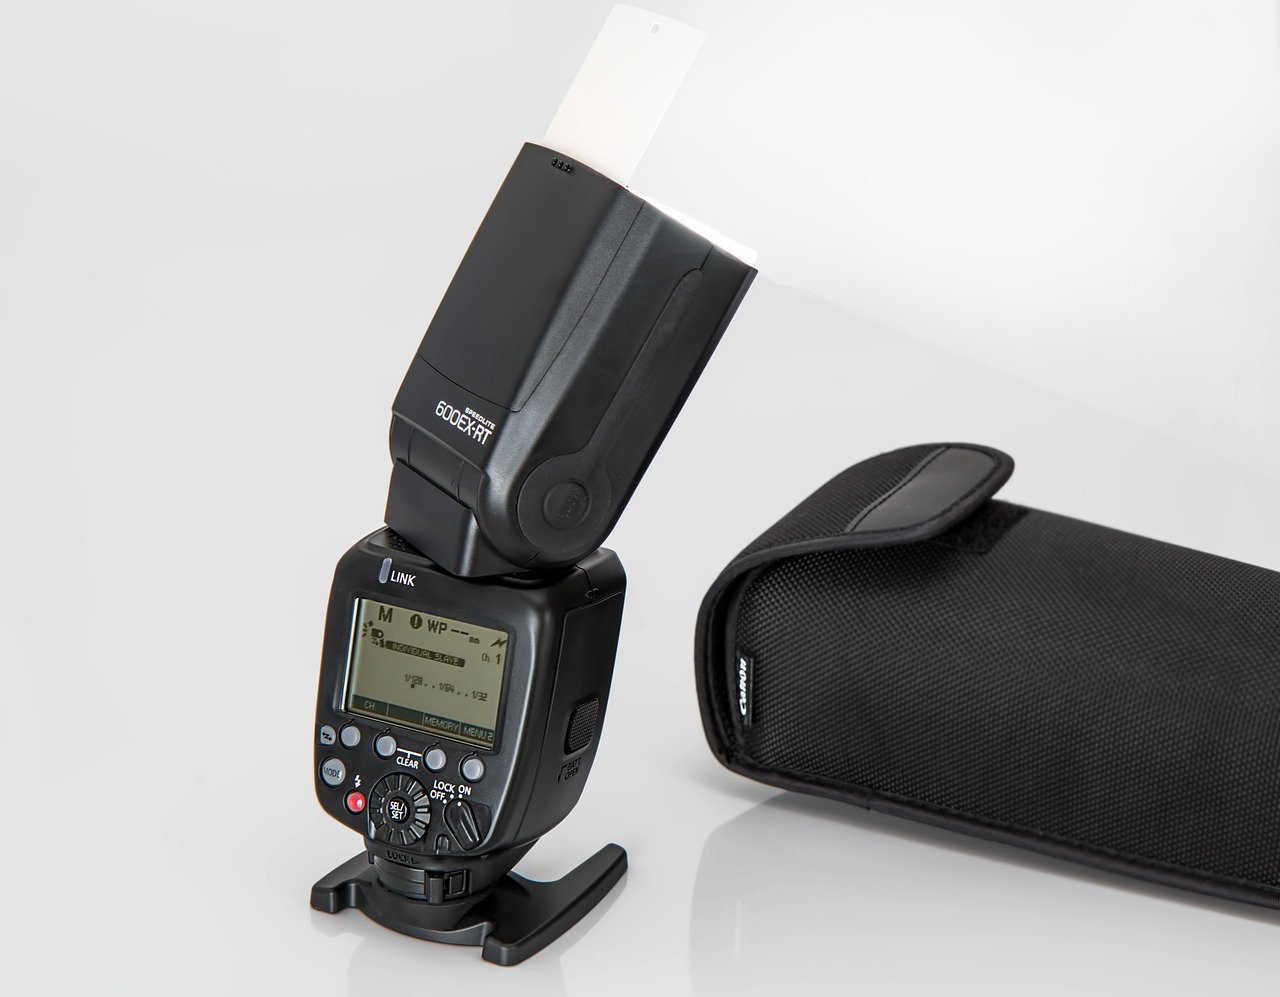
External Flash: Empowering Photography with Power and Versatility
Unleashing the Power:
External flash units, often regarded as the workhorses of professional photographers, elevate the game by offering unparalleled power and versatility. Unlike their built-in counterparts, these dedicated external flashes are purpose-built to deliver robust bursts of light, catering to a wide range of photography scenarios.
Mounted Brilliance:
External flashes can be mounted directly onto the camera’s hot shoe, providing an immediate boost in power and control over the lighting environment. This on-camera usage is ideal for scenarios where additional light is needed without the complexities of off-camera setups. Wedding photographers, event shooters, and photojournalists often rely on this configuration for its efficiency and quick deployment.
Off-Camera Artistry:
What sets external flashes apart is their ability to transcend the confines of on-camera limitations. By utilizing wireless triggers or built-in radio systems, photographers can position the flash away from the camera, unleashing a realm of creative possibilities. This off-camera flexibility allows for the sculpting of light, creating dynamic shadows, and providing a three-dimensional quality to the images.
Versatility Unleashed:
External flashes come equipped with a myriad of features that contribute to their versatility. Manual power control allows precise adjustments to the flash output, giving photographers complete command over the lighting intensity. Additionally, many external flashes incorporate TTL (Through-The-Lens) metering, enabling automatic adjustments based on the camera’s settings for those moments when speed is of the essence.
Zooming into Precision:
To further enhance versatility, external flashes often include zoom functionality. This feature allows the flash to adjust its beam angle to match the focal length of the lens. The result is a more focused and controlled beam of light, particularly useful when photographing subjects at varying distances.
Modifiers for Mastery:
External flashes seamlessly integrate with an array of modifiers, such as softboxes, umbrellas, and diffusers. These accessories transform the harsh, direct light emitted by the flash into a softer, more diffused glow, opening up possibilities for flattering portraits and controlled, mood-setting lighting.
Balancing Act:
Achieving a balance between ambient light and flash is a key skill in flash photography. External flashes, with their power and versatility, allow photographers to delicately balance artificial and natural light, creating visually appealing images that feel both natural and professionally lit.
Studio Strobes: Mastering Light in Controlled Environments
Harnessing Power for Precision:
Studio strobes stand as the pinnacle of lighting equipment in the world of photography, specifically designed to cater to the demands of studio setups. Unlike portable external flashes, studio strobes are heavyweight champions, boasting unparalleled power output that allows photographers to sculpt light with precision in a controlled environment.
High Output Brilliance:
The defining feature of studio strobes is their exceptional power output. These units are engineered to deliver intense bursts of light, illuminating even the most expansive studio spaces. The high output ensures consistent and well-distributed lighting, crucial for capturing intricate details and achieving professional-grade results.
Tailored for Studio Setups:
Studio strobes are purpose-built for the studio environment, where lighting conditions can be meticulously controlled. Their design factors in the need for consistent and reliable performance, making them ideal for commercial photography, fashion shoots, product photography, and other professional applications where precision is paramount.
Modifiers Galore:
One of the standout features of studio strobes is their compatibility with an extensive range of modifiers. Softboxes, beauty dishes, reflectors, and barn doors are just a few examples of the arsenal of modifiers available to photographers. These accessories allow for the manipulation of light, enabling the creation of soft, flattering illumination or dramatic, high-contrast effects, depending on the desired outcome.
Taming the Shadows:
Studio strobes excel in producing controlled, shadow-free lighting. This is achieved through the proper placement of multiple strobes, strategically positioned to eliminate unwanted shadows and highlight the subject’s features. The ability to precisely shape and direct light makes studio strobes indispensable for portrait and commercial photography.
Consistent Color Temperature:
Maintaining consistent color temperature is crucial in professional photography, especially in studio settings where accurate color rendition is imperative. Studio strobes are designed to provide stable color temperatures across their power range, ensuring that the colors in the photographs remain true to life.
Remote Control and Sync:
Many studio strobes offer advanced features such as remote control and synchronization options. This allows photographers to adjust power settings, trigger multiple strobes simultaneously, and achieve complex lighting setups without the need to physically adjust each unit.
Investment in Professionalism:
While studio strobes are undoubtedly powerful tools, they also represent a significant investment. Professional photographers and studios, however, consider them a worthy investment due to the level of control, consistency, and quality they bring to the creative process.
Key Features: Illuminating the Path to Perfect Shots
In the intricate world of photography, mastering light is a craft, and the key features of flash units play a pivotal role in shaping the final image. Let’s explore some essential features that contribute to the artistry of flash photography.
1. Flash Duration: Freezing Motion with Precision
Definition:
Flash duration refers to the time a flash emits light. In the realm of freezing motion, this feature becomes paramount.
Importance:
Short flash durations are instrumental in capturing fast-moving subjects without motion blur. Whether it’s a dancer in mid-leap or a sports moment frozen in time, the ability to control flash duration ensures that every detail is crisply captured.
2. TTL (Through-The-Lens): The Genius of Automatic Metering
Definition:
Through-The-Lens (TTL) is a sophisticated metering system where the flash communicates with the camera to automatically determine the required amount of light for a well-exposed image.
Importance:
TTL takes the guesswork out of flash exposure, making it an invaluable feature in fast-paced situations where manual adjustments might be impractical. It enables photographers to focus on composition and creativity while the flash optimally meters the light based on the camera’s settings.
3. Manual Mode: Crafting Light with Precision
Definition:
Manual mode in flash units provides photographers with complete control over the power settings of the flash, allowing them to fine-tune the intensity of the light.
Importance:
Manual mode is a go-to feature for photographers who seek meticulous control over their lighting setups. It enables the adjustment of flash power to achieve desired effects, making it an indispensable tool for those who wish to sculpt light with precision and creativity.
4. Zoom Functionality: Adapting to Focal Length
Definition:
Zoom functionality in flash units allows the adjustment of the beam angle to match the focal length of the lens.
Importance:
This feature ensures that the flash coverage aligns with the field of view of the lens. As photographers zoom in or out, the flash adapts, providing optimal illumination for subjects at varying distances. It’s particularly useful in situations where the photographer is working with telephoto or wide-angle lenses.
Choosing the Right Flash Unit: A Compatibility Odyssey
Selecting the right flash unit is a pivotal decision in a photographer’s journey, and compatibility is the guiding star that ensures a seamless integration between camera and flash. Let’s delve into the importance of compatibility and explore alternative options for those seeking a perfect match.
1. Ensure Compatibility: The Camera-Flash Tango
The Dance of Compatibility:
Before embarking on the flash unit odyssey, it’s crucial to ensure that the chosen flash is compatible with your camera’s make and model. Compatibility isn’t just about physical connections; it extends to the electronic communication between the two devices.
Harmony in Functions:
A compatible flash unit harmonizes with your camera’s features, allowing for a smooth exchange of information. This ensures that advanced functionalities, such as TTL metering and wireless communication, work seamlessly.
Avoiding Hiccups:
Mismatched components can lead to malfunctions, erratic behavior, or even potential damage to either the camera or the flash unit. Checking compatibility details in the user manuals or consulting with the manufacturer guarantees a trouble-free relationship between the camera and flash.
2. Exploring Third-Party Alternatives: A Symphony of Options
Cost-Effective Harmony:
While the camera’s native flash units are often designed with optimal compatibility in mind, third-party flashes offer a cost-effective alternative without compromising on features.
Comparable Features, Budget-Friendly:
Many reputable third-party manufacturers produce flashes that rival their brand-name counterparts in terms of features and performance. These alternatives often come with a more budget-friendly price tag, making them an attractive option for photographers seeking quality without breaking the bank.
Research and Reviews:
Before venturing into the third-party realm, thorough research is key. Reading reviews, consulting user forums, and considering the experiences of other photographers using similar camera models can provide valuable insights into the compatibility and performance of third-party flashes.
Considerations for Compatibility:
Flash Mount: Ensure that the flash unit’s mount aligns with your camera’s hot shoe or triggering system.
Voltage Compatibility: Check voltage compatibility to avoid potential damage to the camera’s circuitry.
Firmware Updates: Some third-party manufacturers provide firmware updates that enhance compatibility with new camera models and features.
Navigating Power Requirements: The Illuminating Quest for the Right Flash Power
In the realm of photography, understanding the power requirements of a flash unit is akin to choosing the right tool for a specific job. As you embark on this illuminating quest, consider the nuances of power to ensure your flash unit seamlessly meets the demands of your photographic style.
1. Tailoring Power to Your Photographic Style:
The Art of Balance:
Different styles of photography demand varying levels of flash power. Portrait photographers, for example, might find moderate flash power sufficient for capturing the nuances of facial expressions. On the other hand, genres like high-speed photography or outdoor portraiture may necessitate a more robust flash output to effectively illuminate subjects in challenging conditions.
Portrait Photography:
For traditional portrait work, where controlled lighting is often employed, a moderate flash power may suffice. This allows for the creation of flattering, soft lighting without overwhelming the scene with excessive brightness.
High-Speed Photography:
In contrast, high-speed photography, which aims to freeze fast-moving subjects, requires a powerful burst of light with a rapid flash duration. This ensures that the motion is effectively captured without any undesirable blur.
Outdoor Portraits:
Outdoor portraits, especially in bright sunlight, benefit from a more powerful flash to combat harsh shadows and fill in areas where natural light may fall short. This additional power helps balance the ambient light and introduces dimension to the subjects.
2. Assessing Flash Unit Power:
Guide Number (GN):
The Guide Number (GN) is a numerical value that indicates the power of a flash unit. A higher GN signifies a more potent flash. Consider the GN of a flash unit in relation to your typical shooting conditions to ensure it aligns with your power requirements.
High-Speed Sync (HSS):
For situations that demand a higher shutter speed, such as outdoor photography in bright sunlight, a flash unit equipped with High-Speed Sync (HSS) becomes invaluable. HSS allows the flash to synchronize with faster shutter speeds, maintaining proper exposure even in challenging lighting conditions.
3. Future-Proofing Your Gear:
Anticipating Evolving Needs:
As your skills and interests in photography evolve, so too may your requirements for flash power. Investing in a flash unit with adjustable power settings and compatibility with additional accessories ensures that your gear can adapt to new challenges and creative pursuits.
Consider External Power Sources:
Some high-powered flash units allow for external power sources, such as battery packs. These accessories can significantly increase the number of flashes and shorten recycle times, providing a power boost when needed.
Versatility Unleashed: Elevating Your Photography with Flexible Flash Units
In the dynamic world of photography, versatility is a prized attribute in a flash unit. As you embark on the quest for the perfect lighting tool, consider the transformative power of swivel and tilt capabilities, as well as compatibility with modifiers, to enhance your creative possibilities.
1. Swivel and Tilt Capabilities: Directing Light with Precision
Swivel:
Flash units equipped with swivel capabilities offer photographers the freedom to rotate the flash head horizontally. This allows for the redirection of light, enabling photographers to bounce it off walls or other surfaces. Swivel functionality is particularly beneficial in scenarios where direct flash illumination may result in harsh shadows or unwanted highlights.
Tilt:
Tilt functionality complements swivel by providing the ability to angle the flash head vertically. This is especially useful when bouncing light off ceilings. By tilting the flash head, photographers can achieve a softer and more diffused lighting effect, creating a natural and flattering illumination for portraits.
Benefits:
Bouncing Off Ceilings: Tilted flash heads can bounce light off ceilings, creating a soft, indirect illumination that minimizes shadows and produces a natural-looking result.
Avoiding Harsh Shadows: Swiveling and tilting the flash allows photographers to control the direction of light, preventing the formation of harsh shadows directly behind the subject.
2. Compatibility with Modifiers: Sculpting Light to Perfection
Softboxes:
Softboxes are versatile modifiers that diffuse and soften the light emitted by a flash. Flash units with compatibility for softboxes allow photographers to achieve a flattering and even illumination, ideal for portrait photography. Softboxes are particularly effective in creating a gentle transition between highlights and shadows.
Diffusers:
Diffusers scatter and soften light, reducing its intensity and creating a more pleasing effect. A flash unit that can accommodate diffusers becomes a versatile tool for photographers seeking a subtler and more natural-looking light source.
Benefits:
Enhanced Creativity: The compatibility with modifiers opens up a realm of creative possibilities. Photographers can experiment with different modifiers to sculpt light according to their artistic vision.
Portrait Perfection: Softboxes and diffusers contribute to creating soft, flattering light, making them essential tools for portrait photographers aiming to capture the essence of their subjects.
3. Embracing Creative Freedom:
Off-Camera Flash:
Flash units with swivel and tilt capabilities, combined with wireless triggering systems, empower photographers to take their lighting off-camera. This unlocks a world of creative opportunities, allowing for more intricate lighting setups and the ability to shape light from various angles.
360-Degree Swivel:
Some advanced flash units offer a 360-degree swivel, providing photographers with complete freedom in directing light. This is particularly advantageous in dynamic shooting environments where quick adjustments are essential.
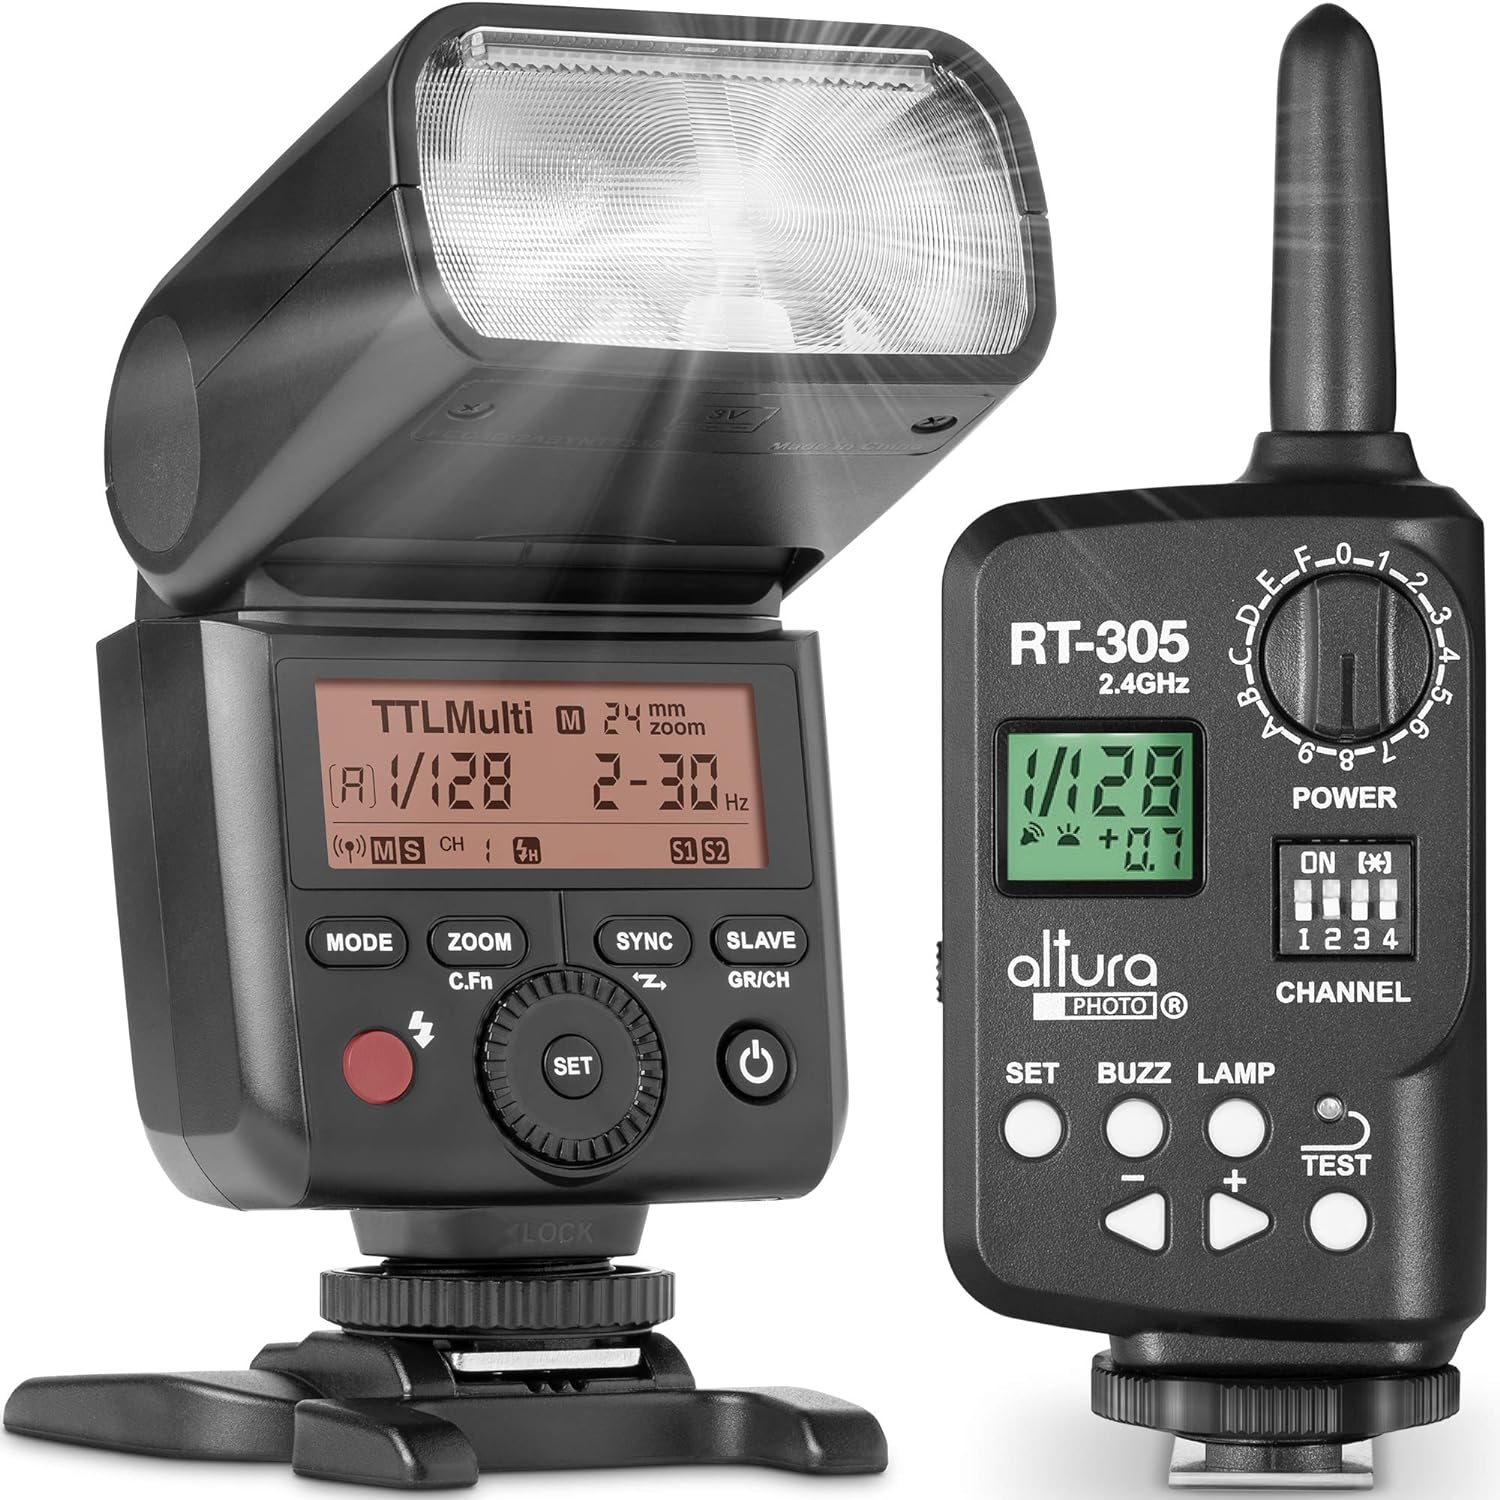
Wireless Capabilities: Unleashing Creative Freedom in Flash Photography
In the ever-evolving landscape of photography, wireless capabilities in flash units stand as a transformative feature, offering photographers a realm of creative freedom and flexibility. Let’s delve into the significance of wireless capabilities and how they elevate the art of flash photography.
1. Off-Camera Flash: Crafting Dimension and Depth
Definition:
Off-camera flash refers to the practice of using a flash unit detached from the camera, allowing photographers to position the flash strategically to achieve unique lighting effects.
Creative Freedom:
Choosing a flash with wireless capabilities opens the door to off-camera flash photography, providing photographers with unparalleled creative freedom. By detaching the flash from the camera, they can experiment with various lighting angles, create dramatic shadows, and add depth and dimension to their images.
Dynamic Lighting Setups:
Wireless capabilities enable photographers to position the flash anywhere within the shooting environment. This versatility allows for dynamic lighting setups, whether it’s sidelighting to emphasize textures, backlighting for dramatic silhouettes, or creating multiple light sources for intricate compositions.
2. Greater Flexibility with Wireless Flash:
Wireless Triggering:
A flash with wireless capabilities can be triggered remotely, eliminating the need for physical connections. This is achieved through radio frequency (RF) or infrared (IR) communication, providing photographers with the flexibility to position the flash in challenging locations or experiment with unconventional setups.
Multiple Flash Setups:
Wireless capabilities facilitate the use of multiple flashes simultaneously. This allows photographers to create complex lighting scenarios with multiple light sources, adding sophistication to their compositions. Each flash unit can be independently controlled, providing precise adjustments to achieve the desired lighting effect.
3. Wireless Flash Control: A Symphony of Possibilities
Remote Power Control:
Wireless flash units often come equipped with remote power control functionality. This feature enables photographers to adjust the flash power settings from a distance, eliminating the need to physically approach each flash unit for changes. It streamlines the creative process and allows for real-time adjustments during a shoot.
TTL Flash Metering:
Through-The-Lens (TTL) flash metering can be wirelessly communicated between the camera and flash unit. This ensures accurate exposure even in complex lighting situations, providing consistent and reliable results.
Triggering Systems:
Advanced triggering systems allow for sophisticated setups, such as using one flash to trigger others in a synchronized fashion. This synchronized triggering ensures that all flashes fire in harmony, resulting in a cohesive and well-lit image.
Illuminating Tips for Soft and Natural Lighting
In the realm of flash photography, mastering the art of bounce flash stands as a key technique for achieving soft, natural lighting and eliminating harsh shadows. Let’s delve into essential tips to hone your skills in bounce flash photography.
1. Understanding Bounce Flash: Softening the Shadows
The Essence of Bounce Flash:
Bounce flash involves redirecting the flash towards a surface, such as a ceiling or wall, before it reaches the subject. This indirect approach diffuses and softens the light, creating a flattering and natural illumination that minimizes harsh shadows.
Ceilings and Walls as Reflectors:
Ceilings and walls serve as natural reflectors when bouncing flash. The neutral color and texture of these surfaces scatter the light, producing a gentle and even illumination. This technique is particularly effective for portrait photography, where soft, diffused lighting enhances facial features and minimizes imperfections.
2. Tips for Effective Bounce Flash:
Experiment with Angles:
The angle at which you bounce the flash significantly influences the resulting lighting. Experiment with different angles to find the optimal position for achieving your desired effect. Bouncing at a slight angle can create more dimension in the lighting, adding depth to your images.
Adjusting Intensity:
The distance between the flash and the bouncing surface, as well as the flash power, impacts the intensity of the bounced light. Closer distances and lower power settings often result in softer, more diffused lighting. Experiment with these variables to achieve the ideal balance for your specific scenario.
Be Mindful of Surface Color:
The color of the bouncing surface affects the color temperature of the light. White or neutral-colored surfaces tend to maintain a more natural color rendition, while colored surfaces may introduce subtle color casts. Be mindful of the surface color and its potential impact on the overall look of your images.
Utilize Bounce Cards or Reflectors:
Some external flash units come with built-in bounce cards or reflectors. These accessories enhance the effectiveness of bounce flash by redirecting and diffusing the light further. Experiment with the built-in features of your flash unit to optimize bounce flash performance.
Consider the Shooting Environment:
The characteristics of the shooting environment, such as room size, ceiling height, and wall texture, influence the effectiveness of bounce flash. In smaller rooms with lower ceilings, the bounced light may be more pronounced, while larger spaces may require adjustments to achieve the desired effect.
3. Practice and Refinement: The Path to Mastery
Consistent Practice:
Mastering bounce flash is a skill that improves with consistent practice. Experiment in various environments, observe the nuances of different surfaces, and refine your technique based on the feedback from your images.
Refine Based on Feedback:
Reviewing your images and analyzing the lighting results provides valuable insights. Pay attention to the quality of highlights and shadows, and adjust your bounce flash technique accordingly. Each shooting scenario offers an opportunity for refinement and improvement.
Navigating the Synchronization Symphony
In the symphony of flash photography, understanding flash sync is akin to orchestrating a harmonious collaboration between your camera and flash unit. Delve into the nuances of sync speed and the transformative power of high-speed sync (HSS) to ensure your images are perfectly synchronized with your creative vision.
1. Sync Speed Essentials: The Rhythmic Harmony of Shutter and Flash
Definition of Sync Speed:
Sync speed refers to the maximum shutter speed at which the camera and flash can synchronize, ensuring that the flash fires at the precise moment when the shutter is fully open.
Importance of Sync Speed:
Understanding sync speed is crucial to avoid potential issues such as partial darkening of images due to the shutter curtain blocking part of the frame while the flash fires. It’s essential to choose a flash unit that syncs seamlessly with your camera at the shutter speed you desire.
Sync Speed Considerations:
Shutter Curtain Speeds: Different cameras have varying shutter curtain speeds. It’s vital to be aware of your camera’s sync speed limitations to avoid synchronization issues.
Studio vs. Outdoor Environments: In studio environments, where lighting conditions are controlled, sync speed may not be as critical. However, for outdoor photography, especially in bright conditions, achieving proper synchronization becomes imperative.
2. High-Speed Sync (HSS): Breaking the Speed Barriers
Definition of High-Speed Sync (HSS):
High-Speed Sync is a feature that allows the flash to synchronize with shutter speeds higher than the camera’s normal sync speed. In traditional flash photography, there is a limit to how fast the shutter speed can be while maintaining synchronization. HSS breaks this barrier, enabling the use of flash at faster shutter speeds.
Benefits of High-Speed Sync:
Bright Conditions: In brightly lit environments, where faster shutter speeds are necessary to control exposure, HSS becomes invaluable. It allows photographers to use flash even in challenging lighting conditions without compromising on shutter speed.
Wide Aperture Possibilities: HSS facilitates the use of wide apertures, creating a shallow depth of field while still using flash. This is particularly advantageous for portrait photographers aiming to achieve a blurred background with the subject sharply illuminated.
Considerations for High-Speed Sync:
Reduced Flash Power: In HSS mode, the effective flash power is often reduced. This reduction is a trade-off for the flexibility of using higher shutter speeds.
Battery Consumption: HSS can consume more battery power than traditional flash modes. It’s advisable to be mindful of battery levels, especially in prolonged shooting sessions.
3. Ensuring Compatibility: The Syncing Symphony
Camera-Flash Compatibility:
Different camera models and flash units may have varying sync speed capabilities. It’s essential to ensure that your chosen flash unit is compatible with your camera’s sync speed requirements. Refer to your camera and flash manuals for detailed information on sync compatibility.
Wireless Flash Systems:
When using wireless flash systems, the syncing capabilities extend beyond the camera’s built-in flash sync speed. Advanced triggering systems enable high-speed sync even in off-camera flash setups, providing a versatile solution for creative lighting scenarios.
Unlocking Creativity with Flash Modifiers: Sculpting Light for Stunning Results
In the realm of flash photography, the transformative power of flash modifiers cannot be overstated. Softboxes, umbrellas, and diffusers stand as the artisans of light, molding and shaping the illumination emitted by the flash. Let’s explore how these modifiers contribute to a softer, more flattering light that enhances the visual appeal of your images.
1. Softboxes: Crafting Gentle and Even Illumination
Definition:
A softbox is a versatile modifier that consists of a translucent fabric stretched over a frame. The interior of the softbox is lined with reflective material, and it is positioned in front of the flash to diffuse and soften the light.
Benefits of Softboxes:
Soft, Even Lighting: Softboxes create a large, diffuse light source that results in soft and even illumination. This quality is particularly beneficial for portrait photography, where gentle lighting enhances facial features and minimizes harsh shadows.
Controlled Shadows: The use of a softbox helps control the intensity of shadows, allowing for a more flattering and natural-looking result. The transition from highlights to shadows is gradual, creating a pleasing aesthetic.
Positioning and Size:
Distance Matters: The distance between the softbox and the subject affects the softness of the light. Experiment with different distances to achieve the desired level of diffusion.
Size Considerations: Larger softboxes produce softer light due to their broader surface area. Consider the size of the softbox based on your creative vision and the scale of your subjects.
2. Umbrellas: Spreading Light with Graceful Simplicity
Definition:
An umbrella is a classic and straightforward flash modifier that consists of a reflective surface stretched over a frame, resembling a traditional rain umbrella. It is positioned to reflect and spread the light emitted by the flash.
Benefits of Umbrellas:
Wide Light Spread: Umbrellas offer a wide spread of light, making them effective for illuminating larger areas or groups of subjects. They are versatile tools for event photography, group portraits, or situations where broad coverage is desired.
Affordability and Portability: Umbrellas are often more affordable and portable than some other modifiers, making them accessible for photographers seeking effective yet budget-friendly lighting solutions.
Shoot-Through vs. Reflective Umbrellas:
Shoot-Through: When the flash is positioned behind the umbrella and directed toward the subject, it is termed as a shoot-through umbrella. This configuration produces a softer and more diffused light.
Reflective: In the case of a reflective umbrella, the flash is positioned facing away from the subject, bouncing light off the reflective surface and towards the subject. Reflective umbrellas provide a mix of direct and diffused lighting.
3. Diffusers: Softening Light for a Subtle Glow
Definition:
A diffuser is a translucent material placed in front of the flash to scatter and soften the light. It minimizes harsh shadows and reduces the intensity of highlights, creating a subtle and flattering illumination.
Benefits of Diffusers:
Gentle Light Reduction: Diffusers are effective in reducing the intensity of light without sacrificing its quality. They are particularly useful in scenarios where a subtle reduction in contrast is desired.
Portable and Lightweight: Diffusers are often compact and lightweight, making them convenient for on-the-go photographers who need to travel light.
Usage Considerations:
Direct Placement: Diffusers can be attached directly to the flash unit or held in front of it. Experiment with different distances to achieve the desired level of softness.
Outdoor Photography: Diffusers are especially valuable in outdoor photography, where natural light conditions can be challenging. They help create a balanced and pleasing illumination for subjects.
Balancing Flash with Ambient Light: Crafting a Seamless Visual Symphony
In the art of photography, the delicate balance between flash and ambient light is a symphony that, when conducted masterfully, produces images with a natural and harmonious appearance. Let’s explore the techniques and considerations for achieving this balance, where flash and ambient light coalesce to create a visual masterpiece.
1. The Essence of Balance: Merging Flash and Ambient Light
Definition:
Balancing flash with ambient light involves adjusting the intensity of artificial (flash) and natural (ambient) light sources to achieve an equilibrium that results in a visually pleasing image. This technique is crucial for avoiding unnatural-looking highlights and shadows caused by an overpowering flash.
Natural-Looking Illumination:
The goal is to create an illumination that mimics the quality of natural light, avoiding stark contrasts and ensuring a seamless integration of flash and ambient light.
Balancing these elements is particularly relevant in scenarios where ambient light contributes significantly to the scene, such as outdoor portraits during the golden hour.
2. Adjusting Flash Power: Precision in Lighting Control
Flash Power Considerations:
Avoid Overpowering: To achieve a natural look, avoid overpowering the scene with flash. Adjust the flash power to complement the existing ambient light rather than dominating it.
Softening Shadows: A lower flash power helps soften shadows and creates a more flattering illumination, especially in portrait photography.
Use of Flash Modifiers:
Softboxes, umbrellas, or diffusers can be employed to modify the flash and achieve a softer, more diffused light. This contributes to a smoother integration with ambient light, reducing the risk of harsh shadows.
3. ISO Adjustments: Finding the Sensitivity Balance
ISO Settings for Balance:
ISO Sensitivity: Adjusting the ISO setting on your camera impacts its sensitivity to light. In situations where ambient light is predominant, consider a lower ISO setting for better control over the exposure.
Balancing Exposure: Balancing flash and ambient light often involves finding the right ISO setting to maintain a well-exposed image without relying solely on the flash.
Manual Mode Control:
Shooting in manual mode allows for precise control over both flash and ambient light settings. Adjusting the ISO manually ensures that it complements the flash power and ambient light conditions.
4. White Balance Harmony: Ensuring Color Consistency
White Balance Adjustments:
Maintaining Color Consistency: Balancing flash and ambient light extends to white balance considerations. Ensure that your camera’s white balance settings are adjusted to maintain color consistency between the two light sources.
Custom White Balance: In situations where ambient light has a unique color temperature, consider using custom white balance settings to achieve accurate color reproduction.
Test Shots and Iterative Adjustments:
Continuous Evaluation: Balancing flash with ambient light often requires iterative adjustments. Take test shots, review the results, and make necessary modifications to achieve the desired balance.
Experimenting with Flash Ratios: Crafting Light Harmony in Multi-Flash Setups
In the realm of advanced flash photography, the artful use of multiple flash units opens up a realm of creative possibilities. Experimenting with flash ratios becomes a key technique in controlling the intensity of different light sources, allowing photographers to sculpt light and shadows with precision. Let’s delve into the principles and strategies of flash ratios in multi-flash setups.
1. Understanding Flash Ratios: The Symphony of Light Control
Definition of Flash Ratios:
Flash ratios refer to the relative intensity or power distribution of multiple flash units in a scene. Each flash unit contributes to the overall illumination, and the ratios determine the balance between these sources.
Dynamic Light Sculpting:
Flash ratios provide a dynamic way to sculpt light, allowing photographers to emphasize specific elements in a scene, create dimension, and control the interplay of light and shadow.
2. Strategies for Experimentation: Unleashing Creativity
Key Components:
Main Light: The primary light source that illuminates the main subject.
Fill Light: Secondary light source that reduces the contrast created by the main light. It fills in shadows to varying degrees.
Background Light: Illuminates the background and separates the subject from the background elements.
Experimentation Strategies:
Start with Basics: Begin by experimenting with a two-flash setup, gradually adding more units as you become comfortable with the dynamics of flash ratios.
Main-to-Fill Ratio: Adjust the ratio between the main and fill lights to control the contrast on the subject. A higher main-to-fill ratio creates more dramatic lighting with deeper shadows.
Background Illumination: Experiment with the power of the background light to enhance or subdue the ambient environment. This contributes to subject-background separation.
Hair or Rim Lighting: Introduce additional flash units to create hair or rim lighting, emphasizing the contours of the subject.
3. Manual Control and Consistency: Precision in Execution
Manual Control Advantages:
Precision and Consistency: Use manual flash settings for precise control over the power output of each flash unit. Consistency in flash ratios is crucial for achieving a cohesive look in a series of images.
Reducing Automatic Variability: Avoid relying on automatic flash settings that may result in variations in power output. Manual control ensures that your intended flash ratios are maintained.
Use of Light Meters:
Light meters can assist in measuring and balancing the power output of multiple flash units. This ensures accuracy in achieving the desired flash ratios.
4. Directional Lighting and Shadows: Adding Depth and Drama
Controlled Shadows:
Experiment with shadows: Adjusting flash ratios influences the shadows in your composition. Play with the direction and intensity of shadows to add depth and drama to your images.
Balancing Highlights and Shadows: Flash ratios offer the opportunity to balance highlights and shadows, creating images with a visually pleasing tonal range.
5. Fine-Tuning and Iterative Learning: The Art of Refinement
Continuous Review and Adjustment:
Review Images: Take test shots, review the images, and make iterative adjustments to flash ratios based on the results.
Refine and Experiment: As you become more proficient, refine your techniques and experiment with unconventional flash ratios to push the boundaries of your creativity.
Troubleshooting Common Issues
1. Overexposure:
Reduce flash power or increase the aperture to control overexposure.
2. Harsh Shadows:
Use bounce flash or diffusers to soften shadows.
3. Red-Eye:
Red-eye occurs when light reflects off the retina. Use red-eye reduction mode or an external flash to reduce this effect.
Mastering photography flash units opens up a world of creative possibilities. Whether you’re a portrait photographer looking to capture stunning headshots or an event photographer needing to freeze fast-paced action, understanding the nuances of flash photography is essential. As technology continues to advance, photographers can expect even more innovative features and improvements in flash units, further enhancing their ability to craft visually compelling images. Armed with the knowledge from this comprehensive guide, photographers can confidently explore the world of flash photography and elevate their craft to new heights.