


Mastering the Art of Photographing Splashes & Pours

Photography is an art that allows us to freeze fleeting moments, creating captivating images that resonate with emotion and beauty. One fascinating aspect of photography is capturing the dynamic and mesmerizing world of splashes and pours. Whether it’s capturing the joyful splash of a water droplet, the graceful pour of liquid, or the explosion of color from a paint splash, photographing splashes and pours presents unique challenges and rewards. In this article, we’ll delve into the techniques and equipment required to master this captivating art form.
Understanding the Essence of Splashes & Pours
Splashes and pours are ephemeral, unpredictable, and full of life. The challenge for photographers lies in immortalizing these fleeting moments in a still image. Understanding the physics of splashes and the dynamics of pours is crucial to anticipate and capture the perfect shot.
When a liquid is in motion, it forms intriguing shapes and patterns due to forces like gravity, surface tension, and air resistance. These dynamics are essential to comprehend, as they influence the appearance and timing of the splash or pour you aim to capture.
Essential Equipment
Photographing splashes and pours requires some specialized equipment to achieve the desired results:
a. Camera: Use a DSLR or mirrorless camera with manual settings, as it gives you more control over the exposure, focus, and shutter speed.
b. Lens: A macro lens is an ideal choice as it allows you to capture intricate details and get up close to the subject. Additionally, a standard zoom lens can also work well, especially for wider shots.
c. Tripod: Since you’ll be working with fast-moving subjects, a sturdy tripod will help stabilize your camera and ensure sharp images.
d. Lighting: Consider using external flashes or strobes to freeze the motion effectively. Multiple light sources will allow you to control the direction and intensity of light, eliminating unwanted shadows.
e. Remote Shutter Release: To avoid camera shake and improve timing, use a remote shutter release or the camera’s built-in timer.
Setting Up the Scene
Creating the perfect splash or pour shot involves meticulous planning and setup. Here are some steps to follow:
a. Choose the Right Location: Pick a suitable location with good lighting and ample space for your setup. A controlled indoor environment can be beneficial, especially for beginners.
b. Props and Background: Select props that complement the liquid you’ll be photographing. Consider using vibrant colors, interesting textures, or contrasting elements to add depth to your composition. The background should be clean and uncluttered to avoid distractions.
c. Containment: Depending on the type of liquid you’re using, you may need to contain it to control the direction and intensity of the splash or pour. Clear acrylic sheets or glass containers work well for this purpose.
Camera Settings
Achieving the perfect splash or pour shot involves experimenting with camera settings:
a. Shutter Speed: A fast shutter speed (1/1000th of a second or faster) is crucial to freeze the motion and capture the splash at its peak.
b. Aperture: Use a smaller aperture (higher f-stop number) to increase the depth of field and ensure the entire splash is in focus.
c. ISO: Keep the ISO low to minimize noise and maintain image quality.
Timing and Patience
Timing is everything in splash and pour photography. Anticipate the moment of impact, and be patient as you might need several attempts to capture the perfect shot. Continuous shooting mode can be helpful to increase your chances of getting that impeccable frame.
Experiment with Liquids:
Different liquids behave differently when splashed or poured, resulting in a wide range of visual effects. Water is a classic choice for beginners due to its accessibility and versatility. It creates elegant, smooth shapes and is easy to control. As you gain experience, explore other liquids like milk, colored water, fruit juice, or even paint. Each liquid brings unique characteristics, colors, and textures to your photographs.
Add Colored Dyes:
To enhance the visual impact of your splash and pour images, consider adding a few drops of food coloring or liquid dye to the liquid. This will create vibrant bursts of color and make your photographs more captivating. Experiment with different color combinations to achieve the desired artistic effect.
Use High-Speed Sync Flash:
When photographing splashes and pours, one of the key challenges is freezing the motion with a fast shutter speed. However, using fast shutter speeds can limit the amount of light hitting the sensor, especially in a controlled studio environment. To overcome this, consider using high-speed sync (HSS) flash. HSS allows you to use your flash at high shutter speeds, enabling you to freeze the motion while maintaining proper exposure.
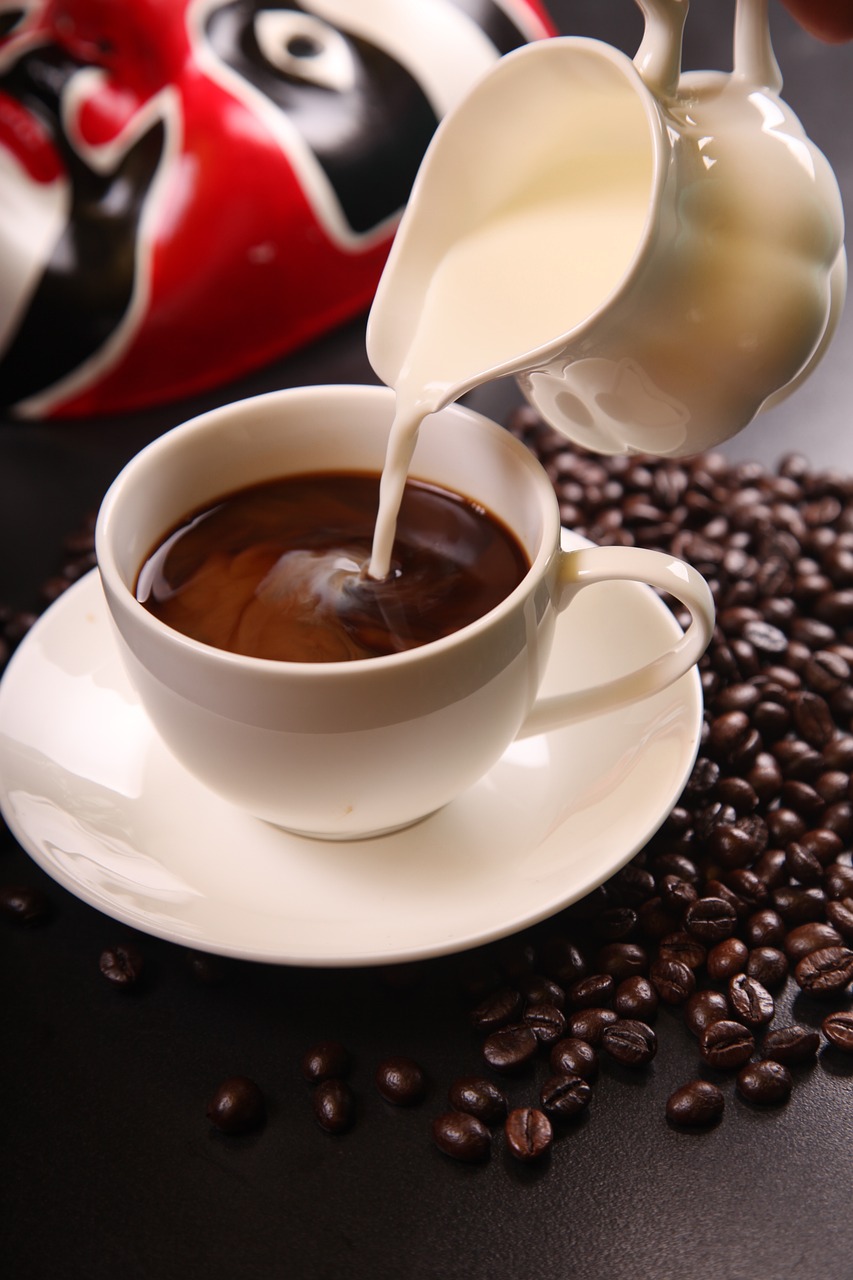
Capture Reflections:
If you’re photographing splashes or pours on a reflective surface, such as a mirror or a polished tabletop, look for opportunities to capture reflections. The reflections can add a dynamic and artistic touch to your images, creating a sense of depth and complexity.
Create Abstract Art:
Splash and pour photography provides an excellent opportunity to create abstract art. Experiment with different pouring techniques and liquid colors to produce artistic and unique compositions. Don’t be afraid to try unconventional methods and let your creativity flow.
Consider Continuous Lighting:
While flash photography is commonly used for freezing motion, continuous lighting can also be effective for splash and pour photography. Continuous lights provide a constant source of illumination, allowing you to visualize the liquid’s movement before pressing the shutter button. This can be particularly useful for beginners who might find it challenging to anticipate the perfect moment.
Safety First:
When working with liquids and props, always prioritize safety. If you’re using glass containers or any materials that could shatter, take precautions to avoid accidents. Additionally, protect your camera from potential spills or splashes by covering it with a clear plastic bag or using a waterproof camera housing.