


Tips for photographing animals in motion

Photographing animals in motion is a thrilling and challenging endeavor for any photographer. Whether you are capturing the grace of a soaring bird, the speed of a running cheetah, or the agility of a leaping dolphin, photographing animals in motion requires skill, patience, and technical expertise. essential tips and techniques to help you capture stunning images of animals in action. From understanding animal behavior to mastering camera settings and composition, these guidelines will assist you in improving your wildlife photography skills and capturing unforgettable moments.
Table of Contents:
Understanding Animal Behavior
1.1 Studying the Species
When it comes to photographing animals in motion, having a good understanding of the species you are capturing is crucial. This knowledge allows you to anticipate their behavior, movements, and patterns, enabling you to position yourself for the best possible shots. Here are some tips on studying the species:
Research: Start by researching the animal you want to photograph. Learn about its habitat, diet, social behavior, and typical movement patterns. This information will provide valuable insights into where and when to find them.
Field Guides and Wildlife Experts: Consult field guides or online resources dedicated to the species you are interested in. These guides often provide detailed information on behavior, feeding habits, and movement patterns. Additionally, seek advice from local wildlife experts or experienced photographers who have worked with the same species.
Observational Skills: Spend time observing the animals in their natural habitat. Visit wildlife reserves, zoos, or areas where the species is commonly found. Take note of their behaviors, such as feeding, grooming, mating, or hunting. Pay attention to their movement patterns, speed, and agility.
Photography Communities and Forums: Engage with photography communities and forums where photographers share their experiences and insights about photographing specific animal species. Here, you can learn from others’ experiences and gain valuable tips.
Documentaries and Literature: Watch nature documentaries or read books about the animal species you want to photograph. These resources often provide visual and written information on their behavior and movement.
1.2 Predicting Movement Patterns
Predicting the movement patterns of animals is a key aspect of photographing them in motion. By anticipating their actions, you can position yourself in the right place at the right time, increasing your chances of capturing dynamic and compelling images. Here are some tips for predicting movement patterns:
Observe and Learn: Spend time observing the animal in its natural environment. Watch how it moves, interacts with its surroundings, and responds to different stimuli. Take note of any repetitive behaviors or patterns that you notice. This firsthand knowledge will help you predict future movements.
Study Environmental Factors: Understand how environmental factors influence the animal’s behavior. Consider the time of day, weather conditions, and seasonal changes. For example, certain animals may be more active during specific times of the day or exhibit different behaviors in different seasons.
Body Language and Signals: Pay attention to the animal’s body language and signals. Animals often display visual cues that indicate their intentions. For instance, a bird might spread its wings before taking flight or a predator might crouch low before pouncing. By studying these cues, you can anticipate their movements and be ready to capture them.
Pre-Focus and Pre-Compose: Once you have observed the animal’s movement patterns, pre-focus your camera on the spot where you expect the action to occur. This technique helps you react quickly when the moment arrives, reducing the chances of missing the shot. Additionally, pre-compose your frame, considering the trajectory of the animal’s movement to capture it in the most compelling way.
Patience and Persistence: Predicting movement patterns requires patience and persistence. Some animals may follow predictable routines, while others may be more elusive or spontaneous. Be prepared to spend extended periods in the field, waiting for the perfect moment to unfold.
Learn from Experience: As you gain more experience photographing animals in motion, you will develop a better intuition for predicting their movements. Learn from each encounter and apply that knowledge to future opportunities. Over time, you will become more adept at anticipating and capturing captivating moments.
Remember, predicting movement patterns is not an exact science, as animals can be unpredictable. Flexibility is key, as sometimes the unexpected can lead to remarkable photographs. By combining your knowledge of the species with keen observation skills and patience, you’ll increase your chances of capturing stunning images of animals in motion.
1.3 Patience and Observation
Allow Time for Observation: Before you start photographing, take some time to observe the animals in their natural habitat. Watch their behavior, movements, and interactions with the environment. This observation period will give you valuable insights into their patterns and enable you to anticipate their actions.
Be Still and Quiet: Animals are sensitive to their surroundings and can be easily startled by sudden movements or loud noises. When you’re in the field, maintain a calm and quiet demeanor. Position yourself in a concealed spot, use camouflage if necessary, and minimize any disturbances that could disrupt the animals’ natural behavior.
Take Your Time: Avoid rushing through your photography session. Remember that capturing animals in motion requires patience. Stay in one location for an extended period, allowing the animals to become comfortable with your presence. By staying put, you increase the chances of witnessing unique behaviors and capturing compelling shots.
Use a Telephoto Lens: Telephoto lenses allow you to observe and photograph animals from a safe distance without disturbing them. This not only protects their natural behavior but also allows you to capture intimate shots without intrusion. A longer focal length will also compress the perspective, making the subject appear closer and more prominent.
Practice Stealth and Camouflage: Blend into the environment to minimize your presence and avoid startling the animals. Wear neutral colors that match the surroundings and move slowly and deliberately. Avoid sudden movements that could draw attention to yourself.
Watch for Signs: Animals often display signs or cues before they make a move. These can include changes in body posture, eye direction, or vocalizations. Learn to recognize these signals, as they can provide valuable hints about impending action.
Be Prepared and Stay Alert: Keep your camera settings ready for action and your finger on the shutter button. Animals can move swiftly and unpredictably, so being alert and ready to capture the moment is crucial. Use burst mode or continuous shooting to increase your chances of getting a sharp image during fast-paced action.
Embrace Serendipity: While observation and anticipation are important, be open to unexpected moments. Some of the most extraordinary wildlife photographs happen when the animals deviate from their usual patterns or engage in spontaneous behavior. Stay adaptable and be ready to seize these unique opportunities.
Essential Gear for Wildlife Photography
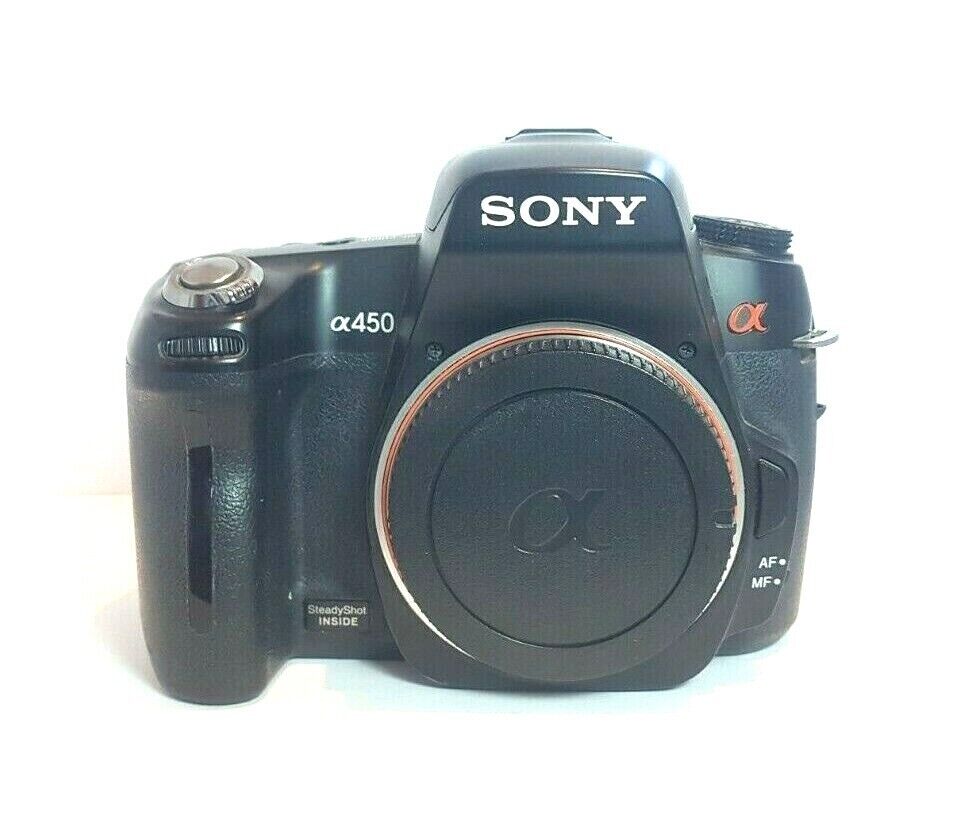
2.1 Camera and Lens Selection
Fast and Accurate Autofocus: Look for a camera with advanced autofocus capabilities, including fast focusing speed and accurate tracking. This is crucial for capturing animals in motion.
High Continuous Shooting Speed: A camera with a high frames-per-second (fps) rate allows you to capture multiple images in quick succession, increasing your chances of getting the perfect shot during fast-paced action.
Good Low-Light Performance: Animals may be active during low-light conditions, such as early mornings or late evenings. A camera with excellent low-light performance will enable you to capture sharp images with minimal noise in such situations.
Weather-Sealed Body: Consider a camera with weather sealing to protect it from dust, moisture, and unpredictable outdoor conditions. This feature is particularly important when photographing wildlife in their natural habitats.
Telephoto Lens: A telephoto lens with a long focal length is essential for wildlife photography. Look for lenses in the range of 200mm to 600mm or even longer for more reach. Longer focal lengths allow you to capture animals from a safe distance without disturbing their behavior.
Wide Aperture: Select a lens with a wide maximum aperture (e.g., f/2.8 or wider) to allow for faster shutter speeds and better low-light performance. A wide aperture also provides more control over depth of field, allowing you to isolate your subject from the background.
Image Stabilization: Consider lenses with built-in image stabilization, also known as vibration reduction (VR) or optical stabilization (OS). This feature compensates for camera shake, especially when shooting handheld or in low-light conditions.
Fast and Silent Autofocus: Look for lenses with fast and silent autofocus motors to ensure quick and accurate focusing, minimizing the chances of missing a crucial moment.
Lens Quality: Invest in high-quality lenses that produce sharp and detailed images. Superior optical performance can significantly enhance the overall image quality and allow for better post-processing flexibility.
Consider your budget, shooting style, and specific wildlife photography needs when selecting your camera and lens combination. It’s important to find a balance between performance, reach, and cost to suit your preferences and requirements.
2.2 Fast Shutter Speeds
Fast shutter speeds help to eliminate motion blur and ensure that the subject appears crisp and well-defined. Here are some tips for achieving fast shutter speeds:
Understand Shutter Speed: Shutter speed refers to the length of time the camera’s shutter remains open to expose the image sensor to light. It is measured in fractions of a second, such as 1/500, 1/1000, or even faster.
Consider the Speed of the Subject: Different animals move at varying speeds. Faster-moving subjects, such as birds in flight or running animals, require faster shutter speeds to freeze their motion effectively. Slower-moving subjects, like grazing animals, may not require extremely high shutter speeds.
Set the Shutter Priority Mode: Many cameras offer a Shutter Priority (Tv or S) mode, which allows you to select a specific shutter speed while the camera automatically adjusts the aperture for proper exposure. This mode gives you control over the shutter speed while ensuring proper exposure.
Increase the ISO: If you find that you need faster shutter speeds in low-light situations, consider increasing the ISO sensitivity. Higher ISO settings allow your camera to capture more light and, therefore, enable faster shutter speeds. However, be cautious not to increase the ISO too much as it can introduce noise or grain into the image.
Use Wide Apertures: When shooting in well-lit conditions, you can use wider apertures (smaller f-number) to allow more light into the camera. This enables the use of faster shutter speeds without compromising proper exposure.
Optimize Your Camera Settings: Make sure to disable any long exposure noise reduction or image stabilization settings that may increase the time it takes for the shutter to release. These settings can cause a delay and result in missing the desired moment.
Utilize Burst Mode: Burst mode, also known as continuous shooting mode, allows you to take multiple shots in rapid succession by holding down the shutter button. This feature increases your chances of capturing the perfect moment, especially when animals are in fast motion.
Consider External Lighting: In situations where natural light is limited, you can use external lighting sources, such as a flash or continuous artificial lights, to supplement the available light and achieve faster shutter speeds.
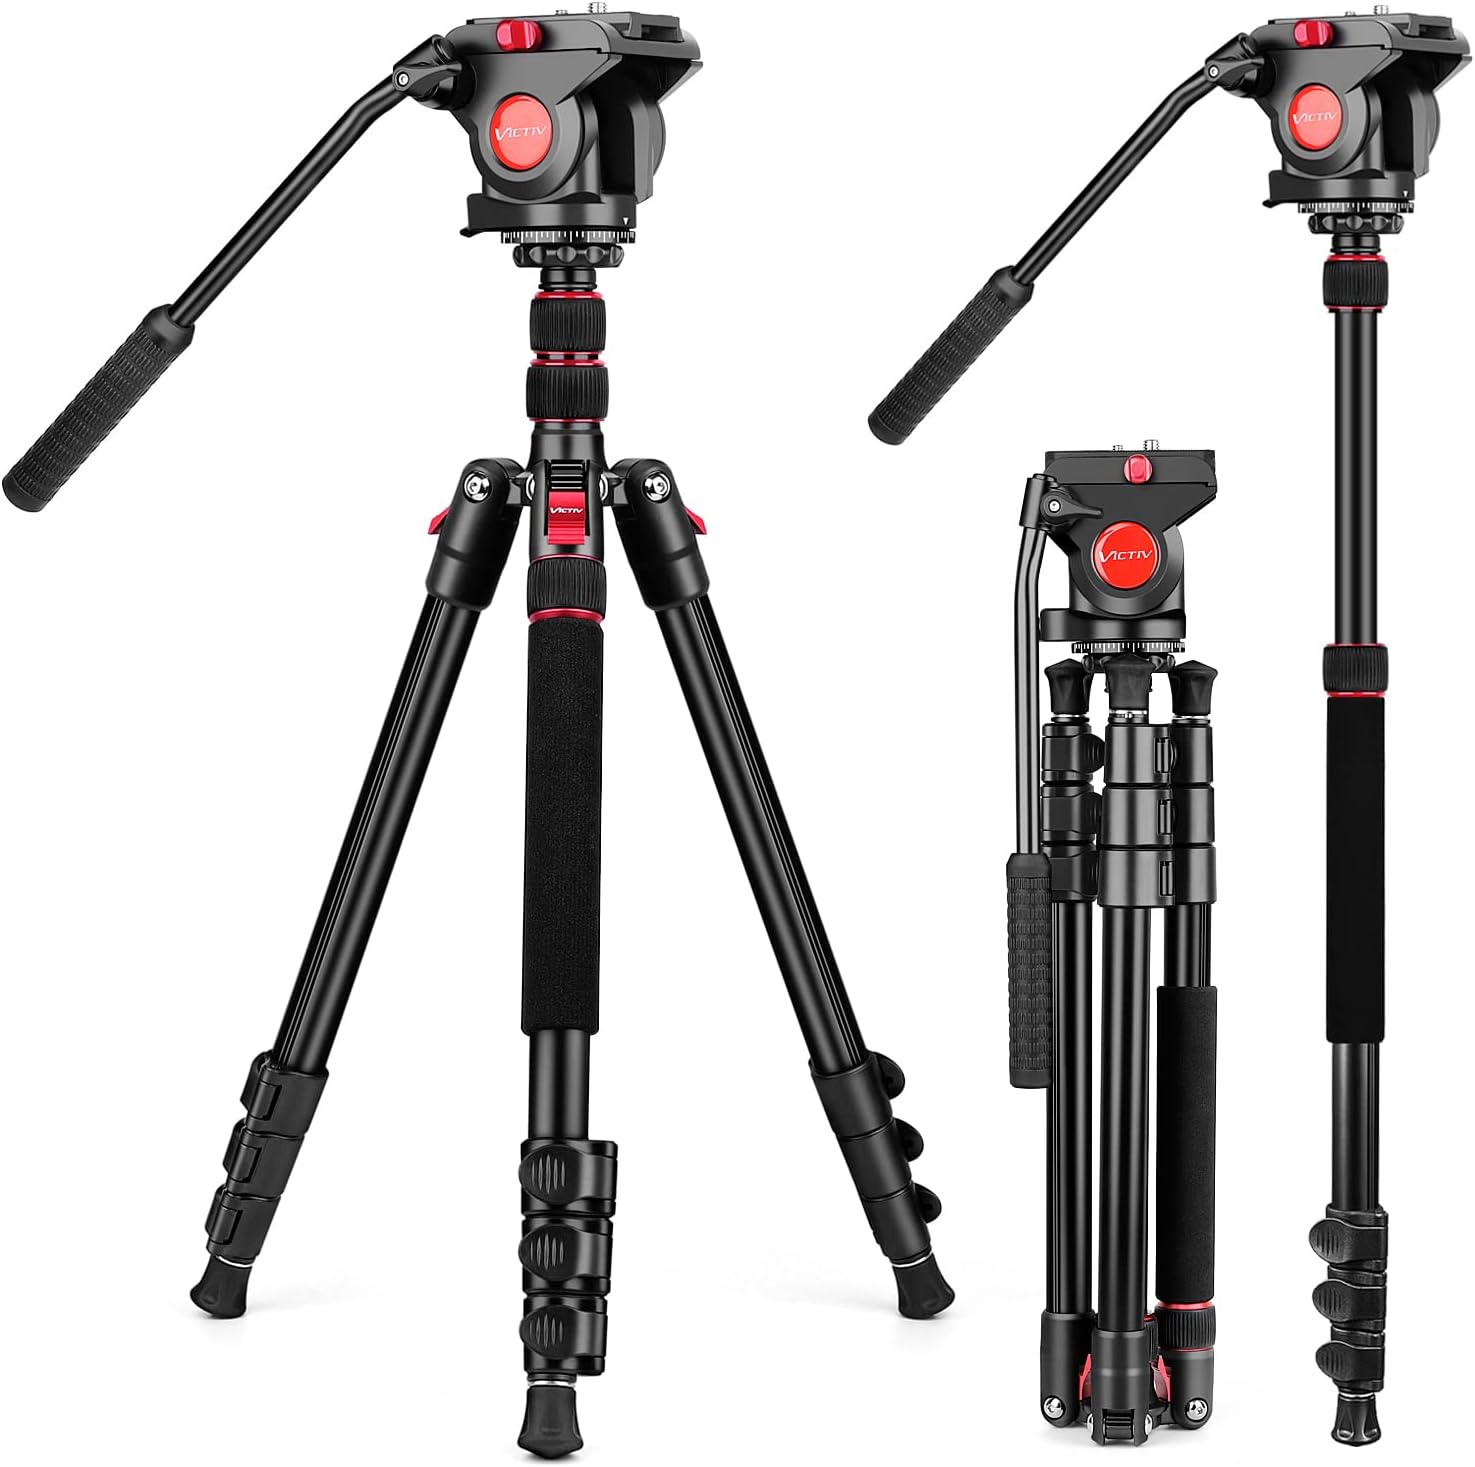
2.3 Tripods, and Monopods
While fast shutter speeds are crucial for capturing animals in motion, there are situations where using tripods or monopods can be beneficial. These camera support systems provide stability, reduce camera shake, and allow for more controlled and steady shots. Here’s how you can utilize tripods and monopods effectively:
Tripods:
Stability: Tripods provide a stable platform for your camera, minimizing camera shake caused by handholding. This is especially useful when photographing animals in low-light conditions or when using longer focal lengths.
Slow Shutter Speeds: Tripods enable you to use slower shutter speeds, allowing you to capture the motion of the animals while keeping the rest of the scene sharp. This technique is particularly effective when you want to convey a sense of motion or capture long exposure effects, such as flowing water or streaking clouds.
Composition: Using a tripod allows you to carefully compose your shots and make precise adjustments to the framing without the risk of camera movement. This is especially important when photographing animals in motion, as it allows you to focus on capturing the right moment.
Wildlife Observation: Tripods can also be useful for extended wildlife observation sessions. By securely mounting your camera on a tripod, you can free up your hands to use binoculars or a spotting scope to track and study the animals’ behavior.
Monopods:
Mobility: Monopods provide a compromise between stability and mobility. They offer some support to reduce camera shake while allowing for more flexibility and quick adjustments. This makes them particularly useful for photographing animals that are constantly on the move.
Tracking Movement: Monopods help stabilize your camera when panning or tracking the motion of animals. This allows you to capture sharp images while maintaining a sense of movement in the background.
Ease of Use: Monopods are lightweight and portable, making them ideal for situations where setting up a tripod is impractical or when you need to move quickly from one location to another.
When using tripods or monopods for wildlife photography, consider the following tips:
Choose a sturdy and lightweight tripod or monopod that suits your camera setup.
Use a tripod or monopod with a quick-release plate for easy mounting and dismounting of your camera.
Consider using a tripod or monopod with a ball head or gimbal head for smooth and precise adjustments.
Adjust the height and position of your tripod or monopod according to your shooting angle and the behavior of the animals.
Be mindful of the terrain and surroundings when setting up your camera support system, ensuring it is stable and secure.
While tripods and monopods provide stability, remember that wildlife photography often requires mobility and the ability to react quickly. There may be situations where handholding your camera is more practical and allows for better flexibility to capture the dynamic movements of animals.
2.4 Additional Accessories
Teleconverters: Teleconverters, also known as telephoto extenders, are optical accessories that increase the effective focal length of your lens. They attach between the camera body and the lens, magnifying the image and allowing you to get even closer to the animals without physically moving closer. Keep in mind that teleconverters may slightly reduce the maximum aperture and autofocus speed.
Gimbal Heads: Gimbal heads are specialized tripod heads designed for long telephoto lenses. They provide smooth and balanced movement when tracking animals in motion. Gimbal heads make it easier to pan smoothly, maintain stability, and follow the movements of fast-moving subjects, ensuring you capture sharp images.
Remote Shutter Release: A remote shutter release allows you to trigger the camera without physically touching it. This minimizes camera shake, especially when using slower shutter speeds or when your camera is mounted on a tripod or monopod. Remote shutter releases come in various forms, including wired, wireless, and smartphone apps.
Bean Bags: Bean bags are versatile and lightweight accessories that can be used as a support for your camera in situations where tripods or monopods are impractical or prohibited. They can be easily shaped and placed on various surfaces, such as rocks, car windows, or the ground, providing a stable base for your camera.
External Flash or Speedlight: While natural light is often preferred in wildlife photography, there may be situations where additional lighting is needed. External flashes or speedlights can provide fill light or help freeze the motion of fast-moving subjects. They also allow you to control the direction and intensity of the light, creating more dynamic and creative images.
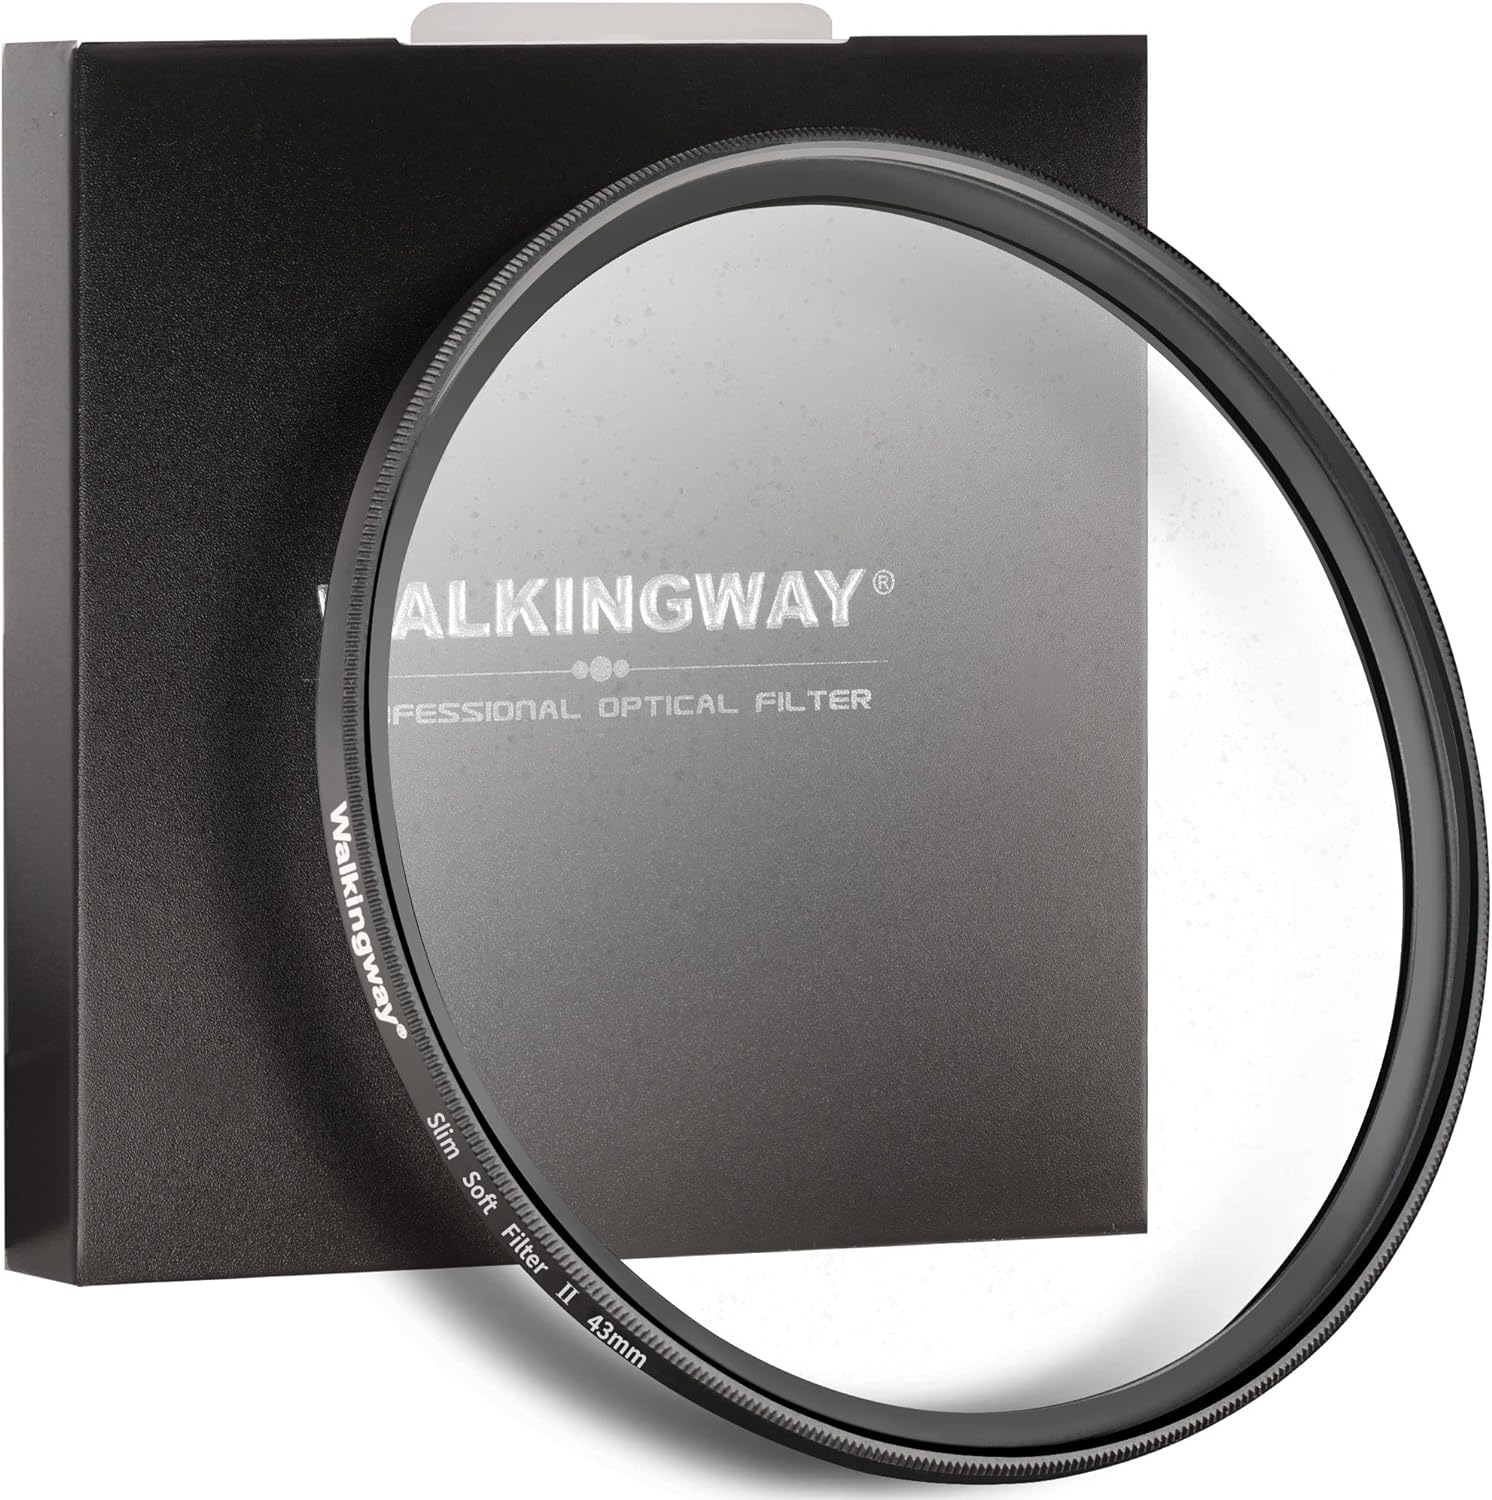
Polarizing Filter: A polarizing filter helps reduce glare and reflections, particularly when photographing animals near water bodies or in bright sunlight. It can enhance colors, increase contrast, and improve overall image quality by reducing unwanted reflections and increasing saturation.
Neutral Density (ND) Filters: ND filters reduce the amount of light entering the lens, allowing you to use slower shutter speeds or wider apertures in bright conditions. They are especially useful when you want to achieve a slower shutter speed to capture motion blur in specific situations, such as flowing water or moving animals.
Rain Cover or Waterproof Camera Bag: When photographing wildlife, you may encounter inclement weather conditions. A rain cover or waterproof camera bag provides protection against rain, snow, dust, and moisture, ensuring the safety of your equipment during challenging shooting conditions.
Remember to consider the compatibility of accessories with your specific camera and lens models. Each accessory serves a specific purpose, and the choice to use them depends on your shooting style, preferences, and the specific requirements of the situation.
Mastering Camera Settings
3.1 Shutter Speed
Shutter speed is a fundamental aspect of photography that directly affects how motion is captured in an image. Understanding shutter speed and how to use it effectively is crucial when photographing animals in motion. Here’s what you need to know:
Definition of Shutter Speed: Shutter speed refers to the length of time that the camera’s shutter remains open, exposing the camera sensor to light. It is typically measured in fractions of a second, such as 1/500, 1/1000, or 1/2000.
Freezing Motion: To capture animals in motion sharply, you need a fast shutter speed to freeze their movement. The faster the subject is moving, the faster the shutter speed required. For fast-moving subjects like birds in flight or running animals, you may need shutter speeds of 1/1000 or higher.
Motion Blur: On the other hand, using slower shutter speeds can intentionally introduce motion blur into your images. This technique can convey a sense of movement and dynamism. For example, photographing a galloping horse with a slower shutter speed can create a beautiful blur in the legs, emphasizing the motion.
Consider the Subject’s Speed: The speed of the animal you’re photographing will determine the appropriate shutter speed. Fast-moving subjects require faster shutter speeds to freeze their motion effectively, while slower-moving subjects allow for slower shutter speeds without losing sharpness.
Handheld vs. Tripod: When shooting handheld, you need to ensure your shutter speed is fast enough to compensate for any camera shake. As a general guideline, the reciprocal of the focal length is often used as a minimum shutter speed. For example, if you’re using a 200mm lens, try to use a shutter speed of 1/200 or faster to minimize camera shake. However, this guideline may not apply to extremely fast-moving subjects, and using a tripod or monopod can provide more stability.
Lighting Conditions: The available light plays a significant role in determining the achievable shutter speed. In bright conditions, you can use faster shutter speeds without compromising exposure. In low-light situations, you may need to increase your ISO or use wider apertures to maintain a fast enough shutter speed.
Continuous Shooting Mode: When photographing animals in motion, using the camera’s continuous shooting mode (burst mode) can increase your chances of capturing the perfect moment. By holding down the shutter button, the camera will capture a series of images in quick succession, allowing you to choose the best shot later.
Experiment and Adjust: There is no one-size-fits-all shutter speed for all situations. It’s important to experiment and adjust your shutter speed based on the specific subject, desired effect, and lighting conditions. Take test shots at different shutter speeds and review the results on your camera’s LCD screen to determine the optimal settings.
3.2 Aperture and Depth of Field
Aperture and depth of field are important considerations when photographing animals in motion. Aperture refers to the size of the lens opening, while depth of field refers to the range of sharpness in the image. Here’s how aperture and depth of field impact your photos:
Definition of Aperture: Aperture is represented by an f-number (e.g., f/2.8, f/5.6). It controls the size of the lens opening and determines the amount of light entering the camera. A smaller f-number (e.g., f/2.8) corresponds to a larger lens opening, while a larger f-number (e.g., f/16) represents a smaller opening.
Depth of Field (DOF): Depth of field refers to the range of distance in the scene that appears acceptably sharp. A shallow depth of field means a small portion of the image is in focus, while a deep depth of field means a larger portion of the image is in focus.
Shallow Depth of Field: Using a wide aperture (small f-number) like f/2.8 or f/4 creates a shallow depth of field. This technique isolates your subject from the background, blurring the foreground and background elements. A shallow depth of field can draw attention to the animal, making it the primary focus of the image, while creating a pleasing separation from the surroundings.
Focus on the Eyes: When photographing animals, particularly portraits, it’s essential to focus on their eyes. The shallow depth of field created by a wide aperture can help emphasize the eyes, resulting in captivating and engaging images.
Fast Shutter Speeds and Wide Apertures: To freeze the motion of fast-moving animals, you may need to use fast shutter speeds. However, using fast shutter speeds in low-light situations can lead to underexposed images. In such cases, using a wide aperture can allow more light into the camera, enabling faster shutter speeds while maintaining proper exposure.
Balancing Depth of Field: If you want more of the animal to be in focus, consider using a smaller aperture (larger f-number) like f/8 or f/11. This increases the depth of field, ensuring that a larger portion of the image is sharp. This technique is useful when photographing animals in groups or capturing their entire body in focus.
Distance to Subject: The distance between you and the subject also affects depth of field. As you move closer to the animal, the depth of field becomes shallower. So, keep this in mind when adjusting your aperture settings.
Balancing Creative Intent and Technical Considerations: Choosing the right aperture is a creative decision that should align with your artistic vision and the story you want to convey through your images. However, it’s important to balance creative intent with technical considerations, such as the amount of light available, the desired level of sharpness, and the specific requirements of the scene.
3.3 ISO and Noise Control
ISO is a crucial camera setting that determines the sensitivity of the image sensor to light. It plays a significant role in capturing animals in motion, especially in low-light conditions. However, increasing the ISO can introduce noise or graininess into the image. Here’s what you need to know about ISO and noise control:
ISO Definition: ISO stands for the International Organization for Standardization, which sets the standards for camera sensor sensitivity. In digital photography, ISO refers to the sensitivity of the camera’s image sensor to light. Common ISO values include 100, 200, 400, 800, 1600, and so on.
Low ISO and Image Quality: Lower ISO values, such as ISO 100 or 200, generally produce cleaner images with minimal noise. These settings are ideal in situations with ample light, as they capture images with high image quality and maximum detail.
Increasing ISO for Low-Light Situations: In low-light conditions, increasing the ISO becomes necessary to maintain proper exposure and achieve faster shutter speeds. Higher ISO settings, such as ISO 800, 1600, or higher, make the sensor more sensitive to light, allowing you to capture images in dimly lit environments without underexposure.
Noise and Image Quality: Increasing the ISO can introduce noise or grain into the image. Noise appears as random pixel variations and can decrease image quality. However, modern camera technology has significantly improved noise performance, allowing for cleaner images at higher ISO settings.
Balancing ISO and Noise: Finding the optimal ISO setting involves balancing the need for proper exposure and fast shutter speeds with acceptable noise levels. Each camera model has its unique ISO performance, so it’s important to test and become familiar with your camera’s ISO capabilities.
Noise Reduction Settings: Many cameras offer in-camera noise reduction settings that can help minimize noise. However, aggressive noise reduction can result in loss of detail and a “smoothing” effect on the image. Experiment with different noise reduction settings to find the right balance between noise reduction and maintaining image detail.
Shooting in RAW Format: When shooting in RAW format, you have more flexibility in post-processing to control noise and adjust the exposure. RAW files retain more information compared to JPEG files, allowing for better noise reduction and fine-tuning of the image.
Post-Processing Noise Reduction: If your images have visible noise, you can apply noise reduction techniques during post-processing. Various software programs offer noise reduction tools that can selectively reduce noise while preserving important details.
3.4 Autofocus Modes and Tracking
Autofocus (AF) modes and tracking are essential features to consider when photographing animals in motion. They help ensure accurate focus on the subject and maintain focus as the animal moves. Here’s what you need to know about autofocus modes and tracking:
AF-S (Single-Servo AF): AF-S mode is suitable for capturing stationary subjects or subjects that move predictably. When you half-press the shutter button, the camera locks focus on the subject and maintains it until you fully press the shutter button to take the shot. AF-S mode is useful when photographing animals that are relatively still or moving at a slow pace.
AF-C (Continuous-Servo AF): AF-C mode is designed for tracking moving subjects. In this mode, the camera continuously adjusts focus as long as you keep the shutter button half-pressed. AF-C mode is ideal for photographing animals in motion, as it allows the camera to adjust focus as the subject moves closer or farther away from you.
AI Servo (Canon) or AF-C (Nikon): AI Servo (Canon) and AF-C (Nikon) are specific autofocus modes that prioritize continuous tracking of moving subjects. These modes are specifically designed for tracking and maintaining focus on subjects in motion. They are particularly useful when photographing animals that are constantly on the move, such as birds in flight or running animals.
Tracking Modes: Many modern cameras offer advanced tracking modes that use predictive algorithms to anticipate the movement of the subject. These modes help ensure accurate focus on the subject, even when it’s moving erratically or across the frame. Experiment with the different tracking modes available on your camera to find the one that works best for your specific shooting situation.
Focus Points and Area Selection: Cameras have multiple focus points that you can select manually or allow the camera to choose automatically. When photographing animals in motion, consider using a single focus point or a small cluster of focus points to maintain precise focus on the subject. This gives you more control over where the camera focuses, reducing the chances of the camera focusing on the background or other distractions.
Continuous Shooting Mode: Using the camera’s continuous shooting mode (burst mode) in conjunction with autofocus tracking allows you to capture a series of images in quick succession as the subject moves. This increases your chances of capturing the perfect moment and ensures a higher success rate of sharp images.
Customizing Autofocus Settings: Depending on your camera model, you may have the option to customize autofocus settings to fine-tune the performance based on your shooting preferences. This can include adjusting autofocus sensitivity, focus tracking speed, or customizing the behavior of the autofocus system to suit specific shooting scenarios.
Practice and Familiarization: Each camera model has its own autofocus capabilities and behavior. It’s crucial to practice and become familiar with your camera’s autofocus system, including the various modes and tracking options. Understanding how your camera performs in different situations will help you make quick and accurate autofocus decisions when photographing animals in motion.
3.5 Burst Mode and Continuous Shooting
Burst mode, also known as continuous shooting or high-speed shooting, is a valuable feature when photographing animals in motion. It allows you to capture a rapid series of images in quick succession, increasing your chances of capturing the perfect moment. Here’s what you need to know about burst mode and continuous shooting:
Definition of Burst Mode: Burst mode is a camera feature that allows you to take a series of photos in rapid succession with a single press and hold of the shutter button. The camera continues to capture images as long as the shutter button is held down or until the buffer fills up.
Capturing Action: Burst mode is particularly useful when photographing animals in motion. It allows you to freeze action and capture various phases of movement within a short timeframe. This gives you more options to choose from and increases the likelihood of getting a perfectly timed shot.
Increased Success Rate: Animals in motion can be unpredictable, and it’s challenging to capture the ideal moment with a single shot. Burst mode significantly improves your chances of getting a sharp and well-timed image, especially when the animal’s movement is fast and erratic.
Continuous Shooting Speed: Different cameras have varying burst speeds, typically measured in frames per second (fps) or images per second (ips). Higher-end cameras often offer faster burst speeds, which are beneficial for capturing fast-moving subjects. However, even cameras with moderate burst speeds can be effective for many wildlife photography scenarios.
Buffer Capacity: The camera’s buffer is a temporary storage space where images are stored before being written to the memory card. The buffer capacity determines the number of continuous shots you can take before the camera slows down or stops shooting. It’s important to consider both the burst speed and the buffer capacity of your camera to ensure a smooth shooting experience.
Timing and Anticipation: Burst mode allows you to capture a series of images during a decisive moment. By anticipating the animal’s movement and using burst mode at the right time, you increase your chances of capturing a standout image with the perfect pose or action.
Sorting and Selecting Images: Shooting in burst mode can result in a large number of images to sort through. It’s essential to review and select the best shots during post-processing to avoid cluttering your photo library. You can use image review tools or software that helps you quickly browse through the images and select the keepers.
Considerations for Memory Card and Battery: Burst mode consumes more memory card space and drains the camera’s battery faster. Make sure you have sufficient memory card capacity and a fully charged battery when shooting in burst mode, especially during longer wildlife photography sessions.
Composition Techniques
4.1 Rule of Thirds
The rule of thirds is a fundamental composition guideline in photography that can help you create visually appealing and well-balanced images of animals in motion. It involves dividing the image frame into a grid of nine equal parts by drawing two horizontal lines and two vertical lines. Here’s what you need to know about the rule of thirds:
Composition Principle: The rule of thirds suggests that you should place the main subject or point of interest in your image along one of the gridlines or at one of the points where the gridlines intersect. This placement creates a more dynamic and visually pleasing composition compared to placing the subject in the center of the frame.
Gridlines and Intersection Points: The gridlines divide the frame into three horizontal sections and three vertical sections, resulting in four intersection points. These points are often referred to as “power points” or “points of interest.” Placing your subject at or near these points can create a stronger and more balanced composition.
Balancing Elements: By placing the main subject off-center and near one of the gridlines, you introduce a sense of balance and visual tension to the image. This technique prevents the subject from appearing static and gives the viewer a more engaging visual experience.
Negative Space: The rule of thirds also considers the use of negative space. Negative space refers to the empty or unoccupied areas in the frame. Placing the subject along one of the gridlines can create negative space in the other sections, which can enhance the overall composition and draw attention to the subject.
Aligning Horizon Lines: The rule of thirds is not limited to subjects but can also be applied to the positioning of horizon lines in landscape photography. Placing the horizon along one of the horizontal gridlines (either on the top or bottom third) can create a more visually appealing composition and allow for a stronger emphasis on the sky or foreground.
Flexibility and Adaptation: While the rule of thirds is a helpful guideline, it’s important to remember that rules in photography are meant to be broken. Experimenting with different compositions and variations can lead to unique and creative results. The rule of thirds should be seen as a starting point, and you should feel free to deviate from it if it enhances your artistic vision.
Gridlines in the Viewfinder: Many cameras offer the option to display gridlines in the viewfinder or on the LCD screen, making it easier to visualize and align your subject within the rule of thirds grid. Check your camera’s settings to enable the gridlines if available.
Planning and Preparation
5.1 Research and Scout Locations
Researching and scouting locations is an essential step in photographing animals in motion. It helps you identify the best places to find and photograph your desired subjects, understand their behaviors, and plan your photography outings effectively. Here’s what you need to know about researching and scouting locations:
5.2 Time of Day and Lighting
The time of day and lighting conditions play a crucial role in capturing stunning images of animals in motion. Understanding how different lighting situations can enhance your photographs and planning your shoots accordingly can significantly improve the quality of your wildlife images. Here are some tips to consider regarding time of day and lighting:
Golden Hours: The golden hours, which occur shortly after sunrise and before sunset, offer some of the most beautiful and soft lighting conditions for photography. The warm, diffused light during these times adds a golden glow to your images, enhances textures, and creates a pleasing atmosphere. Animals in motion during these hours can be especially captivating, as the low angle of the sun can produce long shadows and highlight their movements.
Avoid Harsh Midday Light: The midday sun produces harsh and contrasty lighting conditions, which can result in overexposed highlights, deep shadows, and a lack of detail in your images. Animals tend to seek shade during this time, making it challenging to capture them in motion. If you can’t avoid shooting in the midday sun, look for areas with diffused or dappled light, such as under trees or in areas with cloud cover.
Backlighting: Backlighting occurs when the light source is behind the subject. It can create a stunning effect by illuminating the edges of the animal and producing a halo-like glow. This technique works particularly well when photographing animals in motion, as it emphasizes their shape and adds drama to the image. Experiment with backlighting during sunrise or sunset for striking results.
Overcast Days: Cloudy or overcast days provide soft, even lighting, which is ideal for capturing details and colors in your wildlife images. The diffused light helps eliminate harsh shadows and reduces contrast, allowing for more balanced exposures. On overcast days, animals may also be more active, making it a great opportunity to photograph them in motion.
Silhouettes: Silhouettes can be a creative way to capture animals in motion during sunrise or sunset. Position yourself so that the animal is between you and the sun, and expose for the brighter background. This will result in the animal appearing as a dark silhouette against a colorful sky, creating a striking and dynamic image.
Spot Metering and Exposure Compensation: When photographing animals in motion, spot metering can be helpful to ensure accurate exposure on the subject. Spot metering measures the light from a small area, often the animal itself, rather than the entire scene. Additionally, depending on the lighting conditions, you may need to use exposure compensation to adjust the exposure settings manually. This prevents underexposure or overexposure, especially in challenging lighting situations.
Avoid Harsh Shadows: When photographing animals in motion, try to avoid capturing images with distracting or unflattering shadows. Position yourself or your subject in a way that minimizes harsh shadows on the animal, ensuring a more balanced and pleasing image.
Continuous Monitoring: Lighting conditions can change quickly, especially during sunrise and sunset. Continuously monitor the light and adjust your camera settings accordingly to achieve optimal exposures and capture the desired motion of the animals.
5.3 Understanding Weather Conditions
Understanding weather conditions is crucial when photographing animals in motion as it can greatly influence their behavior, visibility, and overall image aesthetics. Here are some key points to consider when it comes to weather conditions:
Rainy Weather: Rain can create unique opportunities for capturing compelling images. Animals may be more active during or after rainfall, and the wet environment can add a sense of drama and mood to your photographs. Use weather-sealed equipment or protective covers to safeguard your gear and consider using a waterproof camera bag for added protection.
Cloudy and Overcast Days: Cloudy and overcast days provide diffused lighting, which can be advantageous for photographing animals in motion. The absence of harsh shadows and reduced contrast allow for even exposure and vibrant colors. Additionally, animals may be more active during overcast weather, making it an ideal time to capture their movements.
Fog and Mist: Fog and mist can create an ethereal and mysterious atmosphere in your images. It softens the light, adds depth to the scene, and can make your subject stand out. When photographing animals in foggy conditions, emphasize their silhouettes, and pay attention to capturing the ambient mood and atmosphere.
Snowfall and Winter Conditions: Winter landscapes and snowfall offer unique opportunities for wildlife photography. The contrasting white snow against the animal’s fur or feathers can create striking visual compositions. Be cautious of exposure settings as snow can fool the camera’s metering system, resulting in underexposed images. Consider using exposure compensation to achieve accurate exposures.
Windy Conditions: Wind can add a sense of movement and dynamism to your images, especially when capturing animals in motion. Utilize fast shutter speeds to freeze the action and consider using burst mode to capture a series of shots, increasing your chances of getting a well-timed image. Pay attention to potential challenges such as camera shake or movement of the subject caused by strong winds.
Extreme Weather: Extreme weather conditions, such as storms or high heat, may impact animal behavior and make it more challenging to photograph them in motion. Prioritize your safety and the welfare of the animals when considering shooting in extreme weather. Be prepared with appropriate gear, including protective clothing, and know when it’s best to reschedule or wait for more favorable conditions.
Dramatic Skies: Weather conditions can greatly influence the appearance of the sky, adding drama and impact to your images. Stormy clouds, colorful sunsets, or dramatic lightning can enhance the overall composition and create a powerful backdrop for your subjects. Pay attention to the sky and use it to your advantage when framing your shots.
Planning and Flexibility: Keep an eye on weather forecasts to plan your photography outings effectively. However, always be prepared to adapt and make the most of unexpected weather changes. Sometimes, the most remarkable images come from embracing the elements and capturing the unique opportunities presented by ever-changing weather conditions.
5.4 Safety and Ethical Considerations
Maintain a Safe Distance: Always observe animals from a safe distance to avoid causing stress or interfering with their natural behaviors. Use telephoto lenses or zoom capabilities to capture close-up shots without disturbing the animals. Respect any signs or guidelines provided by park rangers or local authorities regarding appropriate viewing distances.
Do Not Disturb or Harass: Avoid actions that could disrupt or distress the animals. Refrain from making loud noises, using flash photography, or intentionally provoking their reactions. Do not approach nesting sites, dens, or young animals, as this can disrupt their routines or cause parental abandonment.
Stay on Designated Paths and Trails: Stick to designated paths and trails to minimize your impact on the environment. Avoid stepping on fragile vegetation, disturbing nests or burrows, or trampling on habitats. By being mindful of your surroundings, you help preserve the natural ecosystem and reduce the risk of unintentional harm.
Know and Observe Local Regulations: Familiarize yourself with local regulations and guidelines pertaining to wildlife photography. Different locations may have specific rules to protect both the animals and their habitats. Follow these regulations, obtain necessary permits if required, and respect any restricted areas or seasonal closures.
Preserve the Habitat: Leave the natural habitat as you found it. Do not remove or disturb plants, rocks, or other elements of the environment for the sake of your composition. Preserve the integrity of the ecosystem and ensure that future visitors can enjoy the same natural beauty.
Avoid Baiting or Luring Wildlife: Do not use bait, calls, or any other means to attract or manipulate animals for photography purposes. This can disrupt their natural behaviors and create an artificial environment. Let the animals behave naturally and capture their genuine interactions and movements.
Be Mindful of Breeding and Mating Seasons: During breeding and mating seasons, animals may be more vulnerable or sensitive to disturbances. It’s crucial to be extra cautious during these times and avoid actions that could disrupt their breeding activities or cause stress to individuals or groups.
Shooting Techniques
6.1 Anticipation and Timing
Anticipation and timing are key factors in capturing compelling photographs of animals in motion. By understanding the behavior of your subject and mastering the art of anticipation, you can increase your chances of capturing the perfect moment. Here are some tips to help you with anticipation and timing:
Study Animal Behavior: Spend time observing and studying the behavior of the animal species you want to photograph. Learn about their habits, movements, and patterns. Understanding their behavior will help you anticipate their actions and be prepared to capture them in motion.
Patience is Key: Patience is essential when photographing animals in motion. Animals may exhibit repetitive behaviors or follow specific patterns, but it can take time to capture the exact moment you desire. Be patient, observe their movements, and wait for the right opportunity.
Anticipate Movement: Anticipating the movement of your subject is crucial for capturing action shots. Pay attention to their body language, signs of alertness or readiness, and any pre-movement cues. This will help you predict when they are about to leap, run, or engage in other dynamic actions.
Track Eye Contact: Animals often provide visual cues before they move or change their behavior. Pay attention to their eye contact, as it can indicate their next move. If an animal locks eyes with another or focuses on a particular point, it might signal an impending action that you can anticipate and capture.
Use Burst Mode: Burst mode or continuous shooting is a valuable feature to capture fast-paced action. When shooting in burst mode, you can take a rapid series of images, increasing your chances of capturing the perfect moment. This is particularly useful when photographing animals in fast motion, such as birds in flight or running mammals.
Pre-focus and Tracking: Use autofocus to pre-focus on the area where you expect the action to take place. This allows your camera to respond quickly when the moment arrives. Additionally, practice tracking the subject as it moves, keeping it in focus throughout the motion. Continuous autofocus modes or focus tracking options on your camera can assist with this.
Experiment with Shutter Speeds: Different shutter speeds can produce varying effects when capturing animals in motion. Experiment with different settings to achieve the desired level of motion blur or freeze the action entirely. Higher shutter speeds freeze the motion, while slower speeds can create dynamic blur, conveying a sense of speed and energy.
Capture Expressions and Gestures: Timing is crucial for capturing unique expressions, gestures, or interactions between animals. These moments add personality and storytelling to your images. Keep a keen eye on their interactions and be ready to press the shutter when an interesting expression or behavior occurs.
Continuous Observation: Animals can surprise you with sudden bursts of movement or unexpected actions. Continuously observe your subject even when you are not actively shooting. Stay attentive and ready to capture any spontaneous moments that unfold.
6.2 Tracking and Following the Subject
Tracking and following the subject smoothly and accurately is essential for photographing animals in motion. It allows you to keep the subject in focus and frame them effectively, resulting in sharp and captivating images. Here are some tips for tracking and following the subject:
Use Continuous Autofocus (AI Servo or AF-C): Set your camera to continuous autofocus mode, which is often labeled as AI Servo (Canon) or AF-C (Nikon and other brands). This mode enables the camera to continuously adjust focus as the subject moves, keeping it sharp throughout the motion.
Select the Appropriate Autofocus Point: Choose the autofocus point that covers the area where the subject is most likely to be. Single-point autofocus or a small cluster of autofocus points are often effective for tracking small or fast-moving subjects. If your camera has subject tracking capabilities, activate them to let the camera automatically follow the subject.
Continuous Shooting (Burst Mode): Use continuous shooting or burst mode to capture a series of images in rapid succession. This allows you to capture multiple frames as the subject moves, increasing your chances of getting the perfect shot with the desired pose or action.
Panning Technique: Panning is a technique where you track the subject’s movement with your camera while using a slower shutter speed. This creates a sense of motion blur in the background while keeping the subject relatively sharp. To execute the panning technique effectively, follow these steps:
a. Set your camera to shutter priority mode (Tv or S) and choose a slower shutter speed (e.g., 1/30s or slower, depending on the speed of the subject).
b. Stand with your feet shoulder-width apart, keeping your body stable.
c. Track the subject smoothly by rotating your upper body, following its movement.
d. Press the shutter release button and continue to pan with the subject until the exposure is complete.
e. Practice panning with different subjects and experiment with various shutter speeds to achieve the desired effect.
Predictive Focusing: Anticipate the path and movement of the subject to maintain focus. If you have prior knowledge of the animal’s behavior or movement patterns, you can pre-focus on a specific spot along its path and trigger the shutter as it enters that area.
Keep Both Eyes Open: When tracking a moving subject, keep both eyes open – one eye looking through the viewfinder and the other observing the subject directly. This helps you maintain awareness of the subject’s movement outside the frame and anticipate any changes or actions.
Stabilize Yourself: Proper body positioning and stability contribute to smooth tracking. Stand with your feet planted firmly on the ground and use both hands to hold the camera steady. Lean slightly forward, bend your knees, and follow the subject’s movement smoothly with controlled motions.
Practice and Experiment: Tracking and following subjects takes practice and experimentation. Take time to practice with different moving subjects, such as birds in flight, running animals, or even sports activities. Adjust your techniques and camera settings based on the speed and behavior of the subject.
6.3 Continuous Autofocus and Servo Mode
Continuous autofocus and Servo mode are essential features for successfully photographing animals in motion. They allow your camera to continuously track and adjust focus on a moving subject, ensuring that it remains sharp and in focus throughout the action. Here’s how to make the most of continuous autofocus and Servo mode:
Understanding Continuous Autofocus: Continuous autofocus (AF-C) is a focusing mode that continuously adjusts focus as the subject moves. It’s designed to track and maintain focus on moving subjects, making it ideal for capturing animals in motion. Different camera brands may have different names for this mode, such as AI Servo (Canon) or AF-C (Nikon).
Activate Continuous Autofocus Mode: Set your camera to continuous autofocus mode. Refer to your camera’s manual or menu settings to find the appropriate autofocus mode. This mode ensures that your camera continuously adjusts focus as long as the shutter button is half-pressed or held down.
Select the Appropriate Autofocus Area: Choose the autofocus area that best suits your subject and composition. Single-point autofocus or a small cluster of autofocus points is typically recommended for tracking fast-moving subjects. Place the active autofocus point over the subject, typically on the part of the animal you want to keep in focus, such as the eye or body.
Enable Subject Tracking (if available): Some cameras offer subject tracking capabilities that use advanced algorithms to identify and track subjects automatically. If your camera has this feature, activate it to enhance the accuracy and reliability of continuous autofocus.
Continuous Shooting (Burst Mode): Combine continuous autofocus with burst mode to capture a series of images in rapid succession. This allows you to increase your chances of getting a well-timed shot with the desired action or pose. Keep the shutter button held down to capture a continuous stream of images as the subject moves.
Use Back-Button Focus: Consider assigning autofocus activation to a dedicated button on the back of your camera instead of the shutter button. This technique, known as back-button focus, separates focusing from shutter release. It allows you to activate and control autofocus independently, giving you more flexibility and control over your tracking and composition.
Track and Follow the Subject: Once you’ve activated continuous autofocus and selected the appropriate autofocus point, track and follow the subject smoothly and steadily. Keep the subject within the autofocus area and maintain a steady hand as you follow its movement. Practice panning techniques to track the subject while keeping it in focus.
Refine and Adjust Settings: Depending on the speed and behavior of the subject, you may need to adjust your camera settings for optimal tracking. Experiment with different autofocus modes, sensitivity settings, or focus tracking options to find the settings that work best for your specific shooting conditions.
6.4 Using Burst Mode
Using burst mode is an effective technique for capturing animals in motion. It allows you to capture a rapid sequence of images, increasing your chances of getting the perfect shot with the desired action or expression. Here’s how to make the most of burst mode:
Activate Burst Mode: Set your camera to burst mode or continuous shooting mode. This mode enables your camera to capture a series of images in quick succession while you hold down the shutter button. Consult your camera’s manual or menu settings to locate and enable this feature.
Adjust Shutter Speed: Choose an appropriate shutter speed based on the speed of the subject and the desired effect. A faster shutter speed (1/1000s or higher) is generally recommended for freezing fast motion, while a slower shutter speed (around 1/250s or lower) can create a sense of motion blur.
Anticipate the Action: Anticipate the moment you want to capture and be ready to press and hold the shutter button. This is particularly important when photographing fast-moving animals, such as birds in flight or running mammals. Understanding the behavior and movement patterns of the subject will help you predict the right moment to start shooting.
Use Continuous Autofocus: Enable continuous autofocus (AF-C or AI Servo) to ensure that your camera continuously adjusts focus as the subject moves. This helps maintain sharp focus throughout the burst sequence. Select the appropriate autofocus point or area that covers the subject, typically the eyes or the area of interest.
Control Burst Length: Some cameras offer options to control the burst length or the number of images captured in a single burst. Check your camera’s settings to adjust this according to your preferences and shooting conditions. Shorter bursts may be useful for conserving memory card space, while longer bursts increase the chances of capturing the decisive moment.
Maintain a Steady Hand: Hold your camera as steady as possible while shooting in burst mode to minimize camera shake. Proper handholding technique, bracing yourself against a stable surface, or using a tripod or monopod can help improve stability. This ensures sharper images and reduces the likelihood of motion blur.
Sort and Review Images: After shooting in burst mode, review your images to select the best ones. Use the zoom function on your camera or transfer the images to a larger screen for a more detailed evaluation. Look for the images with the best composition, focus, and timing, and discard any duplicates or undesired shots.
Practice and Experiment: Burst mode requires practice to develop a good sense of timing and capture the decisive moment effectively. Experiment with different burst lengths, shutter speeds, and subject movements to understand how these variables affect the outcome. Continuous practice and experimentation will enhance your ability to anticipate and capture stunning images of animals in motion.
Remember to consider the limitations of your camera’s buffer capacity and the write speed of your memory card when using burst mode. If shooting for an extended period, make sure you have enough storage space and a spare battery if necessary.
6.5 Experimenting with Different Perspectives
Experimenting with different perspectives can add a creative and unique touch to your photographs of animals in motion. By exploring various angles and viewpoints, you can capture dynamic and visually engaging images. Here are some ideas to help you experiment with different perspectives:
Low Angle Shots: Get down to the eye level of the animal or even lower to create a dramatic effect. This perspective can emphasize the subject’s power, agility, and intensity. Use a wide-angle lens to incorporate the surroundings and create a sense of scale.
High Angle Shots: Shoot from an elevated position, such as a hill, tree, or elevated platform, to capture the animal from above. This perspective can offer a different view of the subject’s behavior and habitat. It works particularly well for animals running or moving in groups.
Eye-Level Shots: Capture the animal at its eye level to create a connection between the viewer and the subject. This perspective provides a more intimate and immersive experience, allowing the viewer to feel like they are in the animal’s world.
Close-Up Shots: Focus on specific details of the animal, such as its eyes, fur, feathers, or claws, to highlight their unique characteristics. Use a macro lens or zoom in tightly to capture intricate textures and patterns.
Wide-Angle Shots: Utilize a wide-angle lens to capture the animal in its environment. This perspective emphasizes the subject’s surroundings, providing a broader context for their actions. It works well for animals in large herds or in expansive landscapes.
Motion Blur Shots: Experiment with intentional motion blur to convey a sense of speed and dynamic movement. Use a slower shutter speed and pan with the subject to create a blurred background while keeping the animal relatively sharp. This technique works best when the subject is moving across your field of view.
Silhouette Shots: Capture the animal as a silhouette against a vibrant sky during sunrise or sunset. This perspective creates a visually striking image, emphasizing the animal’s shape and profile while adding a sense of drama.
Reflection Shots: Look for opportunities to photograph animals near water bodies to capture their reflections. The reflection adds depth and symmetry to the image, creating an artistic and captivating composition.
Unconventional Angles: Don’t be afraid to experiment with unconventional angles and compositions. Shoot from behind the subject, from below or above, or through obstacles like vegetation or fences. These unique perspectives can result in intriguing and thought-provoking images.
Post-Processing and Editing
7.1 Selecting the Best Images
Selecting the best images from your collection of photographs is an important step in showcasing your skills as a photographer and telling a compelling story. When photographing animals in motion, it’s crucial to carefully curate your images to highlight the most impactful and visually stunning shots. Here are some tips to help you select the best images:
Review the Technical Aspects: Start by evaluating the technical aspects of the images. Look for sharp focus, proper exposure, and good composition. Check for any technical flaws, such as motion blur, noise, or distractions in the frame. Eliminate images that don’t meet your technical standards.
Consider the Storytelling Element: Look for images that convey a story or evoke emotions. Choose photographs that capture the essence of the animal’s behavior, movement, or interaction with the environment. Select images that communicate a clear message or elicit a strong emotional response from viewers.
Seek Unique and Creative Shots: Identify images that stand out from the rest in terms of composition, perspective, or artistic interpretation. Look for shots that offer a fresh and unique take on the subject. Images that showcase creativity, unusual angles, or unexpected moments often leave a lasting impression.
Focus on the Subject’s Expression: Pay attention to the subject’s expression or body language. Choose images that capture captivating moments where the animal’s expression reflects its personality or emotions. These shots can add depth and a sense of connection to the viewer.
Vary the Action and Pose: Aim for a diverse selection of images that showcase different actions, poses, and behaviors of the animal. Include shots that depict various stages of movement, such as running, jumping, or flying. This variety adds visual interest and keeps the viewer engaged.
Compositional Strength: Evaluate the composition of each image. Look for strong leading lines, balanced or asymmetric compositions, and effective use of negative space. Choose photographs that have a clear focal point and utilize compositional techniques to guide the viewer’s eye.
Eliminate Repetition: Avoid selecting multiple similar shots that don’t offer significant variations or improvements. Prioritize images that bring something new to the table or have a unique quality. This helps avoid redundancy and keeps the selection diverse and engaging.
Get Feedback: If possible, seek the opinion of others who have a keen eye for photography. Their objective perspective can provide valuable insights and help you make informed decisions. Consider joining photography communities or seeking feedback from fellow photographers to gain different perspectives.
Be Selective: Remember, quality is better than quantity. It’s better to have a smaller collection of impactful images than a large set of mediocre ones. Be ruthless in your selection process, choosing only the strongest images that truly showcase your skills and vision.
7.2 Adjusting Exposure and Colors
Adjusting exposure and colors in your photographs of animals in motion can greatly enhance the visual impact and overall quality of your images. Proper exposure ensures that the subject is well-lit and details are preserved, while color adjustments can help create a more appealing and immersive atmosphere. Here are some tips for adjusting exposure and colors effectively:
Evaluate Exposure: Start by assessing the overall exposure of your image. Ensure that the subject is neither too bright (overexposed) nor too dark (underexposed). Look for details in both the highlights and shadows. Use the histogram on your camera or post-processing software to check the distribution of tones and make necessary adjustments.
Brighten Shadows and Recover Highlights: If there are areas in your image that appear too dark or lack detail, use tools like shadow recovery or lifting the shadows to bring out those details. Similarly, if there are blown-out highlights, decrease the exposure or use highlight recovery tools to recover lost details.
Adjust Contrast: Fine-tuning the contrast can add depth and definition to your image. Increase contrast to make the subject stand out and create more impact. Decrease contrast for a softer and more atmospheric look. Use the contrast slider or curves adjustments in post-processing software to achieve the desired effect.
Enhance Colors: Adjusting the colors can greatly impact the mood and atmosphere of your images. Experiment with white balance settings to correct any color casts and achieve accurate and natural tones. Use color adjustments, such as saturation, vibrance, or selective color adjustments, to enhance or mute specific colors for visual impact.
Consider Split Toning: Split toning involves adding different colors to the highlights and shadows of an image. It can create a unique and artistic look. Experiment with split toning to add warmth, coolness, or other color effects to specific areas of the photograph.
Use Graduated Filters: Graduated filters are useful for balancing exposure when dealing with challenging lighting situations, such as a bright sky and a darker foreground. They can help darken or lighten specific areas of the image to achieve a more balanced exposure overall.
Preserve Natural Look: While it’s important to enhance your images, avoid over-processing them to the point where they appear unrealistic or unnatural. Strive for a balance between enhancing the image and maintaining a natural and authentic look.
Work in RAW Format: Shooting in RAW format gives you more flexibility and control over exposure and color adjustments during post-processing. RAW files retain more image data, allowing you to make more significant adjustments without compromising quality.
Keep a Consistent Style: When adjusting exposure and colors, aim for a consistent style across your images. Develop your own editing style that reflects your vision and preferences. Consistency in editing can help create a cohesive body of work and reinforce your artistic identity.
7.3 Enhancing Sharpness and Details
Enhancing sharpness and details in your photographs of animals in motion can make a significant difference in the overall impact and quality of your images. It helps to bring out the textures, fur, feathers, and intricate details that make the subject come alive. Here are some tips to help you enhance sharpness and details effectively:
Start with a Sharp Capture: Ensure that your initial capture is as sharp as possible. Use a fast shutter speed to minimize motion blur and stabilize your camera by using a tripod or monopod. Pay attention to focusing techniques and use the appropriate autofocus mode to ensure accurate focus on the subject.
Use Post-Processing Software: Post-processing software provides a range of tools and techniques to enhance sharpness and details. Popular software options include Adobe Lightroom, Photoshop, Capture One, and various other editing programs. Familiarize yourself with the sharpening and detail enhancement tools available in your chosen software.
Apply Global Sharpening: Begin by applying a global sharpening adjustment to the entire image. This can be done using the sharpening tools or filters in your editing software. Be cautious not to oversharpen, as it can introduce artifacts and create an unnatural appearance. Adjust the sharpening settings gradually and use the “before and after” view to gauge the impact of your adjustments.
Use Masking for Selective Sharpening: To retain a natural appearance while enhancing specific details, use masking techniques for selective sharpening. Create a mask to protect areas that don’t require sharpening, such as the background or out-of-focus elements. This allows you to focus the sharpening effect on the subject, where it is most needed.
Increase Clarity and Texture: Utilize the clarity and texture adjustments in your editing software to enhance fine details and textures. These tools can help bring out the subtle fur, feather, or scale details in the animal’s body. Again, exercise caution to avoid overdoing the adjustments, which can result in an unnatural or overly textured appearance.
Utilize High Pass Filter: The High Pass filter is a popular technique to enhance details and sharpen specific areas of an image. Duplicate the image layer, apply a High Pass filter with a radius that emphasizes the desired details, and blend the layer using the appropriate blending mode (e.g., Overlay or Soft Light). This technique allows for precise control over the sharpening effect.
Zoom for Fine-Tuning: Zoom in to 100% or 200% magnification to evaluate the impact of your sharpening and detail enhancement adjustments. This allows you to check for any artifacts, halos, or unnatural effects caused by excessive sharpening. Make necessary adjustments to achieve the desired level of sharpness and detail without compromising image quality.
Sharpening for Web and Print: Consider the intended output of your image when applying sharpening. Images destined for web display generally require a higher level of sharpening to compensate for the reduced resolution and screen display. On the other hand, images intended for print should be sharpened with the specific print size and output medium in mind.
Regularly Calibrate Your Monitor: To ensure accurate evaluation and adjustment of sharpness and details, calibrate your monitor regularly. A properly calibrated monitor ensures that you are seeing accurate colors, contrast, and details, allowing you to make more informed editing decisions.
7.4 Removing Distractions
Removing distractions from your photographs of animals in motion helps to create a cleaner and more focused composition, allowing the viewer to fully appreciate the subject. By eliminating unnecessary elements or distractions in the frame, you can enhance the impact and visual appeal of your images. Here are some tips to help you remove distractions effectively:
Review the Entire Frame: Carefully examine the entire frame of your image and identify any elements that compete with or detract from the main subject. Look for objects, people, or elements that draw attention away from the animal in motion.
Use Selective Composition: When framing your shot, be mindful of the composition and position of the subject in relation to the surrounding elements. Consider using the rule of thirds or other compositional techniques to create a balanced and visually pleasing image. Place the subject in a position where distractions are minimized, or use the surroundings to naturally frame and emphasize the subject.
Simplify the Background: One effective way to remove distractions is to simplify the background. Look for plain or uncluttered backgrounds that allow the subject to stand out. Position yourself in a way that minimizes busy or distracting elements, such as buildings, people, or bright objects, in the background.
Utilize Depth of Field: Controlling the depth of field can help isolate the subject from distracting elements in the foreground or background. Use a wide aperture (small f-number) to achieve a shallow depth of field, which blurs the background and brings the subject into sharp focus. This technique draws attention to the subject and minimizes distractions.
Clone or Heal in Post-Processing: If distractions are present in your image, you can use post-processing software to remove them. Tools like the Clone Stamp or Healing Brush can help you eliminate unwanted elements by sampling nearby areas and seamlessly blending them with the rest of the image. Be careful to maintain a natural look and avoid overusing these tools.
Crop the Image: Cropping is another effective method to remove distractions and improve the composition of your photograph. By adjusting the framing of the image, you can eliminate unwanted elements along the edges or corners that may draw attention away from the subject. However, be mindful not to crop too much and lose important elements or reduce the image quality.
Utilize Content-Aware Fill: Some advanced post-processing software offers Content-Aware Fill tools that automatically remove distractions by intelligently analyzing the surrounding areas and filling in the gaps seamlessly. This tool can be helpful in removing larger or complex distractions while maintaining the overall integrity of the image.
Pay Attention to Color and Contrast: Distractions can sometimes be reduced by adjusting the color or contrast of specific elements in the image. Use tools like selective color adjustments, local contrast adjustments, or targeted adjustments to make distracting elements blend better with the overall image.
Take Careful Pre-Shot Preparation: Finally, whenever possible, try to anticipate and address potential distractions before taking the shot. Pay attention to your surroundings, the position of other objects or people, and the overall scene. Adjust your composition or wait for a more suitable moment when distractions are minimized.
7.5 Preserving the Essence of the Moment
Preserving the essence of the moment in your photographs of animals in motion is crucial to capturing the energy, emotion, and unique characteristics of the subject. It involves capturing the right expression, movement, and context that tell a story and evoke a sense of connection with the viewer. Here are some tips to help you preserve the essence of the moment:
Be Present and Observant: Stay fully engaged and present in the moment. Observe the behavior, movements, and interactions of the animal. Anticipate key moments and be ready to capture them as they unfold. Being attentive and observant allows you to capture the essence of the animal’s behavior and personality.
Capture the Action: Focus on capturing the dynamic aspects of the animal in motion. Freeze the action using fast shutter speeds to capture the energy and movement. Look for moments that convey a sense of power, agility, or grace. Timing is critical, so be patient and ready to press the shutter at the decisive moment.
Seek Eye Contact: The eyes are often the window to the soul and can communicate a lot of emotion and connection. Aim to capture the animal’s eye contact whenever possible. It adds depth and a sense of engagement to the photograph, creating a stronger connection between the subject and the viewer.
Include the Environment: Context is important in storytelling. Include elements of the animal’s natural habitat or environment to provide a sense of place and enhance the narrative. This could be the landscape, vegetation, or other animals interacting with the subject. It helps to create a more immersive and meaningful photograph.
Show Emotion and Personality: Animals, like humans, have unique personalities and emotions. Look for moments that reveal their character, whether it’s a playful expression, a fierce stance, or a tender interaction with their young. Capturing these authentic moments conveys the essence of the animal and creates a more engaging photograph.
Experiment with Different Perspectives: Explore different angles and perspectives to add variety and visual interest to your images. Get down to the animal’s eye level or try shooting from above for a different viewpoint. Changing perspectives can provide a fresh and unique perspective on the subject, helping to capture the essence of the moment in a distinctive way.
Embrace Imperfection: Not every photograph will be technically perfect, and that’s okay. Sometimes, the most authentic and emotive moments can be captured in less-than-ideal conditions. Embrace the imperfections and focus on the overall impact and emotion of the image. A technically flawless image may not always convey the true essence of the moment.
Edit with Intention: During the post-processing stage, edit your images with the intention of enhancing the essence of the moment. Adjust the exposure, contrast, and colors to accurately represent the atmosphere and mood of the scene. Be mindful of maintaining a natural and authentic look while bringing out the key elements that preserve the essence of the moment.
Share Your Story: When sharing your photographs, provide context and narrative to accompany the images. Share the story behind the moment, the behavior you observed, or the connection you felt. By sharing your experience and insights, you allow the viewer to connect more deeply with the photograph and appreciate the essence of the moment.
Photographing animals in motion is a rewarding yet challenging pursuit. By understanding animal behavior, equipping yourself with the right gear, mastering camera settings, applying effective composition techniques, and planning your shoots meticulously, you can significantly improve your chances of capturing incredible images of wildlife in action. Remember, patience and perseverance are key virtues when it comes to photographing animals in their natural habitat.
As you embark on this journey, be mindful of ethical considerations, respecting the animals and their environment. With practice and experience, you will enhance your skills and develop a unique style of capturing animals in motion. Embrace the unpredictability and excitement that comes with wildlife photography, and let it inspire you to preserve the beauty of our natural world through your lens. Happy shooting!