


Mastering Photography with Flash Techniques

In the ever-evolving realm of photography, the mastery of light is an art form in itself. “LightCraft: Mastering Photography with Flash Techniques” is your comprehensive guide to unlocking the full potential of flash photography. This article is designed to empower photographers of all levels with the knowledge and skills needed to harness artificial light sources creatively and effectively.
The Power of Light
Photography, at its core, is the art of capturing light. In this foundational chapter, we delve into the fundamental role that light plays in shaping our visual narratives. From the gentle glow of sunrise to the vibrant hues of a sunset, understanding the essence of light is paramount to mastering the art of photography.
The Language of Light
In the opening chapter, we embark on a journey into the profound impact that light has on photographic storytelling. We delve into the language of light, understanding its emotional nuances, and exploring the concepts of soft and hard light, dissecting their effects on mood and composition. Additionally, we unravel the art of reading the direction of light, uncovering its implications on shadows and highlights.
Exploring the Emotional Impact of Different Qualities of Light
Natural vs. Artificial Light:
Delve into the emotional qualities of natural light, such as the warm hues of sunrise and the cool tones of twilight.
Explore how artificial light sources can evoke different emotions, from the intimate warmth of tungsten to the clinical coolness of fluorescent light.
Time of Day and Mood:
Analyze how the changing quality of light throughout the day influences the mood of a scene.
Understand the emotional resonance of golden hour, the starkness of midday light, and the mysterious ambiance of the blue hour.
Color Temperature and Emotional Tone:
Examine the emotional connotations of color temperature, relating warmer tones to comfort and intimacy, and cooler tones to drama and detachment.
Understanding Soft and Hard Light and Their Effects on Mood and Composition
Soft Light:
Grasp the characteristics of soft light, often found on overcast days or during the golden hour.
Explore how soft light minimizes shadows, creating a gentle and flattering illumination that is ideal for portraiture.
Hard Light:
Dive into the defining features of hard light, prevalent under a clear sky or in direct sunlight.
Understand how hard light accentuates shadows, creating a bold and dramatic atmosphere, suitable for dynamic compositions.
Applications in Photographic Storytelling:
Learn to select between soft and hard light based on the mood and narrative you aim to convey in your photographs.
Explore case studies that showcase the effective use of different light qualities in storytelling across genres.
Learning to Read the Direction of Light and Its Implications on Shadows and Highlights
Directional Light and Shadows:
Master the art of identifying the direction of light by observing shadows and highlights in a scene.
Understand how front, side, and backlighting impact the mood and depth of an image.
Controlling Highlights and Shadows:
Gain techniques for controlling highlights and shadows based on the direction of light.
Experiment with exposure settings and modifiers to sculpt light according to your creative vision.
Using Light to Guide the Viewer’s Eye:
Explore compositional strategies to guide the viewer’s eye through the use of directional light.
Understand how the interplay of light and shadow can emphasize key elements in a photograph.
Natural Light vs. Artificial Light
In this chapter, we explore the fundamental distinction between natural light and artificial light, unraveling the unique characteristics, advantages, and limitations of each. We delve into the ever-changing qualities of natural light, examining its variability across different times of the day and under various weather conditions. As we contrast natural light with the controlled precision of artificial light sources, we uncover the diverse scenarios where each type of light excels in photographic storytelling.
Delving into the Characteristics of Natural Light
Variability Throughout the Day:
Examine the changing qualities of natural light from sunrise to sunset, exploring the evolving color temperatures and moods.
Understand how the angle and intensity of sunlight impact shadows and highlights at different times.
Effects of Weather Conditions:
Contrast the soft, diffused light on overcast days with the crisp, directional light on clear, sunny days.
Explore the unique opportunities and challenges presented by rain, snow, or fog in shaping the visual narrative.
Quality of Light in Different Environments:
Analyze how natural light interacts with diverse environments, from the urban jungle to serene landscapes, and adapt your photographic approach accordingly.
Contrasting the Qualities of Natural Light with Artificial Light
Precision and Control of Artificial Light:
Delve into the controlled precision offered by artificial light sources, enabling photographers to sculpt and shape light according to their creative vision.
Explore the flexibility of adjusting color temperature, intensity, and direction with artificial lights.
Consistency and Reliability:
Contrast the consistent and reliable nature of artificial light sources with the variability of natural light.
Understand how artificial light allows for predictable results, crucial in studio or controlled environments.
Creative Potential of Artificial Light:
Uncover the creative potential of using artificial light to achieve specific moods, highlight details, or create dramatic effects.
Explore case studies that showcase the transformative impact of artificial light in various genres of photography.
Discovering the Advantages and Limitations of Relying on Ambient Light Alone
Advantages of Natural Light:
Appreciate the authenticity and organic feel that natural light imparts to photographs.
Explore the advantages of using natural light in candid moments, outdoor portraits, and documentary photography.
Limitations of Natural Light:
Acknowledge the limitations of natural light in challenging conditions, such as low light situations or unpredictable weather.
Understand the constraints of relying solely on ambient light when precision and control are paramount.
Balancing Natural and Artificial Light:
Explore techniques for harmoniously blending natural and artificial light sources to create visually compelling and balanced compositions.
Learn to leverage the strengths of each type of light in diverse scenarios.
Flash Photography as a Versatile Tool
In this chapter, we delve into the transformative power of flash photography as a versatile tool in shaping the visual narrative. We explore the basics of how flash interacts with the scene, providing creative control over highlights and shadows. Additionally, we understand the pivotal role of flash in overcoming challenging lighting conditions and creating dynamic images that go beyond the constraints of ambient light.
Uncovering the Transformative Power of Flash
Introduction to Flash Photography:
Explore the fundamental concept of flash photography as the introduction of artificial light to a scene.
Understand how the controlled use of flash can dramatically alter the mood and visual impact of an image.
Versatility of Flash:
Uncover the diverse applications of flash in various genres of photography, from portraits and landscapes to macro and action photography.
Explore how flash adapts to different lighting conditions, providing photographers with a tool that transcends natural light constraints.
Learning the Basics of How Flash Interacts with the Scene
Controlling Highlights and Shadows:
Grasp the basics of flash exposure and its impact on highlights and shadows in an image.
Understand how flash can fill in shadows or create dramatic contrast, adding depth and dimension to your photographs.
Understanding Flash Color Temperature:
Explore the color temperature of flash and learn how it can be matched or modified to harmonize with ambient light.
Master the art of achieving color balance in mixed lighting scenarios through the use of flash.
Understanding the Role of Flash in Overcoming Challenging Lighting Conditions
Overcoming Low Light Situations:
Discover how flash becomes a crucial tool in low light situations, allowing for proper exposure and detail even in dark environments.
Explore techniques for balancing ambient light with flash to achieve a natural and pleasing look.
Creating Dynamic Images with Flash:
Learn how flash can be used to freeze motion, opening up creative possibilities in action and sports photography.
Understand the role of flash in creating dynamic and vibrant images, especially in situations where natural light may fall short.
Balancing Flash with Ambient Light:
Delve into the art of balancing flash with ambient light to create visually compelling compositions.
Explore case studies that illustrate the effective use of flash to enhance the subject while preserving the atmosphere of the scene.
Balancing Natural and Artificial Light
In this chapter, we embark on a journey to master the delicate art of balancing natural and artificial light. We explore techniques for seamlessly integrating flash with the existing ambient light to create a harmonious blend. Through a nuanced understanding of flash exposure and ambient light, we learn to craft visually compelling photographs. The chapter is enriched with case studies and examples that illuminate successful marriages of natural and artificial light across various genres of photography.
Exploring Techniques for Seamlessly Integrating Flash with Natural Light
Understanding Ambient Light Conditions:
Develop an awareness of the existing ambient light conditions, considering factors such as color temperature, direction, and intensity.
Recognize the opportunities presented by natural light and identify scenarios where artificial light can enhance the visual narrative.
Selecting the Right Flash Settings:
Explore flash settings, such as power, zoom, and modifiers, to adapt to the ambient light and complement the scene seamlessly.
Understand the importance of flash color temperature and how it influences the overall mood of the photograph.
Mastering the Art of Balancing Flash Exposure with Ambient Light
Determining Flash Power and Distance:
Learn to adjust flash power and distance to achieve a balanced exposure that complements the ambient light.
Understand the inverse square law and its implications on flash intensity in relation to distance.
Adjusting Flash Color Temperature:
Explore techniques for adjusting the color temperature of the flash to match or creatively contrast with the ambient light.
Master the use of color gels and modifiers to achieve a cohesive and visually appealing color balance.
Maintaining Natural Shadows and Highlights:
Strike a balance between filling in shadows with flash and preserving natural shadows to create dimension in the image.
Understand how flash can be used to emphasize or soften highlights, contributing to the overall mood.
Case Studies and Examples Showcasing Successful Marriages of Light Sources
Portrait Photography with Fill Flash:
Case study: Demonstrating the effective use of fill flash in portrait photography to balance ambient light, adding a subtle touch to facial features without overpowering natural highlights and shadows.
Outdoor Event Photography:
Case study: Illustrating the versatility of balancing flash with natural light in capturing dynamic outdoor events, ensuring subjects are well-lit while preserving the atmosphere.
Architectural Photography at Twilight:
Case study: Exploring the art of balancing natural and artificial light in architectural photography during twilight, creating a captivating blend of warm artificial light against the cool tones of the evening sky.
Macro Photography with Controlled Flash:
Case study: Showcasing the precision of balancing flash with natural light in macro photography, revealing intricate details while maintaining a natural and unobtrusive feel.
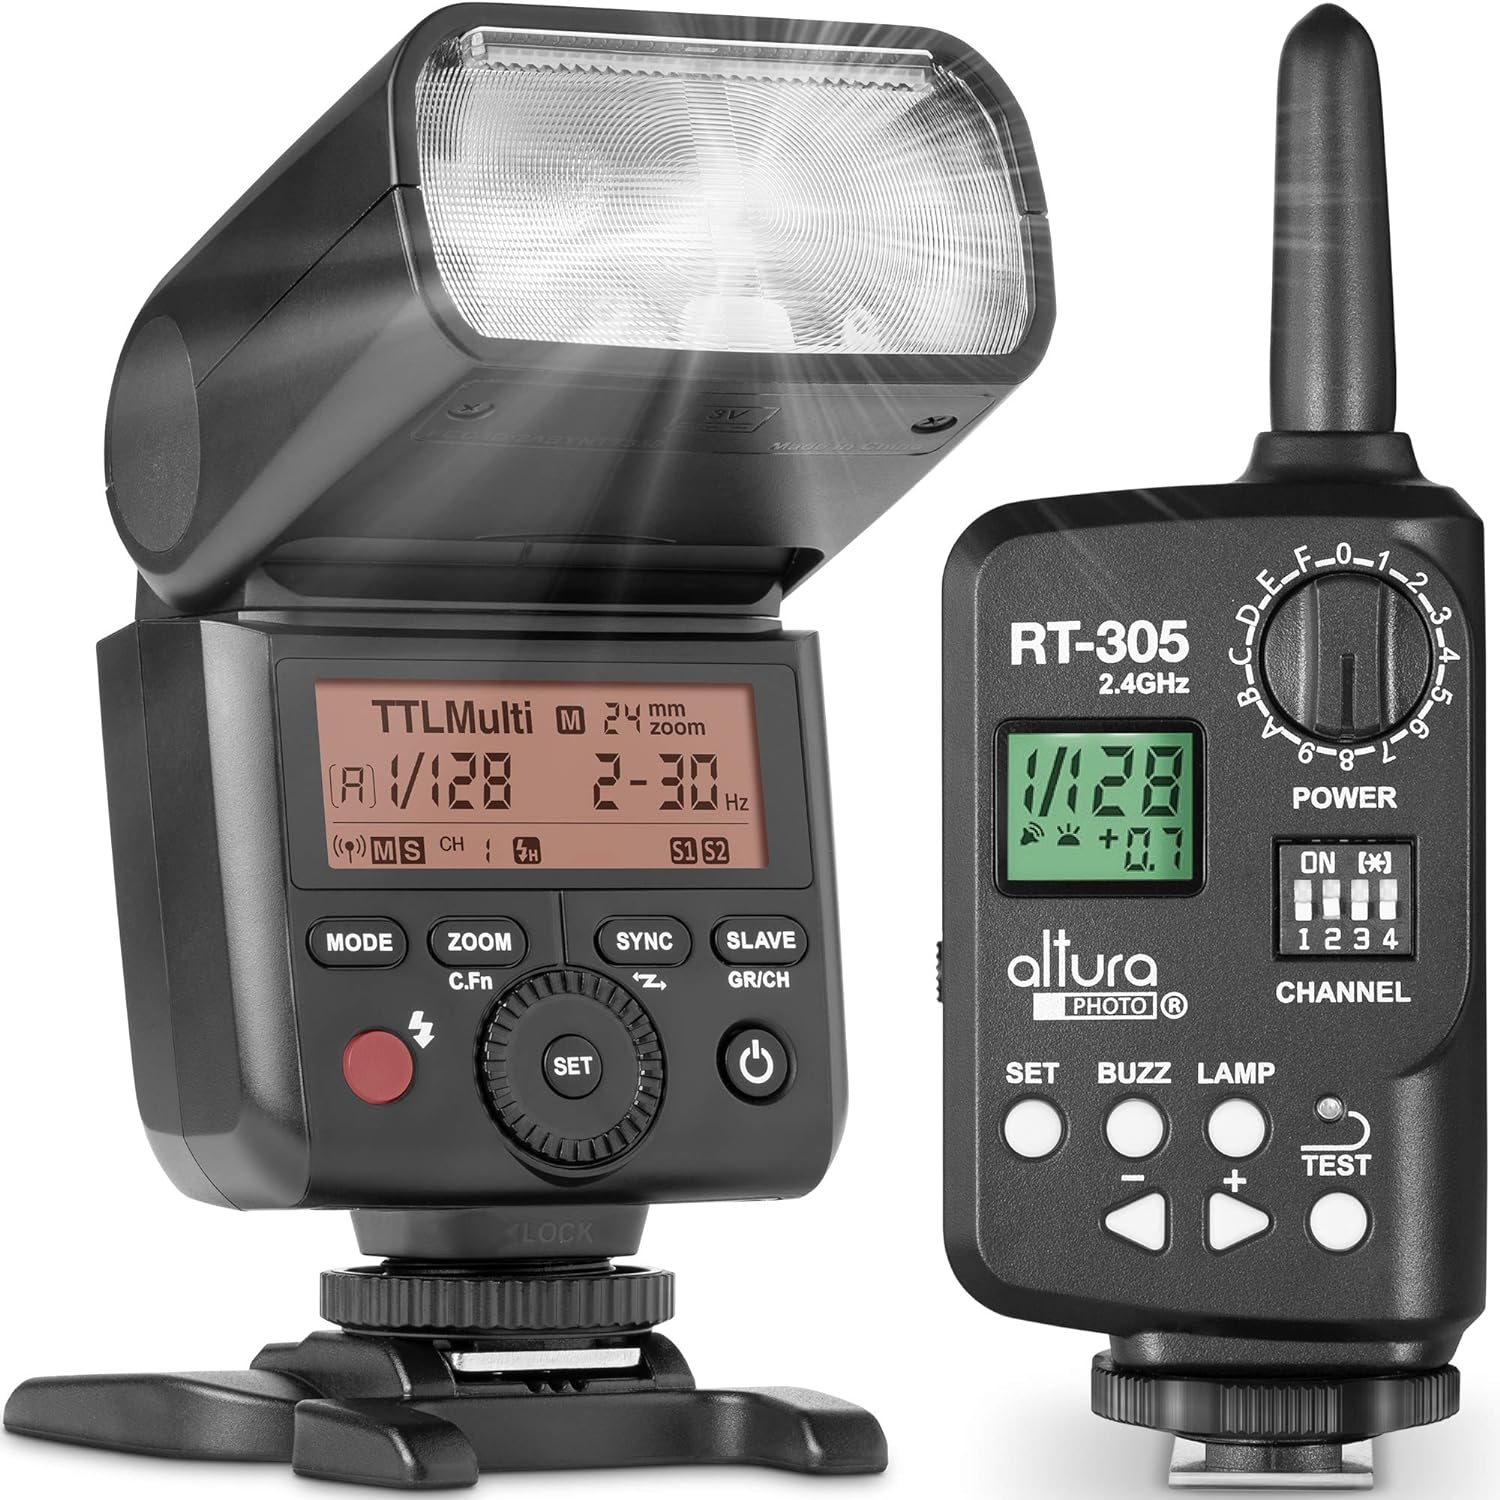
Essential Gear
In the world of flash photography, the right equipment can make all the difference between capturing an ordinary image and crafting a masterpiece. This chapter serves as a comprehensive guide to navigating the myriad choices available, ensuring you have the essential gear to bring your creative visions to life.
Choosing the Right Flash Equipment
In this chapter, we embark on the crucial process of selecting the right flash equipment for your photography needs. We demystify technical jargon, providing a guide to understanding specifications such as guide number, power output, and recycle times. Evaluating compatibility with your camera system is explored, ensuring seamless integration. Additionally, we delve into key factors to consider when choosing between speedlights, monolights, and external flashes.
Demystifying Technical Jargon: Guide to Understanding Specifications
Guide Number (GN):
Unpack the significance of guide numbers and how they represent the power and range of a flash unit.
Understand how guide numbers are calculated and how they can be used to estimate flash exposure.
Power Output:
Explore the concept of power output in flash units and how it influences the intensity of the light emitted.
Learn how power output affects the flexibility of a flash unit in different shooting scenarios.
Recycle Times:
Demystify recycle times and their importance in determining how quickly a flash can be ready for the next exposure.
Understand the factors that influence recycle times and how they impact shooting efficiency.
Evaluating Compatibility: Ensuring Seamless Integration with Your Camera System
Camera System Compatibility:
Understand the importance of compatibility between your flash equipment and camera system.
Explore the features and functions that ensure seamless communication and integration between the two.
TTL vs. Manual Flash:
Delve into the choice between TTL (Through-The-Lens) and manual flash modes.
Understand the advantages and limitations of each mode and how they align with your shooting preferences.
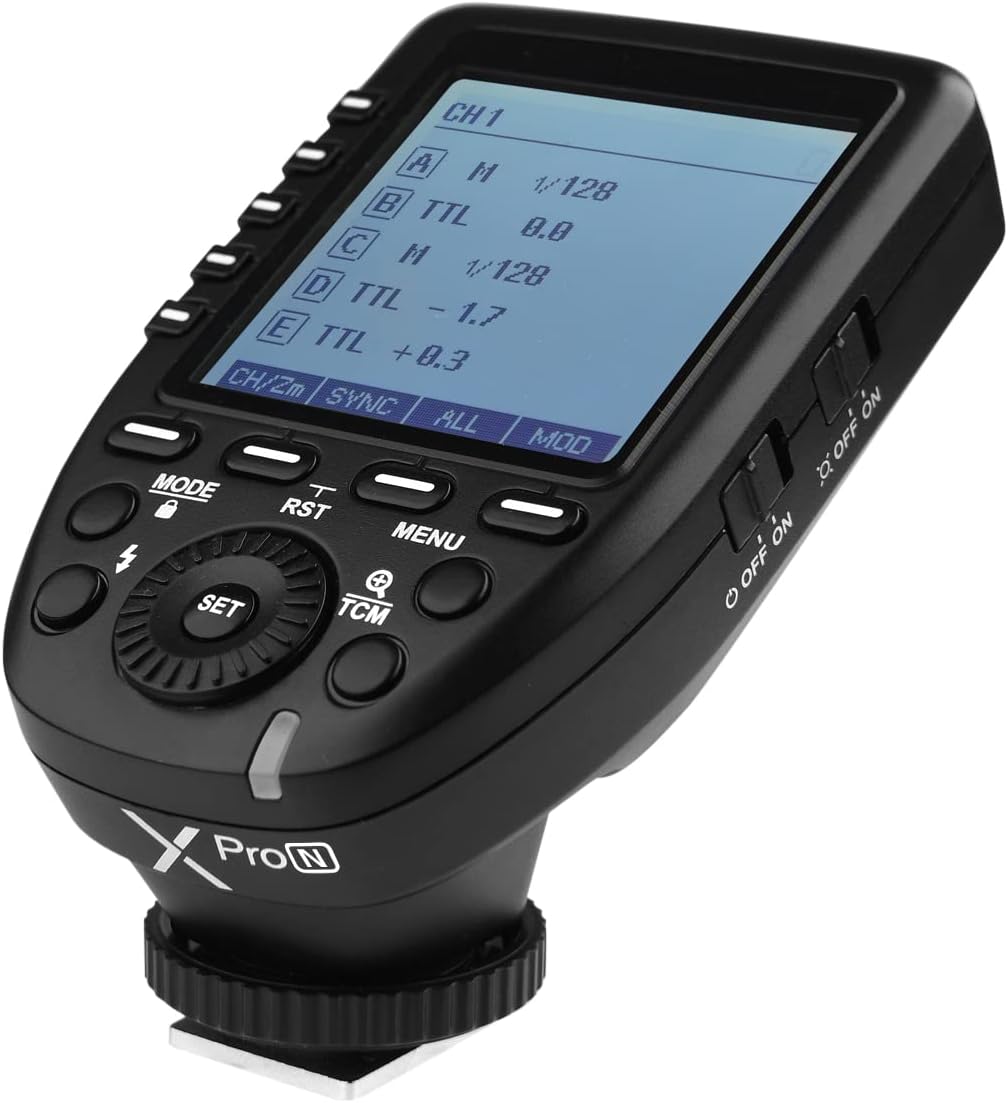
Wireless Flash Systems:
Explore the compatibility of your flash equipment with wireless flash systems and triggers.
Understand the benefits of wireless setups for off-camera flash and creative lighting scenarios.
Factors to Consider When Choosing Between Speedlights, Monolights, and External Flashes
Speedlights:
Examine the compact and portable nature of speedlights, suitable for on-the-go photography and events.
Explore their versatility in various shooting scenarios, including fill flash and creative lighting.
Monolights:
Understand the characteristics of monolights, standalone flash units with built-in power sources.
Explore their applications in studio setups and controlled environments, providing consistent and powerful lighting.
External Flashes:
Explore external flashes designed for specific camera models, offering compatibility and integration advantages.
Understand how external flashes can enhance the capabilities of compact cameras and advanced DSLRs alike.
Making Informed Decisions: Considerations for Your Photography Style
Photography Style and Genres:
Evaluate your preferred photography style and the genres you frequently explore.
Consider how the chosen flash equipment aligns with the demands of your photography, from portrait work to action photography.
Budget and Investment:
Factor in your budget and assess flash equipment options that offer the best value for your investment.
Understand that different types of flash units cater to various price ranges and feature sets.
Versatility and Expandability:
Consider the versatility and expandability of your chosen flash system.
Explore options that allow for future additions of modifiers, wireless triggers, and accessories to enhance your creative toolkit.
Understanding Flash Modifiers
In this chapter, we delve into the world of flash modifiers, exploring their profound impact on the quality and direction of light. We provide an overview of essential modifiers, including softboxes, umbrellas, grids, and gels, and examine their respective effects on the final image. Practical considerations for selecting modifiers based on the desired photographic outcome are discussed, empowering photographers to shape and control light effectively.
Exploring the Impact of Modifiers on the Quality and Direction of Light
Quality of Light:
Understand how modifiers influence the quality of light emitted by a flash, transforming it from harsh and direct to soft and diffused.
Explore the characteristics of light produced by modifiers and their impact on the mood and atmosphere of the photograph.
Direction of Light:
Delve into how modifiers control the direction of light, affecting the placement and intensity of shadows in a scene.
Learn to use modifiers strategically to achieve the desired lighting direction for various subjects and compositions.
Overview of Essential Modifiers and Their Effects on the Final Image
Softboxes:
Explore the characteristics of softboxes in creating soft, even, and flattering light.
Understand how the size and shape of a softbox influence the spread and quality of light, and its applications in portrait and studio photography.
Umbrellas:
Examine the versatility of umbrellas in modifying light, from creating soft and broad illumination to controlling spill.
Understand the different types of umbrellas, such as shoot-through and reflective, and their effects on the final image.
Grids:
Dive into the precision offered by grids in controlling the spread of light, creating focused and directional illumination.
Explore how grids are used to limit spill and highlight specific areas of a scene, adding depth and drama.
Gels:
Understand the role of gels in modifying the color temperature of flash, allowing for creative effects and color correction.
Explore practical applications of gels in balancing flash with ambient light and creating unique atmospheres in the image.
Practical Considerations for Selecting Modifiers Based on Photographic Outcome
Subject and Genre Considerations:
Tailor your choice of modifiers based on the nature of your subject and the genre of photography.
Consider how modifiers contribute to the visual storytelling of portraits, still life, action, and other photographic styles.
Space and Environment:
Evaluate the space and environment in which you’ll be shooting, taking into account the size and characteristics of your modifiers.
Choose modifiers that suit the constraints of the shooting location, whether it’s a confined studio or an expansive outdoor setting.
Desired Lighting Style:
Define the desired lighting style for your image, whether it’s soft and flattering, dramatic and contrasty, or creatively colored.
Select modifiers that align with the mood and atmosphere you aim to convey in your photographs.
Portability and Convenience:
Consider the portability and convenience of modifiers, especially when shooting on location or in dynamic environments.
Explore collapsible and portable modifiers that provide flexibility without compromising on quality.
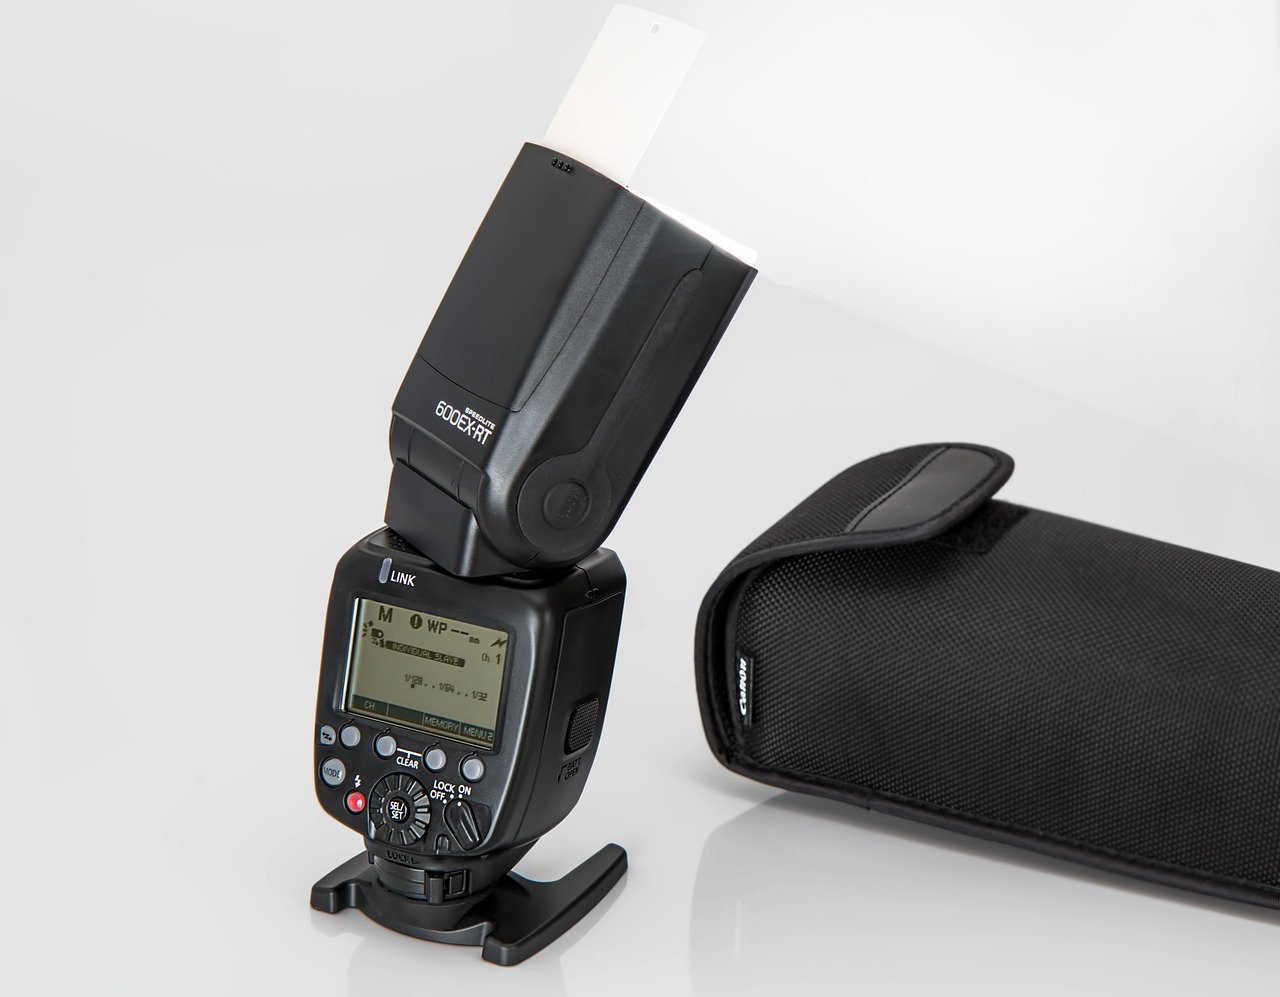
Types of Flashes and Their Applications
This chapter provides an in-depth examination of different types of flashes, including speedlights, studio strobes, and hybrid flashes. We explore the unique characteristics, strengths, and weaknesses of each type in various shooting scenarios. Practical tips are shared to help photographers adapt to different types of flashes for maximum versatility in their creative pursuits.
In-Depth Examination of Speedlights, Studio Strobes, and Hybrid Flashes
Speedlights:
Explore the compact and portable nature of speedlights, ideal for on-the-go photography and events.
Understand their versatility and adaptability in various shooting scenarios, from outdoor portraits to fill flash applications.
Studio Strobes:
Delve into the power and control offered by studio strobes, designed for controlled environments like studios.
Explore their applications in portrait photography, fashion shoots, and commercial work, where consistent and powerful lighting is paramount.
Hybrid Flashes:
Examine hybrid flashes that combine features of both speedlights and studio strobes.
Understand how hybrid flashes offer flexibility in power, portability, and control, making them suitable for a range of shooting situations.
Understanding the Strengths and Weaknesses of Each Type in Various Shooting Scenarios
Speedlights:
Strengths:
Portability and convenience for on-the-go photography.
Versatility in various shooting situations, including events and outdoor portraits.
Weaknesses:
Limited power compared to studio strobes.
Shorter battery life for extended shooting sessions.
Studio Strobes:
Strengths:
High power output for controlled studio environments.
Consistent and reliable performance for extended shoots.
Weaknesses:
Bulkier and less portable than speedlights.
May require external power sources or outlets.
Hybrid Flashes:
Strengths:
Combines the portability of speedlights with the power of studio strobes.
Offers flexibility in terms of power settings and control.
Weaknesses:
May have a steeper learning curve compared to basic speedlights.
Typically larger and heavier than traditional speedlights.
Tips for Adapting to Different Types of Flashes for Maximum Versatility
Understand Your Shooting Environment:
Assess the shooting environment and choose the flash type that best suits the demands of the scene, whether it’s an outdoor event or a controlled studio setting.
Master the Basics of Each Flash Type:
Invest time in learning the unique features and controls of speedlights, studio strobes, and hybrid flashes.
Understand how to adjust power, modify light, and use additional accessories for each type.
Build a Versatile Flash Kit:
Consider building a versatile flash kit that includes a combination of speedlights and studio strobes to cater to different shooting scenarios.
Experiment with hybrid flashes to enjoy the benefits of both worlds.
Practice and Experiment:
Gain hands-on experience with each type of flash in various situations.
Experiment with different modifiers and techniques to harness the full potential of each flash type.
Building a Basic Flash Kit on Any Budget
This chapter is dedicated to helping entry-level photographers build a basic flash kit without breaking the bank. We explore budget-friendly options without sacrificing quality, discuss essential accessories to complement your flash kit, and provide recommendations for upgrading as your skills and needs evolve.
Budget-Friendly Options for Entry-Level Photographers
Entry-Level Speedlights:
Explore affordable speedlight options that deliver reliable performance for beginners.
Consider reputable brands offering a balance of cost-effectiveness and essential features.
Budget Studio Strobes:
Identify entry-level studio strobes that provide a good balance between power and affordability.
Look for kits that include multiple lights, modifiers, and necessary accessories to maximize value.
Hybrid Flashes on a Budget:
Explore hybrid flash options that offer a middle ground between speedlights and studio strobes.
Consider models that provide versatility in terms of power output, portability, and control.
Essential Accessories to Complement Your Flash Kit
Light Stands:
Choose budget-friendly light stands that offer stability and adjustability.
Consider lightweight and compact options for on-location shoots.
Modifiers:
Explore affordable modifiers such as umbrellas and collapsible softboxes to shape and soften light.
Opt for modifiers that are versatile and easy to use for beginners.
Flash Brackets:
Consider budget flash brackets that allow for versatile positioning of your speedlights or hybrid flashes.
Look for brackets that accommodate different modifiers and angles.
Triggers and Wireless Systems:
Invest in budget-friendly triggers to wirelessly control your flashes.
Explore entry-level wireless systems that offer reliable communication between your camera and off-camera flashes.
Recommendations for Upgrading Your Kit as Your Skills and Needs Evolve
Gradual Equipment Upgrades:
Plan for gradual upgrades as your budget allows, starting with essential items like additional speedlights or versatile modifiers.
Consider investing in higher-end flashes or studio strobes as your skills progress and demand more advanced features.
Advanced Modifiers:
Upgrade to more advanced modifiers, such as beauty dishes or specialized grids, to enhance your creative lighting options.
Experiment with different modifier shapes and sizes to diversify your lighting setups.
Specialized Flash Accessories:
Explore specialized accessories like color gels, snoots, and reflectors to add unique effects to your images.
Consider investing in high-quality accessories that withstand wear and tear for long-term use.
Advanced Trigger Systems:
Upgrade to advanced trigger systems that offer more control, reliability, and compatibility with future equipment.
Explore triggers with features like high-speed sync, multiple channels, and group control for refined lighting setups.
DIY and Alternative Flash Gear Hacks
In this chapter, we explore creative and resourceful solutions for photographers on a budget. Discover DIY (Do It Yourself) options and alternative hacks to craft your own modifiers, repurpose everyday items as makeshift lighting tools, and enhance your gear arsenal without breaking the bank. These inventive solutions offer cost-effective ways to expand your creative possibilities.
Creative Solutions for Crafting Your Own Modifiers on a Budget
DIY Softboxes:
Learn how to create budget-friendly softboxes using materials like white bedsheets, foam boards, or shower curtains.
Explore different shapes and sizes for DIY softboxes to experiment with various lighting effects.
Homemade Snoots and Grids:
Craft snoots and grids using materials like cardboard, aluminum foil, or black straws.
Experiment with shaping and focusing light by adjusting the size and length of your DIY snoots.
Repurposed Diffusers:
Repurpose household items like milk jugs, shower curtains, or white umbrellas as diffusers.
Create portable and lightweight diffusers for on-the-go photography without the need for specialized equipment.
Repurposing Everyday Items as Makeshift Lighting Tools
Reflectors from Foil or White Cards:
Utilize aluminum foil or white foam boards as makeshift reflectors to bounce and enhance natural light or flash.
Experiment with different angles and positions to control the direction and intensity of reflected light.
Colored Gels from Stationery Supplies:
Create colored gels for creative effects using transparent sheets, colored plastic folders, or even cellophane paper.
Experiment with different colors to add a unique and artistic touch to your lighting setups.
Household Items as Light Modifiers:
Explore unconventional items like colanders, lace fabrics, or patterned shower mats as makeshift light modifiers.
Experiment with these textured items to cast interesting shadows and patterns on your subjects.
Resourceful Ways to Enhance Your Gear Arsenal Without Breaking the Bank
DIY Light Stands:
Create sturdy DIY light stands using PVC pipes, tripods, or even repurposed furniture.
Customize the height and stability of your DIY light stands to suit various shooting scenarios.
Improvised Flash Brackets:
Craft flash brackets from materials like aluminum brackets, DIY clips, or repurposed brackets from household items.
Experiment with different bracket designs to achieve versatile flash positioning.
Homemade Snoots for Specific Effects:
Craft specialized snoots for effects like starbursts or patterned shadows using simple materials.
Explore creative possibilities by combining DIY snoots with colored gels for unique and personalized effects.
Safety Considerations and Best Practices for DIY Gear:
Fire Safety:
Avoid using materials that are highly flammable or could pose a fire hazard when crafting DIY gear.
Be cautious of heat generated by flashes, especially when using improvised modifiers.
Stability and Durability:
Ensure that DIY stands and brackets are stable and capable of supporting the weight of your flash and modifiers.
Regularly inspect and reinforce DIY gear to maintain durability and prevent accidents.
Adaptability:
Keep in mind that DIY solutions may require adjustments and fine-tuning to achieve optimal results.
Embrace a spirit of experimentation and adaptability when using homemade gear.
Caring for Your Equipment
In this chapter, we delve into the crucial aspect of caring for your flash equipment. Whether it’s speedlights, studio strobes, or modifiers, proper maintenance is essential for prolonging their lifespan and ensuring consistent performance. We provide maintenance tips, troubleshooting advice for common issues, and guidance on developing good habits for storing, transporting, and cleaning your valuable gear.
Maintenance Tips to Prolong the Lifespan of Your Flashes and Modifiers
Keep Flash Units Clean:
Regularly inspect your flash units for dirt, dust, and debris.
Use a soft brush or compressed air to gently remove particles from vents and crevices.
Protect Flashes from Moisture:
Avoid exposing your flash units to excessive moisture or humidity.
Consider using protective covers or cases when shooting in challenging weather conditions.
Check and Replace Batteries:
Monitor battery levels regularly and replace them before they deplete completely.
Remove batteries during extended periods of inactivity to prevent corrosion.
Inspect Modifiers for Wear and Tear:
Examine softboxes, umbrellas, and other modifiers for signs of wear, such as frayed edges or damaged seams.
Repair or replace damaged modifiers to maintain their effectiveness.
Troubleshooting Common Issues with Flash Equipment and Quick Fixes
Flash Not Firing:
Check the battery level and replace if necessary.
Ensure proper contact between the flash and the camera’s hot shoe or triggers.
Inconsistent Flash Output:
Clean the flash tube and reflector to ensure even light distribution.
Check for loose connections or damaged wires in the flash unit.
Overheating Issues:
Allow sufficient cooldown time between rapid or continuous flashes.
Consider using external fans or cooling devices in studio setups for prolonged shoots.
Color Temperature Inconsistencies:
Verify that color gels are properly secured and not affecting the flash tube.
Adjust white balance settings on your camera to correct color discrepancies.
Developing Good Habits for Storing, Transporting, and Cleaning Your Gear
Proper Storage:
Store flash units and modifiers in protective cases or padded bags to prevent scratches and damage.
Use moisture-absorbing packets in storage containers to mitigate humidity.
Secure Transportation:
Securely pack and cushion your equipment during transportation to prevent jostling and impacts.
Consider investing in padded camera bags or hard cases for added protection.
Cleaning Procedures:
Clean softboxes, umbrellas, and other modifiers regularly to maintain optimal light diffusion.
Wipe down flash units with a soft, lint-free cloth to remove dust and fingerprints.
Regular Inspections:
Conduct routine inspections of your gear before and after each shoot.
Address any issues promptly to prevent minor problems from escalating.
Investing in Protective Accessories:
Flash Covers and Caps:
Use flash covers or caps when the flash is not in use to protect the hot shoe and contacts.
These accessories shield the flash from dust and debris when stored.
Lens Hoods for Modifiers:
Consider using lens hoods or protective covers for softboxes and other modifiers to prevent damage during storage or transport.
These accessories shield fragile components from accidental impacts.
Weather-Resistant Gear:
Invest in weather-resistant or waterproof covers for outdoor shoots in unpredictable conditions.
Protecting your gear from the elements ensures longevity and reliable performance.
Flash Fundamentals
With the right gear in hand, it’s time to dive into the fundamental principles of using flash effectively. This chapter will demystify the intricacies of flash settings, guide you through mastering flash exposure, and explore the diverse flash modes at your disposal.
Demystifying Flash Settings and Controls
In this chapter, we delve into the fundamental controls and settings of your flash unit. Understanding the intricacies of power, zoom, and different modes—manual vs. TTL—is essential for harnessing the full potential of your flash. We also explore the menus and custom settings on your camera related to flash functionality. Additionally, we provide tips for adapting to various shooting conditions and environments using your flash controls.
Understanding the Key Controls on Your Flash Unit: Power, Zoom, and Modes
Power Settings:
Learn to adjust the power output of your flash to control its intensity.
Understand the concept of flash exposure compensation to fine-tune the amount of light emitted.
Zoom Settings:
Explore the zoom function on your flash, which controls the spread of light.
Understand how adjusting the zoom setting can match the focal length of your lens for more efficient lighting.
Manual vs. TTL Modes:
Differentiate between manual and TTL (Through-The-Lens) modes and understand when to use each.
Learn how manual mode provides complete control over flash output, while TTL mode allows the camera to automatically determine the required flash power.
Navigating Through Flash Menus and Custom Settings on Your Camera
On-Camera Flash Menus:
Explore the menus on your camera for on-camera flash settings.
Familiarize yourself with options such as flash exposure compensation, sync modes, and rear-curtain sync.
Wireless Flash Settings:
Understand the menus and settings for controlling off-camera flash units wirelessly.
Learn about channels, groups, and ratios for managing multiple flash units.
Custom Functions:
Explore custom functions specific to your flash unit and camera model.
Customize settings such as flash duration, color temperature, and high-speed sync based on your shooting preferences.
Tips for Adapting to Different Shooting Conditions and Environments Using Your Flash Controls
Balancing Flash and Ambient Light:
Experiment with flash exposure compensation to balance flash and ambient light for natural-looking results.
Adjust power settings and modify light to seamlessly integrate flash with existing lighting conditions.
Changing Flash Angles:
Explore the impact of changing the angle of your flash, either by bouncing it off surfaces or using diffusers.
Understand how modifying the flash angle can affect the quality and direction of light.
Zooming for Different Scenes:
Adapt the zoom setting on your flash to match the scene and subject.
Use wider settings for group shots and narrower settings for individual portraits to ensure even illumination.
Using Modes Strategically:
Utilize manual mode when precise control over flash output is essential, such as in studio setups.
Opt for TTL mode in dynamic environments where quick adjustments are needed, such as events or fast-paced shoots.
Customizing Settings for Specific Genres:
Tailor flash settings to suit the demands of different photography genres.
Customize settings for portrait photography, events, macro work, or any other specific scenarios you frequently encounter.
Mastering Flash Exposure
This chapter focuses on mastering flash exposure, a fundamental skill that is crucial for achieving well-lit and balanced images. We will delve into the principles of the inverse square law and its implications on flash exposure. Additionally, we’ll explore techniques for calculating flash-to-subject distance to ensure optimal exposure and provide insights into achieving consistent lighting across your images.
The Inverse Square Law and Its Implications on Flash Exposure
Understanding the Inverse Square Law:
Explore the concept of the inverse square law, which states that the intensity of light is inversely proportional to the square of the distance from the source.
Grasp how this law affects the fall-off of light, emphasizing the need for careful consideration of flash-to-subject distance.
Application in Flash Photography:
Learn how the inverse square law impacts flash exposure, emphasizing the importance of maintaining consistent distances for even lighting.
Understand how changes in flash-to-subject distance can result in significant variations in light intensity.
Calculating Flash-to-Subject Distance for Optimal Exposure
Guide Number and Flash Output:
Understand the guide number of your flash, representing its power output at a specific ISO setting.
Learn how to use the guide number to calculate the optimal flash-to-subject distance for a desired aperture and ISO.
Adjusting Aperture and ISO:
Explore the relationship between aperture, ISO, and flash-to-subject distance.
Learn how changes in aperture and ISO impact the required flash power and effective flash range.
Practical Distance Calculations:
Apply practical calculations to determine the ideal flash-to-subject distance for different scenarios.
Understand how to adapt these calculations in real-world shooting environments.
Techniques for Achieving a Well-Exposed Image with Consistent Lighting
Metering and Test Shots:
Utilize your camera’s metering system to gauge ambient light and set initial exposure parameters.
Take test shots to assess flash exposure, making adjustments as needed for a balanced result.
Using Flash Modifiers:
Explore the role of flash modifiers in controlling and shaping light.
Understand how modifiers can affect flash exposure and contribute to the desired lighting style.
Balancing Flash and Ambient Light:
Master the art of balancing flash and ambient light for a natural and visually appealing look.
Adjust flash power and exposure settings to seamlessly integrate artificial and natural lighting.
Consistency in Lighting Setups:
Develop a systematic approach to lighting setups for consistent results.
Create lighting ratios and repeatable setups for scenarios where consistent lighting is crucial, such as portrait sessions or studio work.
Continuous Monitoring and Adjustment:
Continuously monitor flash exposure during a shoot, especially in changing lighting conditions.
Be prepared to adjust flash power, modify settings, or change flash-to-subject distance to maintain optimal exposure.
Balancing Ambient Light with Flash
This chapter explores the art of seamlessly integrating ambient light with flash to achieve natural-looking and visually compelling results. We’ll delve into techniques for adjusting flash power to harmonize with existing light conditions, and we’ll illustrate these concepts through case studies that showcase successful balance between ambient and flash exposure.
The Art of Ambient and Flash Light Integration for Natural-Looking Results
Understanding Ambient Light:
Explore the characteristics of ambient light, including color temperature, direction, and intensity.
Understand the role of ambient light in setting the overall mood and atmosphere of a scene.
Integrating Flash for Enhancement:
Learn how to use flash to enhance and complement ambient light rather than overpowering it.
Discover techniques for filling in shadows, adding catchlights, and creating dimension without losing the natural feel of the scene.
Techniques for Adjusting Flash Power to Match Existing Light Conditions
Flash Exposure Compensation:
Master the use of flash exposure compensation to adjust the intensity of your flash relative to ambient light.
Understand how positive and negative flash exposure compensation affects the overall exposure of your image.
Manual Flash Power Adjustments:
Explore manual adjustments of flash power to achieve precise control over the balance between flash and ambient light.
Learn to adapt flash power to different shooting conditions and distances.
Color Temperature Considerations:
Understand the color temperature of ambient light sources and adjust the flash color temperature to match.
Use color gels on the flash to create a harmonious color balance between artificial and natural light.
Case Studies Illustrating Successful Balance Between Ambient and Flash Exposure
Outdoor Portraits at Golden Hour:
Explore the nuances of balancing flash and ambient light during golden hour.
Case study: Achieving warm and flattering portraits with a fill flash to counteract shadows.
Indoor Environmental Portraits:
Navigate the challenges of mixed lighting conditions indoors.
Case study: Using flash to illuminate the subject while maintaining the ambient light’s ambiance.
Backlit Scenes:
Address the difficulties of balancing flash with strong backlighting.
Case study: Achieving a natural and balanced look in backlit scenarios through strategic flash placement.
Twilight Cityscapes:
Experiment with balancing flash and ambient light in low-light urban environments.
Case study: Creating dynamic cityscape portraits with controlled flash and ambient light balance.
Key Takeaways for Achieving Balance Between Ambient and Flash:
Observation and Analysis:
Train your eye to observe and analyze the existing ambient light conditions.
Determine the direction, quality, and intensity of ambient light before introducing flash.
Gradual Adjustments:
Make gradual adjustments to flash power and exposure settings to achieve a balanced look.
Experiment with small changes and review the results to avoid drastic shifts in lighting.
Consistency in Style:
Develop a consistent style for balancing ambient and flash across your portfolio.
Create a signature look that aligns with your artistic vision and complements various shooting environments.
Exploring Different Flash Modes
This chapter dives into the various flash modes available on your camera and flash unit. Understanding the differences between TTL (Through-The-Lens) and Manual flash modes, exploring the benefits and limitations of each, and delving into advanced techniques like High-Speed Sync (HSS) and Rear Curtain Sync are essential for mastering flash photography. Let’s explore the advantages, limitations, and creative applications of these different flash modes.
TTL (Through-The-Lens) vs. Manual Flash Modes: Advantages and Limitations
TTL Flash Mode:
Understand how TTL mode allows the camera to automatically determine the optimal flash power based on the scene’s metering.
Explore the advantages of quick adjustments in dynamic shooting environments.
Manual Flash Mode:
Delve into the advantages of manual flash mode, providing complete control over flash power.
Learn how manual mode allows for consistency in lighting setups and precise adjustments for creative effects.
Choosing the Right Mode for the Situation:
Explore scenarios where TTL mode is advantageous, such as fast-paced events or changing lighting conditions.
Understand when manual mode is preferable for controlled studio setups and specific creative effects.
High-Speed Sync (HSS) for Overcoming Shutter Speed Limitations
Understanding Shutter Speed Limitations:
Grasp the limitations of standard flash sync speeds, especially when using fast shutter speeds.
Recognize the challenges of balancing ambient light with flash in scenarios where shutter speed is a crucial factor.
Benefits of High-Speed Sync (HSS):
Explore how HSS enables the use of flash at shutter speeds beyond the camera’s sync limit.
Understand the advantages of HSS in freezing motion and achieving a balanced exposure in bright conditions.
Applications of High-Speed Sync:
Implement HSS in outdoor portrait photography to control ambient light and achieve a shallow depth of field.
Explore action photography where freezing fast-paced motion is essential.
Rear Curtain Sync and Front Curtain Sync: Creative Applications in Flash Photography
Rear Curtain Sync:
Understand the creative applications of Rear Curtain Sync, where the flash fires just before the shutter closes.
Explore how Rear Curtain Sync is used to create dynamic effects, particularly in capturing motion trails.
Front Curtain Sync:
Learn about Front Curtain Sync, where the flash fires as soon as the shutter opens.
Explore scenarios where Front Curtain Sync is suitable and understand its impact on the visual narrative.
Creative Uses of Curtain Sync Modes:
Experiment with combining Rear Curtain Sync with slow shutter speeds for compelling light trails in night photography.
Understand how Front Curtain Sync can be employed for traditional flash effects in various genres.
Key Considerations When Using Different Flash Modes:
Consistency in Style:
Maintain a consistent style when choosing between TTL and Manual flash modes.
Develop a deliberate approach to selecting the mode that aligns with your creative vision.
Adaptability in Shooting Environments:
Assess the shooting environment and subject dynamics to determine the most suitable flash mode.
Be adaptable, switching between modes based on the specific requirements of each scenario.
Experimentation and Creativity:
Embrace experimentation with different flash modes to discover new creative possibilities.
Understand the nuances of each mode and how they contribute to the overall look and feel of your images.
When to Use Different Flash Modes
This chapter focuses on practical considerations for choosing the appropriate flash mode based on specific shooting scenarios. Understanding when to use TTL (Through-The-Lens) for dynamic lighting situations and when to leverage manual flash mode for precise control and consistency is essential for achieving optimal results in different environments.
Choosing the Appropriate Flash Mode Based on Shooting Scenarios
Dynamic and Changing Environments (TTL Mode):
Explore scenarios where TTL mode excels, such as events, weddings, or street photography.
Understand how TTL mode adapts to changing lighting conditions, providing quick and automated adjustments.
Studio and Controlled Setups (Manual Mode):
Determine the advantages of manual mode in studio environments or controlled setups.
Recognize the need for precise control over flash power and consistency in lighting ratios.
Mixed Lighting Conditions (TTL and Manual):
Navigate scenarios with mixed lighting conditions, where both TTL and manual modes may be beneficial.
Learn how to seamlessly integrate flash with ambient light using a combination of TTL and manual adjustments.
Creative Applications of TTL for Dynamic Lighting Situations
Event Photography:
Utilize TTL mode in fast-paced events to adapt to changing scenes and lighting.
Explore the advantages of TTL for capturing candid moments with consistent flash exposure.
Wedding Photography:
Navigate varied lighting conditions during weddings, from dimly lit interiors to bright outdoor settings.
Leverage TTL mode for quick adjustments when moving between different scenes and lighting setups.
Street Photography:
Experiment with TTL mode in street photography to capture dynamic and spontaneous moments.
Take advantage of the automated adjustments in TTL to respond swiftly to ever-changing lighting scenarios.
Leveraging Manual Flash Mode for Precise Control and Consistency
Studio Portraits:
Opt for manual flash mode in studio portrait sessions for precise control over lighting setups.
Create consistent and repeatable lighting ratios for a cohesive look in a series of images.
Product Photography:
Use manual mode for product photography to maintain consistent lighting across a series of images.
Achieve precise control over flash power for highlighting product details and textures.
Controlled Environments:
Leverage manual mode in controlled environments where the lighting remains consistent.
Experiment with deliberate and creative lighting effects by adjusting flash power manually.
Key Considerations When Choosing Flash Modes:
Environment and Lighting Conditions:
Assess the shooting environment and the nature of lighting conditions.
Choose the flash mode that best adapts to the dynamic or controlled aspects of the scene.
Subject Dynamics:
Consider the movement and dynamics of your subjects.
Select the flash mode that allows for quick adjustments in fast-paced scenarios or provides precise control for static subjects.
Consistency in Style:
Maintain a consistent style across your portfolio by choosing flash modes that align with your artistic vision.
Develop a deliberate approach to selecting modes that complement different genres of photography.
Adaptability:
Be adaptable in your approach, understanding that different scenarios may require a combination of flash modes.
Experiment with blending TTL and manual modes to achieve the desired balance between automation and control.
Flash Techniques for Various Genres
In this chapter, we will explore specific flash techniques tailored for various photography genres. Each genre demands a unique approach to lighting, and understanding how to use flash effectively enhances the visual impact of your images. We’ll delve into portrait photography, event and wedding photography, and macro photography, providing insights into flattering lighting setups, capturing candid moments, and highlighting intricate details with controlled lighting.
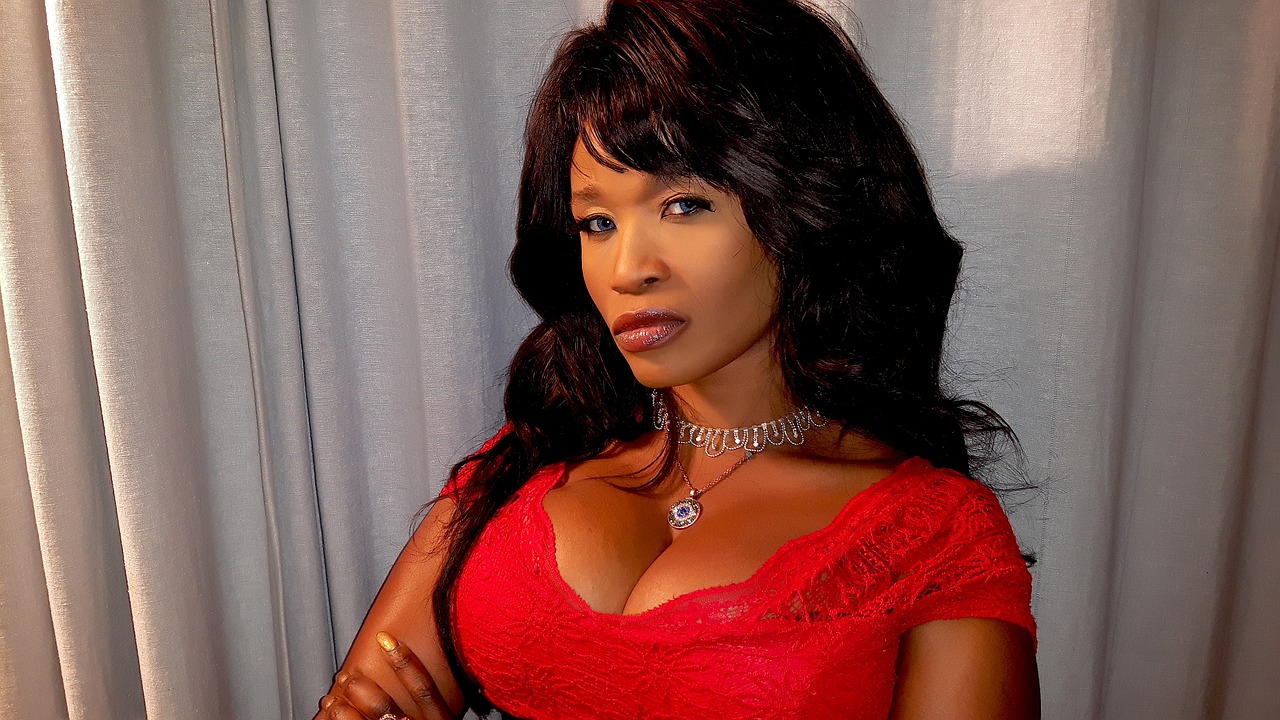
Portrait Photography: Flattering Lighting Setups and Techniques
Classic Portrait Lighting:
Explore traditional portrait lighting setups, such as Rembrandt, loop, and butterfly lighting.
Understand how to use flash to sculpt the subject’s face, creating flattering and dimension-rich portraits.
Low-Key and High-Key Lighting Techniques:
Delve into the art of low-key and high-key lighting for diverse portrait styles.
Learn how to use controlled flash to create dramatic shadows in low-key setups and achieve soft, evenly lit backgrounds in high-key setups.
Flattering Light for Diverse Subjects:
Tailor your flash techniques to flatter diverse subjects, considering factors such as age, skin tone, and facial features.
Experiment with lighting modifiers and angles to accentuate positive features and minimize imperfections.
Event and Wedding Photography: Capturing Candid Moments with Flash
Balancing Flash and Ambient Light in Events:
Explore techniques for balancing flash and ambient light in event photography.
Learn to use flash to freeze action while maintaining the natural feel of the scene.
Candid Moments and Fill Flash:
Utilize fill flash to capture candid moments during events and weddings.
Understand how to enhance facial expressions and details in varied lighting conditions.
Group Shots and Controlled Setups:
Master flash techniques for group shots, ensuring even illumination across multiple subjects.
Experiment with controlled setups for formal portraits during weddings or events.
Macro Photography: Highlighting Intricate Details with Controlled Lighting
Soft Lighting for Macro Subjects:
Explore soft and diffused lighting techniques for macro subjects.
Understand how to minimize harsh shadows and reveal intricate details with controlled flash.
Using Flash for Freeze Motion:
Leverage flash to freeze motion in macro photography, capturing details without motion blur.
Experiment with high-speed sync for optimal results in fast-paced macro scenarios.
Controlling Highlights and Shadows:
Understand how to control highlights and shadows in macro subjects using flash.
Explore techniques for revealing texture and enhancing the three-dimensional quality of macro images.
Key Considerations Across Genres:
Understanding the Genre’s Aesthetic:
Adapt your flash techniques to complement the aesthetic of each genre.
Consider the mood, style, and expectations associated with portrait, event, wedding, or macro photography.
Flexibility in Lighting Setups:
Be versatile in your approach, understanding that different situations within each genre may require adjustments to your lighting setups.
Experiment with a range of techniques to develop a diverse skill set.
Building a Signature Style:
Use flash techniques to contribute to the development of your signature style.
Consider how your unique approach to lighting can set your work apart in a crowded field.
Troubleshooting Flash Issues
This chapter addresses common challenges that photographers encounter with flash exposure and provides practical solutions to overcome these issues. Understanding the impact of modifiers on flash performance and having quick fixes for unexpected flash behavior in different shooting conditions is crucial for maintaining control and achieving consistent results. Let’s delve into troubleshooting techniques to enhance your ability to handle various flash-related challenges.
Common Challenges with Flash Exposure and How to Overcome Them
Underexposure and Overexposure:
Identify the causes of underexposure or overexposure in flash photography.
Adjust flash power, aperture, or ISO settings to achieve the correct exposure.
Inconsistent Flash Exposure:
Troubleshoot issues leading to inconsistent flash exposure across a series of shots.
Ensure that flash power, distance, and modifiers are consistent for each frame.
Harsh Shadows and Hotspots:
Address challenges related to harsh shadows and hotspots caused by direct flash.
Introduce modifiers such as softboxes, umbrellas, or diffusers to soften and diffuse the light.
Color Temperature Mismatch:
Solve problems related to color temperature mismatches between ambient and flash light.
Use color correction gels or adjust white balance settings to achieve a cohesive look.
Understanding the Impact of Modifiers on Flash Performance
Softboxes and Diffusers:
Explore the impact of softboxes and diffusers on the quality and softness of light.
Understand how to position and modify softboxes for optimal results in different shooting scenarios.
Umbrellas and Reflectors:
Learn the role of umbrellas and reflectors in shaping and directing light.
Experiment with different umbrella configurations and reflector angles for desired lighting effects.
Grids and Snoots:
Understand the focused and controlled lighting achieved with grids and snoots.
Experiment with grid patterns and snoot adjustments to highlight specific areas or subjects.
Quick Fixes for Unexpected Flash Behavior in Different Shooting Conditions
Flash not Firing:
Troubleshoot issues when the flash fails to fire.
Check connections, batteries, and ensure compatibility between camera and flash.
Reduction in Flash Range:
Address situations where the flash range appears reduced.
Check for obstacles or interference and ensure the flash is set to the appropriate power level.
Reflections and Glare:
Manage reflections and glare that can occur in glossy or reflective surfaces.
Adjust flash angles, use diffusers, or reposition the subject to minimize unwanted reflections.
Unwanted Shadows:
Tackle issues related to unwanted shadows, especially in portrait photography.
Experiment with fill flash, additional lighting sources, or repositioning to mitigate shadows.
Key Considerations in Troubleshooting Flash Issues:
System Compatibility:
Ensure compatibility between your camera system and flash equipment.
Check for firmware updates and compatibility issues that may affect flash performance.
Consistency in Settings:
Maintain consistency in flash settings and camera parameters for consistent results.
Create presets or checklists for different shooting scenarios to avoid overlooking crucial settings.
Experimentation and Learning:
Embrace experimentation and continuous learning in flash photography.
Analyze and learn from troubleshooting experiences to enhance your problem-solving skills.
Preparedness:
Be prepared for unexpected challenges by having backup equipment, batteries, and alternative lighting solutions on hand.
Develop a systematic approach to troubleshooting to efficiently address issues during a shoot.
Creative Lighting Techniques
Now that we’ve established a strong foundation in flash fundamentals, it’s time to unleash your creativity through advanced lighting techniques. This chapter explores the artistic side of flash photography, offering insights into sculpting light, mastering backlighting, rim lighting, and the enchanting world of painting with light through long exposure techniques.
Sculpting Light: Using Shadows and Highlights
In this chapter, we will explore the art of sculpting light to enhance the three-dimensional quality of your images. The interplay of light and shadow is a powerful tool in photography, allowing you to create depth, form, and dimension. We’ll delve into techniques for strategically placing highlights and shadows to accentuate the subject’s shape, experiment with different light angles and intensities, and discuss how these elements can evoke mood and emotion in your photographs.
The Interplay of Light and Shadow in Creating Depth and Dimension
Understanding the Role of Shadows:
Explore how shadows contribute to the perception of depth in an image.
Understand the concept of chiaroscuro and how it enhances the visual impact of your photographs.
Creating Dimension with Highlights:
Recognize the role of highlights in defining the contours and surfaces of your subject.
Experiment with controlled highlights to bring out texture and add a sense of realism.
Balancing Light and Shadow:
Learn the importance of achieving a harmonious balance between light and shadow.
Understand how an imbalanced distribution can impact the overall mood and storytelling in your images.
Techniques for Strategically Placing Highlights and Shadows to Accentuate Form
Directional Lighting:
Experiment with different lighting angles to create shadows that enhance the subject’s form.
Understand how side lighting, backlighting, and overhead lighting influence the appearance of shadows.
Controlling Shadows with Modifiers:
Utilize modifiers such as flags, grids, and barn doors to control the spread and direction of light.
Learn how to shape and direct shadows to emphasize specific features or achieve a particular mood.
Highlight Placement for Emphasis:
Strategically place highlights to draw attention to specific areas of your subject.
Explore techniques for using catchlights in the eyes to add life and vitality to portraits.
Experimentation with Different Light Angles and Intensities to Evoke Mood and Emotion
Low and High Key Lighting:
Experiment with low key lighting to create moody and dramatic atmospheres.
Explore high key lighting for bright and airy compositions that convey a sense of positivity.
Emotional Impact of Light:
Understand how the angle and intensity of light influence the emotional impact of an image.
Explore the use of soft and diffused light for a gentle and intimate mood, or harsh light for a bold and dynamic feel.
Creating Contrast for Impact:
Experiment with high-contrast lighting setups to add visual interest and drama.
Understand how contrasting highlights and shadows can emphasize the shape and structure of your subject.
Key Considerations in Sculpting Light:
Subject and Context:
Consider the characteristics of your subject and the context of the scene when sculpting light.
Tailor your approach to suit the subject’s shape, texture, and the mood you want to convey.
Storytelling through Lighting:
Use lighting as a storytelling element in your images.
Consider how the interplay of light and shadow contributes to the narrative and emotional resonance of your photographs.
Consistency in Style:
Develop a consistent style in your approach to sculpting light.
Consider how your unique lighting techniques can become a signature element in your body of work.
Continuous Learning and Adaptation:
Embrace continuous learning and experimentation with different lighting techniques.
Adapt your approach based on feedback, experiences, and evolving creative preferences.
The Art of Backlighting and Rim Lighting
This chapter delves into the captivating techniques of backlighting and rim lighting, exploring how these approaches can infuse drama, storytelling, and a three-dimensional quality into your photographs. We’ll discuss the nuances of harnessing the power of backlighting, utilizing rim lighting to outline subjects, and overcoming challenges associated with achieving optimal exposure in these scenarios.
Harnessing the Drama and Storytelling Potential of Backlighting
Creating Silhouettes and Drama:
Explore the powerful impact of silhouettes created by backlighting.
Understand how backlighting contributes to a sense of drama and mystery in storytelling.
Enhancing Mood and Atmosphere:
Utilize backlighting to enhance the mood and atmosphere of your images.
Experiment with different light sources and angles to evoke specific emotions.
Controlling Flare for Artistic Effect:
Understand how lens flare can be used artistically in backlighting scenarios.
Learn techniques for controlling and manipulating flare to achieve creative and visually compelling results.
Utilizing Rim Lighting to Outline Subjects and Create a Three-Dimensional Effect
Defining the Subject with Rim Light:
Explore the role of rim lighting in outlining and separating your subject from the background.
Understand how rim light adds a three-dimensional quality, emphasizing the contours of your subject.
Positioning and Adjusting Rim Light:
Experiment with the placement and intensity of rim lighting for optimal effect.
Consider the angle and distance of the light source to achieve the desired level of separation and definition.
Creative Applications of Rim Light:
Use rim lighting creatively in various genres, including portraits, wildlife photography, and product photography.
Understand how rim light can add a sense of glamour and intrigue to your images.
Overcoming Challenges Associated with Backlighting and Achieving Optimal Exposure
Metering for Backlit Scenes:
Learn how to meter for optimal exposure in backlit situations.
Understand the importance of spot metering and adjusting exposure settings to retain detail in both the subject and background.
Using Fill Flash for Balancing Exposure:
Explore the use of fill flash to balance exposure in backlit scenes.
Understand how fill flash can lift shadows on the subject without overexposing the background.
Silhouette Photography Techniques:
Master the techniques of capturing compelling silhouettes against backlight.
Understand how to expose for the background while keeping the subject in shadow.
Key Considerations in Backlighting and Rim Lighting:
Understanding Light Direction:
Pay attention to the direction of light when harnessing backlighting and rim lighting.
Consider how the angle of light influences the overall look and feel of your images.
Experimentation and Creativity:
Embrace experimentation and creative exploration with different backlighting and rim lighting setups.
Consider the impact of changing light angles, intensity, and modifiers on the final result.
Adaptation to Different Genres:
Adapt backlighting and rim lighting techniques to suit various genres of photography.
Consider the specific requirements and storytelling elements of each genre.
Technical Mastery and Exposure Control:
Develop technical mastery in exposure control to achieve optimal results.
Understand how to balance exposure in challenging lighting situations to capture the desired visual effects.
Painting with Light: Long Exposure Techniques with Flash
This chapter explores the captivating realm of long exposure techniques with flash, commonly known as light painting. We will delve into the concept of long exposure and its creative applications, providing a step-by-step guide to mastering light painting techniques using flash. Additionally, you’ll receive valuable tips for choosing the right light sources and modifiers to enhance your long exposure experiments.
Understanding the Concept of Long Exposure and Its Creative Applications
Introduction to Long Exposure:
Grasp the fundamentals of long exposure photography and how it differs from standard exposure times.
Understand the creative potential of capturing extended moments in a single frame.
Time as a Creative Element:
Explore how time becomes a dynamic and expressive element in long exposure photography.
Consider the impact of motion, light trails, and cumulative light over time on the final image.
Blending Ambient and Flash Light:
Learn the art of balancing ambient light with carefully timed flashes during long exposures.
Understand how this technique allows you to illuminate specific elements in the scene while capturing the ambient light’s overall mood.
Step-by-Step Guide to Light Painting Techniques Using Flash
Equipment Setup:
Gather the necessary equipment, including a sturdy tripod, a camera with manual settings, and a remote shutter release.
Set up your flash units, ensuring they are positioned to achieve the desired lighting effects.
Camera Settings for Long Exposure:
Configure your camera settings for long exposure, including a low ISO, a narrow aperture, and a slow shutter speed.
Understand the relationship between these settings and their impact on the final image.
Light Painting Techniques:
Experiment with different light painting techniques using flash, such as selectively illuminating subjects or creating light trails.
Master the coordination of flash firing with your movements to achieve precise and controlled lighting effects.
Creative Light Paths:
Explore creating intricate and artistic light paths by moving the flash during the long exposure.
Understand how varying the speed, direction, and intensity of the light source can produce diverse and visually compelling results.
Tips for Choosing the Right Light Sources and Modifiers for Long Exposure Experiments
Selecting Light Sources:
Consider various light sources, including speedlights, LED panels, or dedicated light-painting tools.
Understand the unique qualities each light source brings to the image and how they interact with the scene.
Choosing Modifiers:
Experiment with modifiers such as grids, gels, or diffusers to shape and control the light.
Understand how modifiers affect the spread, color, and softness of the light during long exposure.
Coordinating Multiple Flashes:
Explore the creative possibilities of coordinating multiple flash units during a long exposure.
Understand how synchronized flashes can produce intricate and layered lighting effects.
Key Considerations in Long Exposure Techniques with Flash:
Experimentation and Iteration:
Embrace a spirit of experimentation and iterative refinement in your long exposure experiments.
Learn from each attempt and fine-tune your techniques to achieve the desired results.
Creativity in Motion:
Consider how incorporating motion in your light painting adds a dynamic and artistic element to your images.
Experiment with intentional camera movement or subject motion to enhance the visual impact.
Understanding Flash Duration:
Explore the concept of flash duration and how it influences the appearance of moving elements in long exposure photography.
Consider using flashes with varying durations for different effects.
Creative Applications in Portrait Photography
This chapter focuses on the application of creative lighting techniques to elevate portrait photography. We will explore ways to use shadows and highlights strategically to flatter and define facial features, as well as delve into the artistic use of backlighting to enhance the visual impact of portraits.
Implementing Creative Lighting Techniques for Compelling Portraits
Exploring Unconventional Lighting Setups:
Experiment with non-traditional lighting setups to create visually striking and unique portraits.
Understand how unconventional lighting can add an element of intrigue and artistry to your portraits.
Colorful and Dramatic Lighting Effects:
Introduce color gels and dramatic lighting effects to add mood and vibrancy to your portraits.
Experiment with contrasting colors to create dynamic and attention-grabbing visual elements.
Mixing Ambient and Flash Light:
Blend ambient light with carefully placed flash to achieve a natural yet polished look in portraits.
Understand how this technique can create a harmonious balance between the subject and their environment.
Using Shadows and Highlights to Flatter and Define Facial Features
Sculpting Facial Features with Shadows:
Strategically use shadows to sculpt and emphasize the contours of facial features.
Experiment with side lighting to create a sense of depth and dimension in portrait subjects.
Controlling Highlights for a Subtle Glow:
Utilize controlled highlights to add a subtle glow to specific areas of the face.
Understand how highlights contribute to a youthful and vibrant appearance in portraits.
Embracing Low-Key and High-Key Lighting:
Explore the artistic possibilities of low-key and high-key lighting in portrait photography.
Use low-key lighting for dramatic and moody portraits, and high-key lighting for a soft and ethereal look.
Elevating the Visual Impact of Portraits Through Artistic Backlighting
Creating Silhouettes for Dramatic Effect:
Implement backlighting to create captivating silhouettes in portraits.
Understand how the contrast between the subject and the background adds drama and visual interest.
Rim Lighting for Definition:
Use rim lighting to outline the subject and provide a three-dimensional effect.
Experiment with different angles and intensities of rim light to achieve optimal definition.
Balancing Backlight with Fill Flash:
Learn techniques for balancing strong backlight with fill flash to illuminate the subject’s face.
Achieve a harmonious blend of dramatic backlight and well-lit facial features.
Key Considerations in Creative Portrait Lighting:
Understanding the Subject’s Personality:
Tailor your creative lighting techniques to complement the personality and style of your portrait subjects.
Consider the emotional impact you want to convey and adjust lighting accordingly.
Adapting to Different Skin Tones:
Understand how lighting affects various skin tones and adjust your techniques accordingly.
Experiment with color temperature settings to achieve flattering and natural-looking skin tones.
Experimentation and Feedback:
Embrace a spirit of experimentation in your portrait lighting techniques.
Seek feedback from your subjects and collaborators to refine and enhance your approach.
Storytelling through Lighting:
Use lighting as a storytelling element in portrait photography.
Consider how the creative use of shadows, highlights, and backlighting contributes to the narrative and emotional resonance of your portraits.
Enhancing Storytelling in Environmental Portraits
In this chapter, we will explore the art of enhancing storytelling in environmental portraits through the creative use of lighting. We’ll delve into techniques for illuminating background elements without overpowering the subject, showcasing how strategic lighting can elevate the narrative in your environmental portraits. Case studies will provide real-world examples of successful integration of creative lighting to enhance storytelling.
Incorporating Creative Lighting to Enhance the Narrative in Environmental Portraits
Understanding the Environmental Portrait:
Explore the concept of environmental portraits and their unique storytelling potential.
Understand how the subject’s surroundings contribute to the narrative and mood of the portrait.
Creative Lighting for Atmosphere:
Implement lighting techniques that enhance the atmosphere and mood of the environment.
Consider the use of color gels and modifiers to create a cohesive visual narrative.
Emphasizing Character and Occupation:
Use lighting to emphasize the character and occupation of the subject within their environment.
Consider how different lighting styles can convey the subject’s role and story.
Techniques for Illuminating Background Elements Without Overpowering the Subject
Selective Lighting for Depth:
Employ selective lighting to illuminate specific background elements while keeping the subject in focus.
Understand how this technique adds depth and visual interest to the overall composition.
Controlling Light Spill:
Manage light spill to ensure that background elements receive just the right amount of illumination.
Experiment with modifiers and flagging techniques to control the spread of light.
Balancing Subject and Environment:
Achieve a harmonious balance between the subject and their environment through thoughtful lighting.
Consider the use of ambient light combined with strategically placed flashes to create a natural yet captivating look.
Case Studies Illustrating Successful Integration of Creative Lighting in Storytelling
The Artisan’s Tale:
Explore a case study where creative lighting is used to showcase the craftsmanship of an artisan.
Learn how lighting contributes to the narrative by emphasizing tools, textures, and the artisan’s focused expression.
Urban Explorer’s Journey:
Examine a case study involving an urban explorer in a cityscape.
Understand how creative lighting techniques highlight the subject’s adventurous spirit while showcasing the surrounding urban environment.
Cultural Narratives:
Dive into portraits that capture cultural narratives through the creative use of lighting.
Explore how lighting can convey a sense of tradition, heritage, and the stories embedded in cultural surroundings.
Key Considerations in Enhancing Storytelling in Environmental Portraits:
Collaboration with Subjects:
Collaborate with your subjects to understand their story and the elements they want to emphasize.
Involve them in the creative process to ensure the portrait aligns with their narrative.
Adapting to Varied Environments:
Develop the flexibility to adapt your lighting techniques to diverse environmental conditions.
Consider how different locations and settings require tailored approaches to storytelling.
Narrative Cohesiveness:
Ensure narrative cohesiveness by aligning lighting choices with the overall story.
Consider how lighting can connect the subject to their environment and convey a unified narrative.
Learning from Environmental Context:
Pay attention to the unique characteristics of each environment.
Let the environmental context guide your lighting decisions, enhancing the authenticity and realism of the narrative.
Creating Mood and Atmosphere in Still Life Photography
This chapter focuses on the art of creating mood and atmosphere in still life photography through the intentional use of lighting. We will explore techniques for crafting visually stunning still life compositions with sculpted light, leveraging the transformative power of backlighting and rim lighting, and employing long exposure techniques to add an ethereal quality to still life images.
Crafting Visually Stunning Still Life Compositions with Sculpted Light
Understanding Still Life Photography:
Explore the principles of still life photography and its emphasis on composition, lighting, and storytelling.
Understand the significance of lighting in bringing out the details and textures of still life subjects.
Sculpting Light for Dimension:
Implement techniques for sculpting light to add dimension and depth to still life compositions.
Experiment with various light angles, intensities, and modifiers to highlight specific elements within the frame.
Controlling Shadows for Drama:
Explore the use of shadows to create drama and visual interest in still life images.
Understand how controlled shadows contribute to the overall mood and atmosphere of the composition.
The Transformative Power of Backlighting and Rim Lighting in Still Life Settings
Enhancing Translucency with Backlighting:
Utilize backlighting to enhance the translucency of certain still life subjects, such as flowers or glassware.
Explore how backlighting can reveal intricate details and create a sense of delicacy.
Defining Edges with Rim Lighting:
Implement rim lighting to define the edges of still life objects and add a three-dimensional quality.
Experiment with different angles and intensities to achieve optimal definition without overpowering the overall composition.
Creative Silhouettes in Still Life:
Experiment with creative silhouettes using backlighting to produce visually striking and artistic still life images.
Understand how to balance exposure for the background and the subject to achieve the desired silhouette effect.
Long Exposure Techniques for Adding an Ethereal Quality to Still Life Images
Capturing Motion in Still Life:
Introduce motion into still life compositions through long exposure techniques.
Explore the creative possibilities of capturing the movement of elements within the frame.
Softening Light and Details:
Use long exposure to soften the overall light and details in still life images.
Understand how extended exposure times contribute to a dreamy and ethereal atmosphere.
Creating Light Trails:
Experiment with intentional movements of light sources during long exposures to create mesmerizing light trails.
Understand how to coordinate the movement of lights to achieve controlled and artistic effects.
Key Considerations in Creating Mood and Atmosphere in Still Life Photography:
Storytelling through Still Life:
Consider how lighting choices contribute to the narrative or mood you want to convey in still life compositions.
Explore themes and concepts that resonate with the viewer through intentional lighting.
Balancing Realism and Creativity:
Strike a balance between creating visually striking images and maintaining a sense of realism in still life photography.
Consider the desired level of abstraction and artistic interpretation for each composition.
Experimentation with Light Modifiers:
Experiment with a variety of light modifiers, such as diffusers, reflectors, and grids, to achieve different effects.
Understand how each modifier shapes and controls light to enhance the desired mood.
Attention to Detail:
Pay meticulous attention to the details within the still life composition.
Use lighting to accentuate textures, colors, and intricacies that contribute to the overall visual impact.
Safety and Considerations in Long Exposure Techniques
This chapter focuses on the crucial aspect of safety and considerations when employing long exposure techniques in your photography. It explores ways to mitigate risks associated with prolonged exposure to artificial light, provides tips for ensuring the safety and comfort of your subjects during long exposure sessions, and delves into the technical aspects of long exposure, including aperture settings and ISO adjustments.
Mitigating Risks Associated with Prolonged Exposure to Artificial Light
Understanding Health Risks:
Explore potential health risks associated with prolonged exposure to artificial light.
Understand the impact on the eyes, skin, and overall well-being of both the photographer and subjects.
Minimizing Eye Strain:
Implement strategies to minimize eye strain and discomfort during long exposure sessions.
Consider using protective eyewear or taking regular breaks to prevent fatigue.
Managing Temperature and Heat:
Be mindful of the heat generated by continuous or powerful light sources during long exposures.
Ensure proper ventilation in the shooting environment to prevent overheating.
Tips for Ensuring the Safety and Comfort of Your Subjects During Long Exposure Sessions
Communication and Collaboration:
Establish clear communication with your subjects about the duration and nature of the long exposure session.
Collaborate with them to address any concerns or discomfort they may have.
Comfortable Shooting Environments:
Create a comfortable shooting environment by providing seating, temperature control, and other amenities.
Consider the duration of the session and make provisions for breaks if needed.
Protecting Skin and Eyes:
Provide protective gear, such as sunscreen or appropriate clothing, to shield skin from prolonged exposure to light.
Encourage subjects to wear sunglasses or protective eyewear to reduce the impact on their eyes.
Understanding the Technical Aspects of Long Exposure, such as Aperture Settings and ISO Adjustments
Choosing the Right Aperture:
Understand the relationship between aperture settings and long exposure photography.
Select the appropriate aperture to control depth of field while maintaining the desired exposure.
ISO Considerations:
Explore the impact of ISO settings on long exposure images.
Balance the need for sensitivity with the desire to maintain image quality, considering the camera’s performance at higher ISOs.
Exposure Time and Bulb Mode:
Learn to determine the optimal exposure time for different long exposure scenarios.
Understand the use of Bulb mode for exposures longer than the camera’s standard shutter speed settings.
Key Considerations for Long Exposure Safety and Technical Understanding:
Risk Assessment:
Conduct a thorough risk assessment before engaging in long exposure sessions.
Identify potential hazards and take preventive measures to ensure safety.
Subject Comfort and Cooperation:
Prioritize the comfort and cooperation of your subjects during long exposure sessions.
Address any concerns they may have and adjust the shooting conditions accordingly.
Technical Proficiency:
Develop a solid understanding of the technical aspects of long exposure photography.
Practice with different settings and scenarios to refine your skills and achieve consistent results.
Continuous Monitoring:
Continuously monitor the well-being of both the photographer and subjects during long exposure sessions.
Be prepared to adapt to changing conditions and address any issues promptly.
On-Camera Flash Mastery
On-camera flash, when used skillfully, has the potential to be a versatile and powerful tool in a photographer’s arsenal. This chapter is dedicated to mastering the art of on-camera flash, exploring techniques for effective use, overcoming common challenges, and uncovering creative applications that yield stunning results.
Techniques for Effective On-Camera Flash Use
In this chapter, we will delve into the techniques for effective on-camera flash use, emphasizing the importance of bounce flash for achieving flattering results. We’ll explore the distinctions between direct, bounced, and diffused flash, understanding the different effects each produces. Additionally, we’ll discuss how to utilize on-camera flash for fill light in various lighting conditions.
The Importance of Bounce Flash and Techniques for Achieving Flattering Results
Understanding Bounce Flash:
Explore the concept of bounce flash and its role in achieving natural and flattering lighting.
Understand how bouncing light off surfaces can soften shadows and create a more even illumination.
Choosing the Right Surfaces:
Identify suitable surfaces for bounce flash, such as walls, ceilings, or reflectors.
Learn how the color and texture of the bounce surface can influence the character of the light.
Adjusting Angles and Tilt:
Experiment with different angles and tilt adjustments for bounce flash.
Understand how variations in the angle of the flash head impact the direction and quality of the bounced light.
Direct vs. Bounced vs. Diffused Flash: Understanding the Different Effects
Direct Flash for Impact:
Explore scenarios where direct flash can be intentionally used for dramatic impact.
Understand how direct flash can create strong highlights and shadows, adding a dynamic element to certain compositions.
Bounced Flash for Softness:
Contrast the softening effects of bounce flash with the direct approach.
Analyze how bounced light produces softer shadows and a more flattering illumination for portrait photography.
Diffused Flash for Evenness:
Introduce diffusers to create a more evenly spread and diffused flash.
Explore the use of diffusers for achieving a natural and flattering look in different lighting situations.
Utilizing On-Camera Flash for Fill Light in Various Lighting Conditions
Balancing Ambient Light with Fill Flash:
Learn to balance ambient light with on-camera fill flash to maintain natural-looking results.
Understand the role of fill flash in lifting shadows and adding catchlights in scenarios with challenging lighting conditions.
Adjusting Flash Power for Fill:
Explore techniques for adjusting the power of on-camera flash to achieve the desired fill light effect.
Understand how to avoid overexposure and maintain a balanced composition.
Dynamic Fill in Outdoor Settings:
Apply on-camera flash as a dynamic fill light tool in outdoor settings.
Consider the angle and strength of the natural sunlight and supplement it with fill flash to enhance the subject’s features.
Key Considerations for Effective On-Camera Flash Use:
Customizing Flash Settings:
Familiarize yourself with the flash settings on your camera and adjust them according to the shooting conditions.
Experiment with manual and TTL (Through-The-Lens) modes to find the most suitable setting for each situation.
Adapting to Different Environments:
Develop the ability to adapt on-camera flash techniques to various environments.
Consider the reflective surfaces and ambient lighting present in each location.
Understanding Flash-to-Subject Distance:
Grasp the concept of flash-to-subject distance and how it influences the exposure.
Learn to calculate and adjust the flash power based on the distance to achieve optimal results.
Continuous Learning and Experimentation:
Embrace continuous learning and experimentation with on-camera flash techniques.
Stay open to refining your approach and adapting to new challenges and scenarios.
Overcoming Common Challenges with On-Camera Flash
This chapter addresses common challenges encountered when using on-camera flash and provides techniques for overcoming them. We’ll explore red-eye reduction methods and tools, strategies for minimizing harsh shadows to achieve natural-looking results, and effective ways to manage color temperature for consistency in mixed lighting scenarios.
Red-Eye Reduction Techniques and Tools
Understanding Red-Eye Causes:
Explore the causes of red-eye in flash photography, particularly in low-light conditions.
Understand how the angle of light and the reflection from the retina contribute to red-eye.
Pre-Flash and Pre-Focusing Techniques:
Implement pre-flash techniques to reduce the size of the subject’s pupils before the main exposure.
Combine pre-focusing with pre-flash to further minimize the risk of red-eye.
Using Red-Eye Reduction Modes:
Familiarize yourself with the red-eye reduction modes available on your camera.
Understand how these modes work and when to use them for optimal results.
External Flash Accessories:
Explore external flash accessories, such as bounce cards and diffusers, that help redirect the flash and reduce the likelihood of red-eye.
Understand how these accessories can enhance the quality of light while addressing red-eye issues.
Minimizing Harsh Shadows and Achieving Natural-Looking Results
Softening Shadows with Diffusers:
Introduce diffusers to soften the intensity of on-camera flash and minimize harsh shadows.
Experiment with different types of diffusers, such as built-in diffusers or external attachments.
Bounce Flash for Natural Shadows:
Utilize bounce flash techniques to redirect light and create more natural shadows.
Adjust the angle and strength of bounce flash to achieve a flattering and even illumination.
Balancing Fill Flash:
Employ fill flash to balance harsh shadows in outdoor or high-contrast lighting conditions.
Adjust flash power to lift shadows without overexposing highlights.
Understanding Light Falloff:
Grasp the concept of light falloff and how it influences the transition from illuminated areas to shadows.
Adjust flash-to-subject distance and power settings to manage light falloff for a more gradual shadow transition.
Managing Color Temperature and Achieving Consistency in Mixed Lighting Scenarios
Setting Custom White Balance:
Set custom white balance based on the ambient lighting conditions to achieve accurate color reproduction.
Understand how different light sources may have varying color temperatures and affect the overall color balance.
Gel Filters for Color Correction:
Experiment with gel filters to correct color temperature discrepancies between on-camera flash and ambient light.
Choose appropriate gel filters to match or complement the prevailing lighting conditions.
Consistent Use of Flash in Mixed Lighting:
Develop a consistent approach to using on-camera flash in mixed lighting scenarios.
Pay attention to the color temperature of ambient light and adjust flash settings accordingly for a seamless blend.
Post-Processing Techniques:
Explore post-processing techniques for color correction in situations where adjustments were challenging during the shoot.
Use software tools to fine-tune color temperature and achieve a cohesive look across the entire image.
Key Considerations for Overcoming Common Challenges with On-Camera Flash:
Adaptability to Different Environments:
Develop adaptability to different environments and lighting conditions when using on-camera flash.
Consider the unique challenges posed by each setting and adjust your techniques accordingly.
Continuous Monitoring and Adjustment:
Continuously monitor the results of on-camera flash and be ready to make real-time adjustments.
Pay attention to feedback from your camera’s LCD screen and histogram to ensure optimal exposure and color balance.
Customization of Flash Settings:
Customize on-camera flash settings based on the specific challenges presented by each scene.
Experiment with different techniques to find the most effective solution for each situation.
Communication with Subjects:
Communicate with your subjects to ensure their comfort and cooperation, especially when using pre-flash or additional accessories.
Address any concerns they may have and explain the purpose of specific techniques to achieve better results.
Creative Uses of On-Camera Flash for Stunning Results
This chapter explores the creative potential of on-camera flash and provides techniques for achieving stunning and visually impactful results. We’ll discuss using on-camera flash to create dynamic portraits with catchlights, experimenting with on-camera flash for environmental and street photography, and techniques for adding a creative flair to events and candid moments.
Using On-Camera Flash to Create Dynamic Portraits with Catchlights
Strategic Positioning for Catchlights:
Explore the strategic positioning of on-camera flash to achieve captivating catchlights in the eyes of your subjects.
Understand how catchlights add life and dimension to portraits, making the eyes a focal point.
Modifying Flash for Soft Highlights:
Experiment with flash modifiers, such as small softboxes or bounce cards, to create soft highlights in the eyes.
Achieve a balance between the intensity of the flash and the desired subtlety of the catchlights.
Balancing Ambient Light and Flash:
Understand how to balance ambient light with on-camera flash to maintain a natural and appealing look.
Experiment with different flash power settings to achieve the desired balance between ambient and artificial light.
Experimenting with On-Camera Flash for Environmental and Street Photography
Dynamic On-Camera Flash in Environmental Portraits:
Utilize on-camera flash to create dynamic environmental portraits by balancing subject and background lighting.
Explore the use of fill flash to enhance details and add a three-dimensional quality to the scene.
Freezing Motion in Street Photography:
Experiment with on-camera flash to freeze motion and capture dynamic street scenes.
Understand the interplay between flash duration and shutter speed for effective motion freezing.
Creating Dramatic Shadows in Street Photography:
Use on-camera flash to intentionally create dramatic shadows and highlights in street photography.
Explore unconventional angles and perspectives to emphasize the play of light and shadow.
Techniques for Adding a Creative Flair to Events and Candid Moments
Introducing Color Gels for Mood Enhancement:
Experiment with color gels on the on-camera flash to introduce creative and mood-enhancing effects.
Match or contrast the color of the flash with the ambient lighting for a harmonious or dynamic look.
Dynamic Fill Flash at Events:
Employ on-camera flash as dynamic fill light at events to enhance the visual appeal of candid moments.
Adjust flash settings to complement the existing ambient light and add dimension to event photos.
Candid Portraits with Balanced Lighting:
Capture candid portraits with balanced on-camera flash to highlight subjects without overwhelming the scene.
Maintain awareness of the surrounding environment to ensure a harmonious blend of ambient and artificial light.
Key Considerations for Creative Uses of On-Camera Flash:
Adaptability to Various Genres:
Develop adaptability in using on-camera flash across various genres, from portraiture to street photography and events.
Customize your approach based on the specific requirements and visual goals of each genre.
Understanding the Creative Impact of Catchlights:
Grasp the creative impact of catchlights in portraits and experiment with different flash positions to achieve varied effects.
Consider the emotional and narrative implications of catchlights in different contexts.
Seamless Integration with the Environment:
Ensure on-camera flash seamlessly integrates with the environment in environmental and street photography.
Strive for a natural and cohesive look that enhances the overall storytelling.
Creativity in Event Photography:
Embrace creativity in event photography by using on-camera flash to add flair to candid moments.
Experiment with different techniques to elevate the visual interest of event photos without distracting from the narrative.
Balancing On-Camera Flash with Ambient Light
This chapter delves into the art of balancing on-camera flash with ambient light, providing insights into the delicate interplay between these two elements. We’ll explore tips for adjusting flash power to match different lighting conditions and examine case studies demonstrating successful integration of on-camera flash in various environments.
Understanding the Balance Between Ambient Light and On-Camera Flash
Analyzing Ambient Light Conditions:
Develop the ability to analyze and understand the existing ambient light conditions in different environments.
Consider the direction, quality, and color temperature of ambient light as key factors in achieving a harmonious balance.
Assessing Scene Dynamics:
Evaluate the dynamics of the scene, including the presence of highlights, shadows, and potential distractions.
Consider the mood and narrative of the image and how ambient light contributes to these elements.
Harmonizing Flash and Ambient Light:
Aim for a harmonious blend between on-camera flash and ambient light to create a natural and visually appealing look.
Experiment with different flash power settings and angles to achieve the desired balance.
Tips for Adjusting Flash Power to Match Different Lighting Conditions
Matching Flash Power to Ambient Light Intensity:
Understand the relationship between flash power and the intensity of ambient light.
Adjust flash power to complement or counteract the existing ambient light, depending on the desired effect.
Managing Contrast in High-Contrast Environments:
In high-contrast environments, use on-camera flash to fill in shadows and reduce contrast.
Adjust flash power to achieve a balanced exposure that maintains detail in both highlights and shadows.
Adapting to Low-Light Conditions:
In low-light conditions, use on-camera flash as a primary light source to illuminate the scene.
Adjust flash power to control the overall exposure and avoid overreliance on ambient light.
Case Studies Demonstrating Successful Integration of On-Camera Flash in Various Environments
Outdoor Portraiture:
Explore case studies where on-camera flash is seamlessly integrated into outdoor portrait sessions.
Understand how flash power is adjusted to lift shadows and enhance facial features while maintaining a natural look.
Event Photography:
Examine examples of on-camera flash in event photography, where a balance between ambient light and flash is crucial.
Learn how to adjust flash power to capture candid moments with the right amount of illumination.
Street Photography:
Analyze case studies in street photography where on-camera flash is used to freeze motion and add impact.
Discover how flash power is adjusted to maintain a balance that complements the ambient light of urban environments.
Key Considerations for Balancing On-Camera Flash with Ambient Light:
Dynamic Adjustments in Real Time:
Develop the skill of making dynamic adjustments to on-camera flash settings in real-time based on changing ambient light conditions.
Anticipate how adjustments may impact the overall mood and aesthetics of the image.
Understanding the Characteristics of Ambient Light:
Gain a deep understanding of the characteristics of ambient light, including its direction, color temperature, and intensity.
Use this understanding to determine how on-camera flash can enhance or modify these characteristics.
Experimentation and Iteration:
Embrace a spirit of experimentation and iteration when balancing on-camera flash with ambient light.
Iterate through different settings to discover the most effective combination for each specific scenario.
Observation of Environmental Elements:
Pay attention to environmental elements such as reflective surfaces, textures, and background details.
Understand how on-camera flash can interact with these elements to create visually interesting effects.
Innovative On-Camera Flash Setups
This chapter explores innovative setups for on-camera flash, introducing creative modifiers and do-it-yourself (DIY) hacks to enhance the visual impact of your images. We’ll delve into the importance of distance and angle in shaping the quality of on-camera flash, providing insights into maximizing creativity through inventive setups.
Incorporating Modifiers for On-Camera Flash to Enhance Creativity
Exploring Softboxes and Diffusers:
Incorporate softboxes and diffusers for on-camera flash to create soft and flattering light.
Understand how these modifiers can be attached to the flash unit to achieve a larger, softer light source.
Bounce Cards and Reflectors:
Experiment with bounce cards and reflectors to redirect and enhance on-camera flash.
Explore the impact of different materials and angles in shaping the direction and quality of the bounced light.
Gels for Color Effects:
Introduce color gels to on-camera flash for creative color effects.
Explore how gels can be used to match or contrast with ambient light, adding a dramatic and artistic touch to your images.
DIY Hacks for Diffusing and Redirecting On-Camera Flash
DIY Diffusers from Everyday Items:
Explore creative DIY diffuser hacks using household items to soften and modify on-camera flash.
Learn how to repurpose materials like white plastic, fabric, or even a simple shower curtain to achieve diffusion effects.
Reflective Surfaces for Bounce Flash:
Experiment with DIY reflective surfaces to bounce on-camera flash and create unique lighting effects.
Consider using materials like foam boards, white cards, or mirrors to redirect and amplify the light.
Creative Snoots and Grids:
Build DIY snoots and grids to control the direction and spread of on-camera flash.
Understand how these homemade accessories can be crafted to achieve focused and directional lighting effects.
The Impact of Distance and Angle on the Quality of On-Camera Flash
Understanding Flash-to-Subject Distance:
Explore the significance of flash-to-subject distance and its influence on the exposure and quality of light.
Learn how to calculate the ideal distance for achieving optimal flash power and coverage.
Experimenting with Flash Angles:
Understand the creative impact of varying on-camera flash angles.
Experiment with different angles to sculpt light, create shadows, and emphasize specific elements in your composition.
Dynamic Flash Distance for Versatility:
Embrace the versatility of dynamic flash distances to adapt to different shooting scenarios.
Explore how adjusting the distance can impact the balance between ambient and flash light, offering creative control over the final image.
Key Considerations for Innovative On-Camera Flash Setups:
Adaptability to Shooting Environments:
Develop adaptability in incorporating on-camera flash modifiers and DIY setups based on the unique characteristics of shooting environments.
Customize your setup to complement the mood and storytelling requirements of each scene.
Resourcefulness and DIY Spirit:
Embrace a resourceful and DIY spirit when experimenting with modifiers and hacks.
Discover inventive ways to achieve professional-looking results using readily available materials.
Understanding the Purpose of Each Modifier:
Gain a deep understanding of the purpose and impact of each on-camera flash modifier.
Choose modifiers based on their intended effect, whether it’s softening light, adding color, or shaping the direction of illumination.
Continuous Experimentation and Exploration:
Foster a mindset of continuous experimentation and exploration with on-camera flash setups.
Stay open to discovering new possibilities and refining your approach based on the results and feedback from each creative experiment.
Adapting to Challenging Environments
This chapter focuses on adapting on-camera flash to challenging environments, providing techniques for overcoming obstacles and enhancing the visual impact of your images. We’ll explore the use of on-camera flash in low-light situations, strategies for overcoming challenging reflections and shiny surfaces, and methods for maximizing on-camera flash in outdoor environments.
Using On-Camera Flash in Low-Light Situations for Enhanced Visibility
Dynamic ISO and Flash Combinations:
Understand the synergy between ISO settings and on-camera flash in low-light situations.
Experiment with dynamic combinations to achieve optimal visibility without sacrificing image quality.
Balancing Flash and Existing Light:
Master the art of balancing on-camera flash with existing ambient light in low-light environments.
Adjust flash power to enhance visibility while maintaining a natural and well-exposed look.
Utilizing Slow Sync and Rear Curtain Sync:
Explore slow sync and rear curtain sync modes to creatively capture motion in low light.
Understand how these modes can add dynamic elements to your images, especially in situations with movement.
Techniques for Overcoming Challenging Reflections and Shiny Surfaces
Polarizing Filters for Reflection Control:
Introduce polarizing filters to control reflections and glare on shiny surfaces.
Understand how these filters can be used in conjunction with on-camera flash to minimize unwanted reflections.
Angling Flash for Reflection Reduction:
Experiment with different flash angles to minimize direct reflections on shiny surfaces.
Learn how the direction of the flash can be adjusted to achieve optimal results when dealing with reflective materials.
Diffusing and Softening Light on Shiny Surfaces:
Use diffusers and bounce techniques to soften and diffuse on-camera flash on shiny surfaces.
Explore how modifying the quality of light can help reduce harsh highlights and create a more even illumination.
Enhancing the Visual Impact of On-Camera Flash in Outdoor Environments
Fill Flash in Harsh Sunlight:
Explore the role of fill flash in overcoming harsh sunlight and reducing strong shadows in outdoor portraits.
Adjust flash power to achieve a balanced exposure while maintaining a natural and flattering look.
Combining On-Camera Flash with Natural Backlight:
Experiment with combining on-camera flash with natural backlight for striking outdoor portraits.
Understand how to balance the intensity of the flash with the ambient light to create a visually appealing composition.
Overcoming Wind and Environmental Challenges:
Address challenges posed by wind and environmental factors when using on-camera flash outdoors.
Secure and protect your equipment while maintaining flexibility in adapting to changing outdoor conditions.
Key Considerations for Adapting to Challenging Environments:
Situational Awareness and Quick Adjustments:
Develop situational awareness to quickly assess and adapt on-camera flash settings in challenging environments.
Be prepared to make real-time adjustments based on changing conditions to achieve optimal results.
Versatility in Flash Power and Settings:
Familiarize yourself with the versatility of on-camera flash power and settings.
Understand how different flash settings can be optimized for various challenging scenarios, providing flexibility in your approach.
Creativity in Problem-Solving:
Approach challenging environments with a creative mindset, using on-camera flash as a tool for problem-solving.
Embrace the opportunity to create unique and visually compelling images by overcoming obstacles with inventive solutions.
Experimentation for Optimal Results:
Encourage experimentation in challenging environments to discover the most effective techniques for your specific scenarios.
Use trial and error to refine your approach and build a repertoire of strategies for overcoming common challenges.
Off-Camera Flash: Unleashing Creativity
Off-camera flash opens up a realm of creative possibilities, allowing photographers to sculpt light and shape their vision with precision. In this chapter, we explore the intricacies of wireless flash systems, delve into the art of off-camera flash for portraiture, and unveil techniques for creating dramatic effects that elevate your photography to new heights.
Wireless Flash Systems and Triggers
This chapter delves into the realm of wireless flash systems and triggers, providing a comprehensive understanding of their components, guidance on selecting the right triggers for your off-camera flash setup, and troubleshooting tips for common issues with wireless communication.
Understanding the Components of a Wireless Flash System
Flash Units with Built-in Wireless Capability:
Explore flash units equipped with built-in wireless functionality.
Understand how these flashes can communicate with each other and with external triggers, eliminating the need for additional accessories.
External Wireless Triggers:
Learn about external wireless triggers that facilitate communication between your camera and off-camera flash units.
Understand the different types of triggers, including radio frequency (RF) triggers and infrared triggers, and their respective advantages.
Transceivers and Receivers:
Explore the role of transceivers, which can function as both transmitters and receivers in a wireless flash system.
Understand how receivers interface with flash units to trigger them wirelessly based on signals from the transmitter.
Selecting the Right Triggers for Your Off-Camera Flash Setup
Compatibility with Flash Units and Cameras:
Ensure compatibility between your chosen triggers, flash units, and camera system.
Understand the specific requirements for different camera models and flash brands to create a seamless wireless flash system.
Range and Reliability:
Evaluate the range and reliability of wireless triggers based on your shooting scenarios.
Consider triggers with longer ranges for outdoor or expansive indoor setups, ensuring a robust and consistent signal.
Advanced Features and Functionality:
Explore triggers with advanced features such as high-speed sync (HSS), multiple channels, and group control.
Understand how these features enhance your ability to control and manipulate off-camera flash in diverse shooting situations.
Troubleshooting Common Issues with Wireless Communication
Signal Interference and Solutions:
Identify common sources of signal interference in wireless flash systems.
Implement solutions such as changing channels, adjusting frequencies, or repositioning triggers to mitigate interference issues.
Power and Battery Considerations:
Address power-related issues by ensuring that triggers and flash units have sufficient battery levels.
Understand the impact of low battery levels on signal strength and take preventive measures.
Line of Sight and Obstruction Challenges:
Recognize the importance of a clear line of sight between triggers and receivers.
Mitigate challenges posed by obstructions by adjusting the positioning of triggers and receivers for optimal communication.
Key Considerations for Wireless Flash Systems and Triggers:
System Integration and Expandability:
Choose a wireless flash system that integrates seamlessly with your existing equipment.
Consider systems that offer expandability, allowing you to add more flashes or triggers as your needs evolve.
User Interface and Ease of Operation:
Evaluate the user interface and ease of operation of wireless triggers.
Opt for systems that are intuitive to use, with clear controls and settings for efficient operation on location.
Reliability in Different Environments:
Test the reliability of your wireless flash system in various shooting environments.
Ensure that the system can perform consistently in both controlled studio settings and unpredictable outdoor conditions.
Investing in Future-Proof Technology:
Consider investing in wireless flash systems and triggers with future-proof technology.
Look for systems that support firmware updates, ensuring compatibility with new camera models and flash technologies.
Mastering Off-Camera Flash for Portraiture
This chapter delves into the transformative power of off-camera flash in the realm of portrait photography. We will explore techniques for creating flattering and dynamic lighting setups, as well as considerations for posing and composition when using off-camera flash to elevate your portrait photography.
The Transformative Power of Off-Camera Flash in Portrait Photography
Shaping Facial Features:
Explore how off-camera flash can be used to shape and define facial features.
Understand the impact of different lighting angles and modifiers on the overall look and feel of a portrait.
Creating Dimension and Depth:
Learn techniques for introducing dimension and depth to portraits through off-camera flash.
Understand how controlled shadows and highlights contribute to a three-dimensional and visually engaging look.
Emphasizing Catchlights:
Explore the role of catchlights in the eyes and how off-camera flash can be positioned to create captivating highlights.
Experiment with different lighting setups to achieve natural-looking catchlights that enhance the subject’s gaze.
Techniques for Creating Flattering and Dynamic Lighting Setups
Classic Rembrandt and Butterfly Lighting:
Master classic portrait lighting setups, including Rembrandt and Butterfly lighting.
Understand the positioning of off-camera flash to achieve flattering and timeless results.
Split and Rim Lighting Techniques:
Explore split lighting techniques to create dramatic effects and emphasize facial contours.
Understand the use of rim lighting to separate the subject from the background and add a touch of glamour.
High-Key and Low-Key Lighting:
Learn how to create high-key and low-key lighting setups with off-camera flash.
Explore the artistic possibilities of high-key lighting for a bright and airy look, as well as the dramatic impact of low-key lighting for moodier portraits.
Posing and Composition Considerations when Using Off-Camera Flash
Directional Posing for Off-Camera Flash:
Understand how posing directionally can enhance the impact of off-camera flash.
Guide subjects to complement the direction of the key light, creating a cohesive and visually appealing composition.
Balancing Off-Camera Flash with Ambient Light:
Explore techniques for balancing off-camera flash with ambient light in outdoor portrait settings.
Understand how to maintain a natural and harmonious balance between artificial and natural light sources.
Composition Techniques for Off-Camera Flash:
Incorporate off-camera flash into compositional elements to enhance visual interest.
Experiment with creating deliberate shadows and highlights within the frame to guide the viewer’s focus.
Key Considerations for Mastering Off-Camera Flash in Portraiture:
Personalizing Lighting Setups for Subjects:
Tailor off-camera flash setups to suit the unique features and preferences of individual subjects.
Consider factors such as face shape, skin tone, and personal style when designing lighting arrangements.
Communication and Collaboration:
Foster open communication and collaboration with your subjects when using off-camera flash.
Ensure that subjects are comfortable and informed about the lighting process, fostering a collaborative and positive atmosphere.
Dynamic Adaptability in Various Environments:
Develop the ability to adapt off-camera flash techniques to different portrait environments.
Consider how lighting setups may vary in indoor studio sessions, outdoor natural light settings, or dynamic urban environments.
Continual Experimentation and Refinement:
Embrace a mindset of continual experimentation and refinement when mastering off-camera flash for portraiture.
Explore new lighting setups, modifiers, and posing techniques to refine your skills and push creative boundaries.
Building a Portable Off-Camera Flash Studio
This chapter guides you through the process of building a portable off-camera flash studio, providing insights into essential tools and accessories, adapting your setup for various shooting environments, and achieving a balance between portability and versatility in off-camera flash equipment.
Tools and Accessories for Creating a Portable Off-Camera Flash Setup
Compact Flash Units:
Explore lightweight and compact flash units suitable for a portable setup.
Consider factors such as power output, size, and battery life when selecting flash units for portability.
Collapsible Light Modifiers:
Opt for collapsible light modifiers, such as softboxes and umbrellas, that are easy to transport.
Consider modifiers with quick setup mechanisms for efficient use in dynamic shooting situations.
Portable Light Stands and Mounts:
Choose light stands and mounts that are compact and easily collapsible.
Ensure stability and durability while maintaining a lightweight design for ease of transportation.
Battery Packs and Power Solutions:
Invest in reliable battery packs or portable power solutions for extended off-camera flash use.
Consider rechargeable batteries and power banks to ensure continuous operation in various environments.
Portable Backgrounds and Backdrops:
Explore portable background options for creating a studio-like environment on location.
Choose collapsible and lightweight backdrop solutions that complement the portability of your off-camera flash setup.
Adapting Your Off-Camera Flash Studio for Different Shooting Environments
Indoor Studio Adaptations:
Modify your portable off-camera flash studio for indoor studio sessions.
Consider the arrangement of light modifiers, backgrounds, and subjects to optimize the available space.
Outdoor and Environmental Adjustments:
Adapt your setup for outdoor shoots by considering factors such as wind, natural light, and uneven terrain.
Use sandbags or stabilizing tools to secure light stands in outdoor environments.
On-the-Go Adjustments for Events:
Create a streamlined setup for on-the-go events such as weddings or parties.
Optimize your off-camera flash studio for quick adjustments, ensuring flexibility and adaptability during fast-paced events.
Balancing Portability with Versatility in Off-Camera Flash Equipment
Multi-Purpose Lighting Modifiers:
Select lighting modifiers that serve multiple purposes to maximize versatility.
Invest in modifiers that can be used for different genres, from portraits to product photography.
Universal Mounting Systems:
Use universal mounting systems that accommodate various flash units and accessories.
Ensure compatibility with your equipment to streamline the setup process.
Compact Storage Solutions:
Consider compact and organized storage solutions for your off-camera flash equipment.
Use cases, bags, or rolling cases designed for photographers to keep your gear secure and easily transportable.
Modular and Expandable Equipment:
Opt for modular equipment that allows for expansion as needed.
Choose a system that accommodates additional lights, modifiers, or accessories while maintaining a compact and portable design.
Key Considerations for Building a Portable Off-Camera Flash Studio:
Weight and Ergonomics:
Prioritize lightweight and ergonomic designs when selecting portable off-camera flash equipment.
Consider the weight of each component and how it contributes to the overall ease of transportation.
Quick Setup and Breakdown:
Optimize your setup for quick assembly and breakdown.
Practice efficient setup and breakdown routines to minimize downtime during shoots.
Weather Resistance:
Consider weather-resistant options for off-camera flash equipment if shooting in various environmental conditions.
Choose gear that can withstand light rain or unexpected weather changes.
Investment in Quality:
Invest in high-quality, durable equipment to ensure longevity and reliable performance.
Quality gear may come at a higher initial cost but can save you time and frustration in the long run.
Building a portable off-camera flash studio requires thoughtful selection of equipment and a strategic approach to adaptation for different shooting environments. By finding the right balance between portability and versatility, you can seamlessly transition between studio, outdoor, and event settings, expanding your creative possibilities in diverse photography scenarios. Subsequent chapters will continue to explore advanced off-camera flash techniques and applications for a broad range of genres.
Advanced Off-Camera Flash Techniques
In this chapter, we will delve into advanced off-camera flash techniques, exploring the creative possibilities that arise when experimenting with multiple flash units. We’ll discuss strategies for achieving complex lighting setups, tips for maintaining a balanced and cohesive look with multiple light sources, and showcase case studies that highlight the creative potential of advanced off-camera flash techniques.
Experimenting with Multiple Off-Camera Flash Units for Complex Lighting Setups
Understanding Light Ratios:
Explore the concept of light ratios when using multiple off-camera flash units.
Experiment with different ratios to create a dynamic interplay of highlights and shadows in your images.
Selective Lighting:
Utilize multiple flash
units to selectively light specific elements in the scene.
Experiment with directing individual flashes to illuminate key subjects or areas, adding depth and visual interest.
Creating Separation and Depth:
Achieve separation and three-dimensionality in your images by strategically placing multiple off-camera flash units.
Experiment with cross-lighting and backlighting to create depth and emphasize contours.
Achieving a Balanced and Cohesive Look with Multiple Light Sources
Color Temperature Consistency:
Maintain consistent color temperatures across multiple flash units for a cohesive look.
Use color correction gels or adjust white balance settings to harmonize the lighting in your scenes.
Controlling Shadows and Highlights:
Develop techniques for controlling and shaping shadows when using multiple off-camera flash units.
Ensure that highlights are well-balanced to avoid overexposure and maintain a visually pleasing image.
Integrating Ambient Light:
Blend ambient light seamlessly with multiple off-camera flash sources.
Adjust flash power and modifiers to complement natural light, creating a harmonious and balanced overall lighting scheme.
Case Studies Illustrating the Creative Potential of Advanced Off-Camera Flash Techniques
Fashion Photography with Multi-Light Setups:
Explore how multiple off-camera flash units can be used to create dramatic and dynamic lighting in fashion photography.
Case studies will showcase the versatility of advanced techniques in highlighting textures, fabrics, and intricate details.
Portrait Storytelling with Controlled Lighting:
Witness how advanced off-camera flash setups can enhance storytelling in portrait photography.
Case studies will illustrate the use of multiple lights to convey mood, emotion, and narrative elements in portraiture.
Product Photography with Precision Lighting:
Examine the precision and control achievable in product photography through advanced off-camera flash techniques.
Case studies will demonstrate how multiple light sources can be precisely directed to showcase products with clarity and impact.
Architectural Photography with Balanced Illumination:
Discover how multiple off-camera flash units contribute to balanced illumination in architectural photography.
Case studies will highlight the ability to control highlights and shadows to emphasize architectural details and create visually striking compositions.
Key Considerations for Advanced Off-Camera Flash Techniques:
Planning and Visualization:
Plan your advanced off-camera flash setups in advance, considering the desired mood and visual impact.
Visualize the final result and plan the placement of each flash unit to achieve the intended lighting effects.
Consistent Testing and Refinement:
Conduct thorough testing and refinement of your advanced off-camera flash setups.
Ensure consistent results by fine-tuning flash power, angles, and modifiers during the testing phase.
Effective Communication with Subjects:
Communicate effectively with your subjects when using complex lighting setups.
Provide clear instructions and ensure collaboration to achieve the desired poses and expressions that complement the advanced lighting techniques.
Post-Processing Considerations:
Consider post-processing adjustments to fine-tune the overall look of images captured with advanced off-camera flash setups.
Use post-processing tools to further enhance the creative vision and address any minor discrepancies in lighting.
Environmental Flash Photography
As a photographer, the ability to master flash techniques in various outdoor environments is crucial. This chapter delves into the nuances of environmental flash photography, guiding you through the challenges of shooting in open spaces, overcoming harsh sunlight with flash, and capturing the enchanting moments of the golden hour with supplementary lighting.
Flash Photography in Outdoor and Challenging Environments
In this chapter, we will explore the nuances of flash photography in outdoor and challenging environments. Understanding the unique challenges posed by shooting outdoors, adapting to changing light conditions and unpredictable weather, and selecting the right flash equipment for outdoor photography are crucial aspects that will be covered.
Understanding the Unique Challenges Posed by Outdoor Shooting
Unpredictable Lighting Conditions:
Explore the challenges of dealing with constantly changing natural light outdoors.
Understand how factors such as sunlight direction, cloud cover, and reflections can impact your outdoor flash photography.
Wind and Environmental Factors:
Address challenges posed by wind and other environmental factors when shooting outdoors.
Learn techniques for stabilizing light stands and modifiers to ensure a secure setup in various conditions.
Subject and Background Integration:
Navigate the integration of subjects with diverse outdoor backgrounds.
Understand how to balance flash and ambient light to maintain a natural and cohesive look in your outdoor compositions.
Techniques for Adapting to Changing Light Conditions and Unpredictable Weather
Continuous Monitoring of Light Levels:
Develop the skill of continuously monitoring light levels in outdoor environments.
Adjust flash power and settings to compensate for changes in sunlight and shadows throughout the shoot.
Quick Adjustments for Cloud Cover:
Learn techniques for quick adjustments when shooting in variable cloud cover.
Adapt your flash settings to maintain consistent exposure when sunlight intensity fluctuates.
Utilizing Natural Reflectors:
Identify and utilize natural reflectors, such as water surfaces or light-colored surfaces, to enhance outdoor flash photography.
Integrate natural reflectors to bounce and diffuse flash, creating flattering and balanced lighting.
Weather-Sealed Equipment:
Consider the use of weather-sealed flash equipment to mitigate the impact of unexpected weather conditions.
Explore gear options that provide protection against light rain or drizzle during outdoor shoots.
Selecting the Right Flash Equipment for Outdoor Photography
Portable and Lightweight Flashes:
Opt for portable and lightweight flash units for ease of transportation in outdoor environments.
Consider battery-powered flashes for increased mobility and flexibility during outdoor shoots.
High-Power Options for Daylight Fill:
Choose flash units with sufficient power output for effective daylight fill.
Explore high-speed sync (HSS) capabilities to overcome shutter speed limitations when using flash in bright outdoor settings.
Versatile Modifiers for Outdoor Use:
Select versatile modifiers suitable for outdoor use, such as collapsible softboxes and umbrellas.
Prioritize modifiers that are easy to set up and adjust in outdoor conditions with varying terrains.
Off-Camera Flash Triggers:
Invest in reliable off-camera flash triggers with a sufficient range for outdoor shooting.
Ensure compatibility with your flash units and camera system for seamless communication.
Key Considerations for Successful Outdoor Flash Photography:
Flexibility and Adaptability:
Cultivate a mindset of flexibility and adaptability when shooting outdoors.
Be prepared to adjust your flash settings and equipment based on changing conditions to achieve optimal results.
Understanding Natural Light Dynamics:
Develop a deep understanding of natural light dynamics in outdoor environments.
Use this knowledge to strategically integrate artificial light and enhance the visual impact of your outdoor images.
Preparedness for Unpredictable Weather:
Be prepared for unpredictable weather by carrying weather-resistant gear and accessories.
Have a contingency plan for unexpected rain or adverse weather conditions to protect your equipment.
Experimentation and Creativity:
Embrace experimentation and creative exploration in outdoor flash photography.
Use outdoor environments as a canvas for innovative lighting techniques and compositions.
Overcoming Harsh Sunlight with Flash
In this chapter, we will explore the challenges posed by harsh sunlight in outdoor photography and discuss techniques for overcoming these challenges using fill flash. Understanding the impact of harsh sunlight on shadows and highlights, utilizing fill flash to balance exposure, and achieving natural-looking results when supplementing sunlight with flash will be key focal points.
The Impact of Harsh Sunlight on Shadows and Highlights in Outdoor Scenes
Contrast and Shadow Intensity:
Examine how harsh sunlight contributes to high contrast and intense shadows in outdoor scenes.
Understand the challenges of managing extreme light and shadow variations caused by direct sunlight.
Highlight Overexposure:
Explore the potential for overexposed highlights in areas directly illuminated by harsh sunlight.
Recognize the need for techniques to balance exposure and retain detail in highlight areas.
Color Temperature Considerations:
Consider the impact of harsh sunlight on color temperature, potentially resulting in warm tones.
Understand how fill flash can be used to balance color temperatures and achieve a natural and pleasing color balance.
Techniques for Using Fill Flash to Balance Exposure and Soften Shadows
Fill Flash for Shadow Reduction:
Learn how fill flash can effectively reduce harsh shadows cast by direct sunlight.
Explore techniques for positioning the fill flash to minimize shadows while maintaining a natural look.
Balancing Flash Power:
Experiment with adjusting the power of the fill flash to achieve a balanced exposure in harsh sunlight.
Understand the relationship between ambient light and flash power to control the overall lighting contrast.
Softening Shadows with Diffusers:
Utilize diffusers in conjunction with fill flash to soften shadows and create more even illumination.
Explore different types of diffusers, such as reflectors or softboxes, to achieve desired results.
Directionality of Fill Flash:
Consider the direction of the fill flash in relation to the sunlight to achieve a natural and convincing look.
Experiment with positioning the fill flash at different angles to complement the existing light direction.
Achieving Natural-Looking Results When Supplementing Sunlight with Flash
Matching Color Temperatures:
Use color correction gels to match the color temperature of the fill flash with the sunlight.
Achieve a seamless integration of flash and sunlight by ensuring consistent color temperatures.
Avoiding Overexposure and Harsh Shadows:
Implement exposure compensation to prevent overexposure when using fill flash in bright sunlight.
Be mindful of harsh shadows that may result from incorrect flash power or positioning.
Maintaining a Natural Lighting Ratio:
Strive for a natural lighting ratio between ambient sunlight and fill flash.
Avoid overpowering the scene with flash, aiming for a subtle enhancement that preserves the natural feel of the environment.
Key Considerations for Overcoming Harsh Sunlight with Fill Flash:
Understanding the Scene Dynamics:
Analyze the scene and identify areas affected by harsh sunlight, shadows, and potential overexposure.
Tailor your fill flash techniques based on the specific challenges presented by the outdoor environment.
Customizing Fill Flash Intensity:
Customize the intensity of fill flash based on the scene’s lighting conditions.
Use test shots and adjustments to find the optimal balance that enhances the image without appearing artificial.
Adaptability to Changing Sun Angles:
Be adaptable to changing sun angles and lighting conditions during the shoot.
Adjust your fill flash techniques to accommodate variations in sunlight direction and intensity.
Consistency in Lighting Style:
Maintain a consistent lighting style throughout your images when using fill flash.
Ensure that the application of fill flash complements the overall visual narrative of your outdoor photography series.
Capturing the Magic of Golden Hour with Supplementary Lighting
In this chapter, we’ll explore the enchanting qualities of golden hour and delve into techniques for enhancing your images during this magical time using supplementary lighting. Leveraging the warm and diffused light of golden hour for atmospheric portraits and creating a harmonious balance between ambient light and flash will be the focus of this chapter.
Leveraging the Warm and Diffused Light of Golden Hour for Atmospheric Portraits
Understanding Golden Hour Light:
Explore the unique qualities of light during the golden hour, characterized by warm tones and a soft, diffused glow.
Understand how the low angle of the sun during this time creates long shadows and adds dimension to your portraits.
Creating a Golden Hour Mood:
Learn how to capitalize on the mood-setting potential of golden hour light for atmospheric and emotive portraits.
Explore the interplay of warm light with natural elements to evoke a sense of magic and tranquility in your images.
Utilizing Backlighting for Effect:
Experiment with backlighting techniques during golden hour to create a halo effect and emphasize the subject’s contours.
Understand how to position your subject relative to the sun to achieve stunning and ethereal results.
Techniques for Enhancing Golden Hour Images with Supplementary Lighting
Fill Flash for Balanced Illumination:
Incorporate fill flash to balance the exposure during golden hour, especially when the sun creates strong shadows.
Explore techniques for using fill flash subtly to maintain the warm and natural feel of the golden hour light.
Creating Catchlights with Flash:
Utilize flash to create catchlights in the eyes of your subjects during golden hour.
Understand the impact of catchlights in adding life and sparkle to the eyes, enhancing the overall portrait.
Softening Shadows with Reflectors:
Integrate reflectors into your golden hour setup to soften shadows and provide gentle fill light.
Experiment with different reflector surfaces and positions to achieve the desired level of shadow softening.
Enhancing Warm Tones with Gels:
Use warming gels on your flash units to enhance and complement the warm tones of golden hour light.
Achieve color consistency and a harmonious balance between ambient and flash lighting.
Creating a Harmonious Balance Between Ambient Light and Flash During Golden Hour
Understanding Flash-to-Ambient Ratios:
Develop an understanding of flash-to-ambient light ratios during golden hour.
Adjust flash power to achieve a balanced blend that enhances the natural light without overpowering it.
Directionality and Angle of Flash:
Pay attention to the direction and angle of your flash in relation to the golden hour sunlight.
Experiment with off-camera flash positioning to create dimension and add depth to your golden hour portraits.
Maintaining a Natural Look:
Strive for a natural and authentic look in your golden hour portraits by avoiding overly stylized or artificial lighting.
Ensure that supplementary lighting enhances the existing beauty of golden hour rather than overshadowing it.
Key Considerations for Capturing the Magic of Golden Hour with Supplementary Lighting:
Scouting and Planning:
Scout locations and plan your shoots to take full advantage of the golden hour’s warm and diffused light.
Consider the direction of the sunlight and potential backgrounds to complement your desired aesthetic.
Working Quickly and Efficiently:
Recognize the limited time window of golden hour and work efficiently to capture your desired shots.
Have your lighting equipment set up and ready to go to maximize shooting time during this magical period.
Building a Connection with Your Subject:
Leverage the enchanting qualities of golden hour to create a relaxed and intimate atmosphere.
Build a connection with your subject to capture genuine expressions and emotions enhanced by the golden hour glow.
Post-Processing Considerations:
Consider minimal post-processing adjustments to preserve the natural beauty of golden hour portraits.
Enhance warmth and color balance subtly to complement the golden hour aesthetic.
Enhancing Environmental Portraits with Flash
In this chapter, we will explore the art of enhancing environmental portraits with flash. This involves using flash to highlight and accentuate subjects in outdoor environments, employing techniques to create compelling portraits in challenging light, and examining case studies that showcase successful integration of flash in diverse outdoor settings.
Using Flash to Highlight and Accentuate Subjects in Outdoor Environments
Subject Separation from the Background:
Explore techniques for using flash to separate subjects from complex outdoor backgrounds.
Understand how controlled lighting can draw attention to the subject and create a visual hierarchy.
Illuminating Facial Features:
Utilize flash to illuminate and accentuate facial features in environmental portraits.
Experiment with various flash angles and modifiers to achieve flattering lighting on the subject’s face.
Creating a Focal Point:
Understand the role of flash in creating a focal point within the composition.
Use controlled lighting to guide the viewer’s eye toward the subject and key elements of the scene.
Techniques for Creating Compelling Environmental Portraits in Challenging Light
Balancing Natural and Artificial Light:
Learn to balance ambient light with flash to maintain a natural look in environmental portraits.
Adjust flash power to complement existing light conditions and enhance the overall atmosphere.
Overcoming Harsh Sunlight and Shadows:
Address challenges posed by harsh sunlight and deep shadows in outdoor environments.
Implement fill flash to soften shadows and achieve a more balanced exposure.
Dynamic Lighting for Varied Scenes:
Adapt your flash techniques to different outdoor scenes, from open landscapes to dense foliage.
Explore dynamic lighting setups that suit the specific challenges presented by diverse environmental settings.
Case Studies Showcasing Successful Integration of Flash in Diverse Outdoor Settings
Urban Environmental Portraits:
Explore case studies of environmental portraits taken in urban settings.
Analyze how flash was used to enhance subjects amidst the complex textures and lighting conditions of urban environments.
Natural Landscapes and Wilderness:
Examine examples of environmental portraits captured in natural landscapes and wilderness.
Understand how flash was employed to highlight subjects while maintaining the integrity of the natural surroundings.
Portraits in Challenging Weather Conditions:
Explore case studies where flash was effectively utilized in challenging weather conditions.
Learn how to overcome rain, wind, or overcast skies to achieve captivating environmental portraits.
Key Considerations for Enhancing Environmental Portraits with Flash:
Understanding the Character of the Environment:
Analyze the unique characteristics of the outdoor environment before choosing flash techniques.
Consider elements such as architecture, natural features, and ambient lighting conditions.
Collaboration with the Subject:
Foster collaboration with your subject to capture authentic expressions and emotions.
Communicate the role of flash in enhancing the environmental portrait and creating a visually compelling image.
Adapting to Changing Conditions:
Be adaptable to changing outdoor conditions, including shifting sunlight and weather changes.
Adjust flash settings and positions to maintain a consistent and effective lighting approach.
Post-Processing Enhancements:
Consider post-processing techniques to fine-tune environmental portraits captured with flash.
Enhance color balance, contrast, and overall mood while preserving the natural feel of the outdoor setting.
Creating Dimension in Landscape Photography
In this chapter, we’ll explore techniques for adding depth and dimension to landscapes with off-camera flash. This involves enhancing details and textures in outdoor scenes using supplementary lighting, along with tips for achieving a balanced and natural look in flash-enhanced landscape photography.
Techniques for Adding Depth and Dimension to Landscapes with Off-Camera Flash
Creating Foreground Interest:
Explore the use of off-camera flash to illuminate elements in the foreground of a landscape.
Learn how to use controlled lighting to add interest and depth to the overall composition.
Highlighting Textures and Patterns:
Utilize flash to highlight textures and intricate patterns in natural features, such as rocks, foliage, or water.
Experiment with different flash angles and intensities to enhance the visual impact of detailed landscape elements.
Emphasizing Layers in the Landscape:
Develop techniques for using off-camera flash to emphasize distinct layers in a landscape, such as foreground, middle ground, and background.
Understand how controlled lighting can contribute to a three-dimensional feel in your landscape compositions.
Enhancing Details and Textures in Outdoor Scenes Using Supplementary Lighting
Directional Lighting for Texture Enhancement:
Experiment with directional lighting from off-camera flash to enhance the textures of surfaces in outdoor scenes.
Understand the impact of light direction on the perception of texture and detail.
Softening Harsh Shadows in Sunlit Landscapes:
Address challenges posed by harsh sunlight in landscapes by using flash to soften shadows.
Explore techniques for achieving a balanced exposure and preserving details in sunlit areas.
Controlling Reflections and Glare:
Utilize flash to control reflections and minimize glare on surfaces like water or glass in landscapes.
Learn how to position the flash to achieve optimal results in challenging reflective conditions.
Tips for Achieving a Balanced and Natural Look in Flash-Enhanced Landscape Photography
Matching Color Temperatures:
Use color correction gels to match the color temperature of the flash with ambient light in landscapes.
Achieve a harmonious and natural look by ensuring consistent color temperatures throughout the scene.
Balancing Flash Power with Ambient Light:
Adjust flash power to complement ambient light and maintain a natural balance in the landscape.
Avoid overpowering the scene with flash, aiming for a subtle enhancement that adds to the overall visual appeal.
Blend Flash and Ambient Light Seamlessly:
Develop techniques for seamlessly blending flash and ambient light in post-processing.
Ensure that the integration of flash enhances the landscape’s natural beauty rather than appearing artificial.
Key Considerations for Creating Dimension in Landscape Photography:
Study of Natural Light Dynamics:
Deepen your understanding of natural light dynamics in outdoor landscapes.
Identify opportunities to use flash to enhance specific features and aspects of the landscape.
Selective Lighting for Emphasis:
Practice selective lighting to emphasize specific elements or areas within the landscape.
Use off-camera flash strategically to guide the viewer’s attention and enhance the narrative.
Pre-visualization of Lighting Effects:
Develop the ability to pre-visualize the effects of off-camera flash on different landscape elements.
Plan your lighting approach based on the desired visual impact and mood of the landscape scene.
Experimentation and Adaptability:
Embrace experimentation with off-camera flash in various landscape settings.
Be adaptable to changing conditions and adjust your flash techniques based on the specific challenges presented by each landscape.
Flash Photography in Challenging Weather Conditions
In this chapter, we’ll explore the nuances of flash photography in challenging weather conditions. This involves overcoming rain, snow, and adverse elements with flash, protecting your flash equipment from the weather, and employing techniques to create dramatic and atmospheric images in less-than-ideal conditions.
Overcoming Rain, Snow, and Adverse Weather Conditions with Flash
Rain and Water Protection:
Explore protective measures for your flash equipment in rainy conditions, including rain covers and weather-sealed accessories.
Learn techniques for using flash in the rain, such as backlighting raindrops or creating reflections on wet surfaces.
Snow and Cold Weather Considerations:
Understand the challenges posed by snow and cold weather on flash performance.
Implement strategies for preventing snow accumulation on your flash and ensuring reliable operation in freezing temperatures.
Mitigating Wind Challenges:
Address the impact of strong winds on flash stability and light direction.
Explore techniques for positioning and securing your flash equipment in windy conditions.
Protecting Your Flash Equipment from the Elements
Weather-Sealed Flash Units:
Consider investing in weather-sealed flash units designed to withstand moisture and dust.
Understand the limitations and advantages of weather-sealed flashes for use in challenging weather conditions.
DIY Weather Protection:
Explore creative DIY solutions for protecting your flash equipment in adverse weather.
Develop makeshift covers or shields to safeguard your flash from rain, snow, or environmental elements.
Protecting Accessories and Modifiers:
Extend protection to flash modifiers and accessories, such as softboxes or umbrellas.
Invest in weather-resistant modifiers or use additional covers to shield these components from the elements.
Techniques for Creating Dramatic and Atmospheric Images in Challenging Weather
Utilizing Atmospheric Elements:
Embrace adverse weather conditions as an opportunity to add drama and atmosphere to your images.
Use rain, snow, or mist to enhance the visual impact of your photographs and create a unique mood.
Backlighting in Fog and Mist:
Leverage foggy or misty conditions to create atmospheric backlighting effects.
Experiment with flash placement to enhance the visibility of atmospheric elements and add depth to your images.
Capturing Action in Adverse Weather:
Use flash to freeze action in dynamic weather conditions, such as raindrops falling or snowflakes in motion.
Experiment with high-speed sync and flash duration settings to capture fast-paced moments in challenging weather.
Key Considerations for Flash Photography in Challenging Weather Conditions:
Safety and Equipment Maintenance:
Prioritize safety when shooting in adverse weather conditions, both for yourself and your equipment.
Implement proper maintenance practices to ensure the longevity of your flash equipment exposed to the elements.
Planning for Environmental Challenges:
Anticipate and plan for specific challenges presented by rain, snow, or adverse weather.
Adjust your shooting strategy and flash techniques based on the nature of the weather conditions.
Adaptability to Changing Weather:
Be adaptable to changing weather conditions during a shoot.
Have contingency plans for protecting your equipment and adjusting your flash techniques based on evolving weather patterns.
Nighttime Environmental Flash Photography
In this chapter, we’ll delve into the art of nighttime environmental flash photography. This involves techniques for illuminating nighttime scenes with flash, creating dynamic and visually stunning images in low-light conditions, and addressing safety considerations and precautions for nighttime flash photography.
Techniques for Illuminating Nighttime Scenes with Flash
Understanding Nighttime Lighting Challenges:
Explore the unique challenges presented by nighttime photography, including low ambient light and dynamic artificial lighting sources.
Understand how flash can be used to complement and enhance nighttime scenes.
Selective Illumination of Key Elements:
Develop techniques for selectively illuminating key elements in nighttime environments.
Use flash strategically to highlight specific subjects or areas while maintaining a balanced overall exposure.
Creating Natural-Looking Nighttime Lighting:
Achieve a natural and seamless look by matching the color temperature of your flash with the ambient light.
Experiment with gels and white balance settings to blend flash illumination with existing nighttime lighting.
Creating Dynamic and Visually Stunning Images in Low-Light Conditions
Long Exposure Techniques with Flash:
Explore the creative possibilities of combining long exposure with flash in nighttime photography.
Understand how to balance flash exposure with extended shutter speeds to capture both ambient and artificial light.
Lighting Nighttime Portraits:
Develop techniques for illuminating nighttime portraits with flash.
Experiment with different flash positions, modifiers, and intensities to achieve flattering and dynamic lighting.
Enhancing Urban Nightscapes:
Use flash to enhance the visual impact of urban nightscapes by illuminating architectural details or foreground elements.
Consider the interplay of artificial lights with flash to create visually stunning and cinematic images.
Safety Considerations and Precautions for Nighttime Flash Photography
Visibility and Awareness:
Prioritize visibility and awareness when working in low-light environments.
Use reflective gear or lighting to ensure your presence is known to others, especially in urban or public spaces.
Battery and Power Management:
Plan for extended shooting periods by ensuring your flash units and camera batteries are fully charged.
Carry additional batteries to avoid disruptions during nighttime shoots.
Equipment Security:
Be vigilant about the security of your equipment in low-light and potentially unfamiliar environments.
Consider using gear tethers or security measures to prevent theft or accidental damage.
Awareness of Surroundings:
Stay aware of your surroundings, especially when adjusting flash settings or moving equipment.
Minimize disturbances and respect the nighttime environment, particularly in natural or residential areas.
Key Considerations for Nighttime Environmental Flash Photography:
Scouting and Planning:
Scout locations during daylight to identify key elements and potential challenges.
Plan your compositions and flash setups in advance for efficient nighttime shooting.
Experimentation and Creativity:
Embrace experimentation to discover unique and creative ways to use flash in nighttime environments.
Adapt your techniques based on the specific qualities and character of each nighttime scene.
Post-Processing Enhancements:
Explore post-processing techniques to fine-tune nighttime flash images.
Adjust exposure, contrast, and color balance to achieve the desired mood and visual impact.
Creative Applications of Environmental Flash Techniques
In this chapter, we’ll explore the creative applications of environmental flash techniques in various outdoor settings. This involves applying flash techniques to street photography, capturing candid moments in urban environments, and pushing creative boundaries in unconventional outdoor settings.
Applying Environmental Flash Techniques to Street Photography
Dynamic Street Portraits with Flash:
Learn techniques for capturing dynamic and engaging street portraits using flash.
Experiment with different flash placements, angles, and intensities to create compelling visual narratives.
Freezing Motion in Street Scenes:
Explore the use of flash to freeze motion in busy street scenes.
Capture sharp and detailed images of subjects in motion, adding a dynamic element to your street photography.
Balancing Ambient Light in Urban Settings:
Develop skills in balancing ambient light with flash in urban environments.
Enhance the visibility of subjects while maintaining the gritty and authentic feel of urban street scenes.
Techniques for Capturing Candid Moments with Flash in Urban Environments
Natural-Looking Candid Lighting:
Utilize flash to illuminate candid moments in urban environments while maintaining a natural and unobtrusive look.
Experiment with diffusers or bounce techniques to achieve soft and flattering lighting in spontaneous situations.
Storytelling with Flash in Urban Contexts:
Use flash to enhance the storytelling aspect of your street photography.
Illuminate key elements in the frame to guide the viewer’s focus and convey a narrative within the chaotic urban setting.
Candid Street Portraits with Catchlights:
Master the art of capturing candid street portraits with catchlights in the subject’s eyes.
Use on-camera or off-camera flash strategically to add a sparkle to the eyes, bringing life and vibrancy to your candid portraits.
Pushing Creative Boundaries with Flash in Unconventional Outdoor Settings
Flash in Nature and Wilderness Photography:
Explore the application of flash in natural and wilderness settings for unconventional and visually striking images.
Use flash to highlight elements in the landscape or create dramatic effects in the great outdoors.
Flash in Abandoned or Industrial Spaces:
Push creative boundaries by using flash in abandoned buildings or industrial environments.
Experiment with creative lighting to bring out textures, shapes, and contrasts in unconventional outdoor spaces.
Flash in Recreational and Leisure Settings:
Apply flash techniques to capture dynamic and engaging images in recreational areas or during leisure activities.
Use controlled lighting to emphasize the joy and energy in outdoor settings, from parks to sports events.
Key Considerations for Creative Environmental Flash Techniques:
Adaptability to Changing Scenes:
Develop adaptability in using flash techniques across diverse outdoor scenes.
Be prepared to adjust your approach based on the specific characteristics of each setting.
Respecting Privacy and Consent:
Exercise sensitivity and respect when using flash in public spaces.
Be aware of privacy considerations and seek consent when photographing individuals in candid or public settings.
Pushing Boundaries Responsibly:
Push creative boundaries while maintaining a responsible and ethical approach.
Consider the impact of your flash techniques on the environment, subjects, and the overall narrative of your images.
Continuous Experimentation:
Embrace continuous experimentation to discover new and innovative ways to use flash in outdoor photography.
Push your creative limits and challenge conventional approaches to capture truly unique and compelling images.
Portrait Lighting Styles
Portraiture is an art form that hinges on the mastery of lighting. In this chapter, we explore various portrait lighting styles, from classic setups to low-key and high-key techniques. Understanding how to achieve flattering light for diverse subjects is essential for capturing the essence and personality of each individual.
Classic Portrait Lighting Setups with Flash
In this chapter, we’ll delve into classic portrait lighting setups using flash. This involves an introduction to key, fill, and hair lights in the traditional three-point lighting technique, techniques for creating dimension and shaping facial features, and fine-tuning classic setups for various facial structures and expressions.
Introduction to Key, Fill, and Hair Lights in Classic Three-Point Lighting
Key Light Essentials:
Understand the role of the key light as the primary light source in classic portrait lighting.
Explore different key light positions, such as Rembrandt, loop, and butterfly lighting, and their effects on facial features.
Fill Light for Balance:
Learn the importance of the fill light in controlling shadow intensity and maintaining a balanced lighting ratio.
Experiment with various fill light placements and modifiers to achieve the desired level of shadow fill.
Hair Light for Separation:
Introduce the hair light as a crucial element in classic three-point lighting.
Understand how the hair light adds separation and highlights the subject’s hair or shoulders, creating depth in the portrait.
Techniques for Creating Dimension and Shaping Facial Features
Sculpting with Shadows and Highlights:
Explore the art of sculpting with shadows and highlights to enhance the three-dimensional quality of the portrait.
Learn how controlled lighting can emphasize or soften facial features for a flattering effect.
Accentuating Facial Bone Structure:
Use classic portrait lighting setups to accentuate the natural bone structure of the face.
Experiment with light angles to highlight cheekbones, jawlines, and other defining features.
Creating Catchlights for Sparkling Eyes:
Understand the importance of catchlights in the eyes for adding life and sparkle to portraits.
Experiment with the placement of the key light to achieve captivating catchlights that draw the viewer’s attention.
Fine-Tuning Classic Setups for Various Facial Structures and Expressions
Adapting Lighting for Different Face Shapes:
Tailor classic portrait lighting setups to complement various face shapes, from round to oval or square.
Adjust light positions and ratios to flatter the unique characteristics of each subject.
Expressive Lighting for Varied Moods:
Explore how classic lighting setups can convey different moods and emotions in portraits.
Experiment with variations in key light intensity, fill light ratio, and shadow placement to match the desired mood.
Dynamic Adjustments for Expressive Portraits:
Fine-tune classic setups dynamically to capture a range of expressions, from serious and contemplative to joyful and animated.
Adjust lighting ratios and modifiers to convey the subject’s personality and emotional nuances.
Key Considerations for Classic Portrait Lighting with Flash:
Understanding Light Ratios:
Master the concept of light ratios in classic portrait lighting and its impact on facial contours.
Develop an intuitive sense for balancing light and shadow to achieve the desired aesthetic.
Modifier Selection for Softness or Contrast:
Experiment with different modifiers, such as softboxes, umbrellas, or grids, to control the quality of light.
Understand how modifier selection influences the softness or contrast of the portrait lighting.
Creating Consistency in Studio and On Location:
Adapt classic portrait lighting setups for both studio and on-location shoots.
Consider the challenges and advantages of each environment and adjust your lighting accordingly.
Personalizing Setups for Client Preferences:
Communicate with clients to understand their preferences for portrait lighting.
Customize classic setups to align with the client’s vision and the overall style of the portrait session.
Low-Key Lighting Techniques
In this chapter, we’ll explore the art of low-key lighting techniques using flash. This involves creating dramatic and moody portraits, effectively using shadows to emphasize specific facial features, and adjusting flash power and positioning for optimal low-key results.
The Art of Low-Key Lighting: Creating Dramatic and Moody Portraits
Understanding Low-Key Lighting:
Explore the characteristics and qualities that define low-key lighting in portrait photography.
Understand how low-key lighting contributes to a dramatic and moody aesthetic.
Embracing Contrast and Shadows:
Emphasize the role of contrast and shadows in low-key lighting setups.
Learn how controlled shadows contribute to the overall mood and intensity of low-key portraits.
Conveying Emotional Depth:
Use low-key lighting to convey emotional depth and evoke a sense of mystery or intensity.
Experiment with lighting angles and modifiers to enhance the emotional impact of low-key portraits.
Effective Use of Shadows to Emphasize Specific Facial Features
Sculpting with Controlled Shadows:
Master the technique of sculpting facial features with controlled shadows in low-key setups.
Experiment with different shadow placements to accentuate cheekbones, jawlines, and other defining features.
Highlighting Eyes and Expressions:
Utilize low-key lighting to draw attention to the eyes and facial expressions.
Explore the impact of subtle highlights and controlled shadows on the emotive quality of the portrait.
Controlling Background Shadows:
Address challenges related to background shadows in low-key setups.
Implement techniques to control and minimize distracting shadows on the background while maintaining the desired mood.
Adjusting Flash Power and Positioning for Optimal Low-Key Results
Flash Power and Intensity:
Understand the role of flash power in achieving the desired intensity of low-key lighting.
Fine-tune flash settings to control the balance between highlights and shadows in low-key portraits.
Positioning the Key Light for Drama:
Experiment with different key light positions to create dynamic and visually striking low-key portraits.
Understand how the angle and height of the key light impact the overall composition.
Balancing Fill Light in Low-Key Setups:
Explore the subtle use of fill light to control shadow density and maintain detail in low-key portraits.
Adjust the fill light to strike a balance between creating drama and preserving essential facial features.
Key Considerations for Low-Key Lighting with Flash:
Background Selection for Low-Key Portraits:
Choose appropriate backgrounds that complement the low-key aesthetic.
Consider the use of dark or textured backgrounds to enhance the mood of low-key portraits.
Paying Attention to Clothing and Props:
Guide subjects in choosing clothing and props that align with the low-key style.
Ensure that clothing and accessories contribute to the overall mood without distracting from the subject.
Mastering the Play of Highlights and Shadows:
Develop an understanding of the interplay between highlights and shadows in low-key lighting.
Experiment with different lighting ratios and modifiers to achieve the desired level of contrast.
Consistency in Low-Key Setups:
Ensure consistency in low-key lighting setups for a cohesive series or session.
Fine-tune your approach based on the unique characteristics of each subject while maintaining a consistent overall style.
High-Key Lighting Techniques
In this chapter, we’ll explore high-key lighting techniques using flash to achieve a bright and airy look. This involves techniques for reducing shadows and creating a soft, flattering appearance, as well as fine-tuning high-key setups for different skin tones and clothing choices.
Achieving a Bright and Airy Look with High-Key Lighting
Understanding High-Key Lighting:
Explore the characteristics and qualities that define high-key lighting in portrait photography.
Understand how high-key lighting contributes to a bright, clean, and ethereal aesthetic.
Balancing Light for High-Key Portraits:
Master the art of balancing light to achieve a high-key look while maintaining detail and dimension.
Experiment with the intensity and placement of key and fill lights to create a seamless, evenly lit background.
Creating a Soft and Flattering Appearance:
Use high-key lighting to create a soft and flattering appearance, minimizing harsh shadows.
Experiment with diffusers and modifiers to achieve a gentle, wrap-around light that enhances facial features.
Techniques for Reducing Shadows and Creating Soft Light
Minimizing Shadows in High-Key Setups:
Address challenges related to shadows in high-key lighting.
Implement techniques to minimize shadows while maintaining a bright and even illumination across the subject.
Softening Light Sources:
Explore methods for softening light sources to achieve a gentle and diffused quality of light.
Use softboxes, umbrellas, or bounce techniques to create a flattering and soft appearance in high-key portraits.
Controlling Contrast for a Dreamy Look:
Fine-tune the contrast levels in high-key setups to achieve a dreamy and luminous quality.
Adjust lighting ratios to create a seamless transition between highlights and shadows for a glowing effect.
Fine-Tuning High-Key Setups for Different Skin Tones and Clothing Choices
Adapting High-Key Lighting for Diverse Skin Tones:
Tailor high-key lighting setups to complement a variety of skin tones.
Adjust color temperature and lighting ratios to ensure accurate and flattering representation across different ethnicities.
Clothing and Background Coordination:
Guide subjects in selecting clothing that complements the high-key style.
Ensure a harmonious coordination between clothing choices and the background to maintain a cohesive look.
Balancing Brightness for a Consistent Appearance:
Achieve consistency in brightness levels across the entire frame in high-key portraits.
Pay attention to exposure settings to avoid overexposed highlights while maintaining an overall bright appearance.
Key Considerations for High-Key Lighting with Flash:
Background Selection for High-Key Portraits:
Choose backgrounds that contribute to the bright and airy atmosphere of high-key portraits.
Experiment with neutral tones or light-colored backgrounds to enhance the overall aesthetic.
Hair and Rim Lighting in High-Key Setups:
Introduce subtle hair or rim lighting to separate the subject from the background in high-key portraits.
Experiment with controlled highlights to add dimension without creating distracting shadows.
Consistency in High-Key Setups:
Ensure consistency in high-key lighting setups for a cohesive series or session.
Fine-tune your approach based on the unique characteristics of each subject while maintaining a consistent overall style.
Butterfly, Rembrandt, and Split Lighting
In this chapter, we’ll explore three classic lighting techniques—Butterfly, Rembrandt, and Split lighting—using flash. This involves understanding the characteristics of each lighting style and its applications, appreciating the artistic impact of Rembrandt lighting for classic and timeless portraits, and mastering techniques for achieving striking and symmetrical split lighting.
Understanding the Characteristics of Butterfly Lighting and Its Applications
Defining Butterfly Lighting:
Explore the distinctive characteristics of butterfly lighting, characterized by a central, symmetrical shadow under the nose.
Understand how butterfly lighting creates a flattering and even illumination on the face.
Applications in Portrait Photography:
Learn about the applications of butterfly lighting in portrait photography.
Experiment with different variations of butterfly lighting for various moods and styles.
Mastering Butterfly Lighting with Flash:
Understand the role of flash in achieving butterfly lighting.
Fine-tune flash positioning and intensity to create a well-balanced and aesthetically pleasing butterfly lighting setup.
The Artistic Impact of Rembrandt Lighting in Creating Classic and Timeless Portraits
Defining Rembrandt Lighting:
Explore the characteristics of Rembrandt lighting, characterized by a small, triangle-shaped highlight on the cheek opposite the light source.
Understand the artistic impact of Rembrandt lighting in creating classic and timeless portraits.
Creating Depth and Drama:
Learn how Rembrandt lighting adds depth and drama to portraits by emphasizing shadow and highlight areas.
Experiment with controlling the position of the key light to achieve the desired Rembrandt lighting effect.
Enhancing Emotional Connection:
Explore how Rembrandt lighting enhances the emotional connection in portraits.
Use Rembrandt lighting to convey mood and create portraits with a sense of intimacy and character.
Techniques for Achieving Striking and Symmetrical Split Lighting
Defining Split Lighting:
Understand the characteristics of split lighting, characterized by a clear division between the illuminated and shadowed sides of the face.
Explore the visual impact of split lighting for creating bold and high-contrast portraits.
Using Flash for Symmetry:
Master the use of flash to achieve symmetrical split lighting.
Experiment with flash positioning and modifiers to create a sharp and defined split between light and shadow.
Applications in Dramatic Portraiture:
Explore the applications of split lighting in dramatic and impactful portraiture.
Use split lighting to create portraits with a strong and memorable visual presence.
Key Considerations for Butterfly, Rembrandt, and Split Lighting with Flash:
Modifying Light for Variation:
Experiment with different modifiers to modify the quality and direction of light in each lighting style.
Understand how modifiers influence the mood and aesthetic of the final image.
Adapting to Different Subjects:
Tailor each lighting style to suit the unique characteristics of different subjects.
Adjust flash settings and positioning based on factors such as facial structure and expressions.
Mastering the Art of Shadows:
Develop an understanding of how shadows contribute to the visual impact of each lighting style.
Experiment with controlling the size and shape of shadows to achieve desired effects.
Consistency in Lighting Setups:
Ensure consistency in lighting setups when incorporating multiple styles within a series or session.
Fine-tune flash settings and positions to maintain a cohesive look across different lighting techniques.
Flattering Light for Diverse Subjects
In this chapter, we’ll delve into techniques for creating flattering light for diverse subjects using flash. This involves accentuating unique facial features and characteristics, adapting lighting setups for different ages, skin tones, and genders, as well as considering portrait lighting for individuals with glasses, hats, or distinctive accessories.
Techniques for Accentuating Unique Facial Features and Characteristics
Celebrating Diversity:
Embrace the unique qualities of each individual’s face and features.
Explore techniques that accentuate distinctive characteristics, such as facial structure, expressions, and textures.
Highlighting Character:
Use lighting to highlight the character and personality of your subjects.
Experiment with different angles and intensities of light to capture the essence of each person.
Customizing Lighting for Facial Shapes:
Tailor lighting setups to complement various facial shapes.
Adjust the position of key and fill lights to enhance and flatter specific facial features.
Adapting Lighting Setups for Different Ages, Skin Tones, and Genders
Youthful and Radiant Lighting for All Ages:
Develop techniques for creating youthful and radiant portraits across different age groups.
Adjust lighting ratios and modifiers to achieve a fresh and vibrant look suitable for all ages.
Understanding and Celebrating Skin Tones:
Appreciate the diversity of skin tones and adapt lighting setups accordingly.
Experiment with color temperature adjustments to complement and enhance the natural beauty of various skin tones.
Gender-Inclusive Lighting Approaches:
Consider gender-inclusive lighting approaches that celebrate the unique qualities of each individual.
Develop lighting setups that cater to a range of gender expressions and preferences.
Portrait Lighting Considerations for Individuals with Glasses, Hats, or Distinctive Accessories
Handling Glare and Reflections in Glasses:
Address challenges related to reflections and glare when photographing individuals wearing glasses.
Experiment with angles and positioning to minimize reflections and maintain eye contact.
Illuminating Faces with Hats and Headwear:
Adapt lighting setups for individuals wearing hats or headwear.
Explore techniques to ensure proper illumination of facial features while preserving the style of the accessory.
Highlighting Distinctive Accessories:
Use lighting to highlight and showcase distinctive accessories.
Experiment with accent lighting or specific modifiers to draw attention to accessories without overwhelming the portrait.
Key Considerations for Creating Flattering Light for Diverse Subjects with Flash:
Customizing Lighting for Individual Preferences:
Communicate with subjects to understand their preferences for lighting and overall aesthetic.
Tailor lighting setups to align with the comfort and vision of each person being photographed.
Adapting to Various Environments:
Consider the environmental context when planning lighting setups for diverse subjects.
Adjust flash settings and modifiers to accommodate different shooting locations and conditions.
Consistency in Lighting Style Across a Series:
Maintain consistency in lighting style and quality when photographing a series of diverse subjects.
Fine-tune flash settings to ensure a cohesive and visually appealing collection of portraits.
Creative Applications of Portrait Lighting
In this chapter, we’ll dive into the realm of creative and unconventional portrait lighting setups using flash. This involves exploring innovative techniques to add flair, atmosphere, and storytelling to portrait images. We’ll also delve into the use of colored gels to introduce vibrant and expressive elements to your portraits.
Exploring Creative and Unconventional Lighting Setups for Portraits
Breaking Conventions:
Challenge traditional lighting norms and explore unconventional setups.
Experiment with unique angles, multiple light sources, and non-traditional modifiers to create visually striking portraits.
Play of Shadows and Highlights:
Embrace the play of shadows and highlights to add drama and depth to portraits.
Experiment with dynamic lighting ratios and positions to create bold and impactful visual compositions.
Incorporating Environmental Elements:
Integrate environmental elements into your lighting setups for context and storytelling.
Use the surroundings to enhance the narrative and add a layer of uniqueness to your portrait photography.
Using Colored Gels to Add Flair and Atmosphere to Portrait Images
Understanding the Impact of Color:
Explore the psychological and emotional impact of different colors in portrait photography.
Understand how color can influence mood, atmosphere, and the overall feel of an image.
Applying Colored Gels Creatively:
Experiment with colored gels to introduce a spectrum of hues to your portraits.
Use gels on key, fill, or background lights to add flair and a touch of artistic expression to your images.
Creating Harmonious Color Schemes:
Develop an understanding of color theory to create harmonious and visually pleasing color schemes.
Experiment with complementary or analogous color combinations to achieve a balanced and cohesive look.
Techniques for Creating Mood and Storytelling Through Innovative Lighting
Storytelling with Light:
Use lighting to tell a narrative and convey emotions in your portraits.
Experiment with lighting patterns and intensities to evoke specific moods and enhance the storytelling aspect of your images.
Playing with Shadows for Drama:
Leverage shadows creatively to add a sense of mystery and drama.
Experiment with controlled shadow patterns to create visual interest and intrigue.
Highlighting Points of Interest:
Identify and accentuate points of interest in your portraits using strategic lighting.
Experiment with selective lighting to draw attention to specific features, accessories, or expressions.
Key Considerations for Creative Portrait Lighting with Flash:
Balancing Creativity with Flattery:
Strive for a balance between creative experimentation and flattering lighting.
Ensure that unconventional setups enhance the aesthetic without compromising the overall appeal of the portrait.
Tailoring Creative Setups to Individual Styles:
Communicate with subjects to understand their preferences for creative and unconventional portrait lighting.
Adapt your approach to align with the individual style and vision of each person being photographed.
Consistency in Creative Series:
Maintain consistency in creative lighting setups when photographing a series of portraits.
Fine-tune flash settings to achieve a cohesive and visually appealing collection of innovative portraits.
Balancing Flash with Ambient Light in Portraiture
In this chapter, we’ll explore the art of balancing flash with ambient light in portraiture. This involves mastering techniques to integrate flash seamlessly with natural light, achieving a balanced and cohesive appearance in mixed-lighting scenarios. Case studies will be used to illustrate successful examples of achieving harmony between flash and ambient light in portraiture.
Techniques for Integrating Flash with Natural Light for a Balanced Look
Understanding Ambient Light:
Develop a deep understanding of ambient light, considering factors such as color temperature, direction, and intensity.
Recognize the unique qualities of natural light in different environments and times of day.
Determining Flash Power and Position:
Experiment with flash power and positioning to complement rather than overpower ambient light.
Use flash as a fill light to lift shadows and add a subtle boost to existing natural light.
Adjusting White Balance for Consistency:
Fine-tune white balance settings to ensure a consistent color temperature between flash and ambient light.
Avoid color imbalances by adapting to the prevailing lighting conditions.
Achieving a Natural and Cohesive Appearance in Mixed-Lighting Scenarios
Identifying Mixed-Lighting Challenges:
Recognize common challenges associated with mixed lighting, such as color shifts and uneven illumination.
Develop an awareness of potential issues to address during the planning and execution of a portrait session.
Harmonizing Color Temperatures:
Use color correction techniques to harmonize the color temperatures of flash and ambient light.
Adjust color gels on the flash to match or complement the color of the ambient light sources.
Controlling Contrast for a Unified Look:
Control the contrast between flash and ambient light to achieve a unified and natural appearance.
Experiment with flash modifiers and settings to soften or enhance the contrast based on the desired aesthetic.
Case Studies Illustrating Successful Balance Between Flash and Ambient Light in Portraiture
Outdoor Portraiture at Golden Hour:
Explore a case study showcasing the balance between flash and the warm, diffused light of golden hour.
Learn techniques for preserving the magic of the golden hour while adding subtle fill light with flash.
Indoor Portraiture with Window Light:
Dive into a case study highlighting the integration of flash with window light in indoor portraiture.
Understand how to use flash to complement existing light sources and create a natural and flattering look.
Nighttime Portraits with Artificial and Ambient Light:
Explore a case study featuring nighttime portraits with a combination of flash and ambient city lights.
Learn how to balance flash exposure with the ambient glow of cityscapes for striking and atmospheric portraits.
Key Considerations for Balancing Flash with Ambient Light in Portraiture:
Observing and Adapting to Changing Conditions:
Stay attentive to changes in ambient light conditions and adjust flash settings accordingly.
Develop the ability to adapt in real-time to evolving lighting scenarios during a portrait session.
Preserving the Mood and Atmosphere:
Prioritize the preservation of the mood and atmosphere created by ambient light.
Use flash as a subtle enhancement rather than a dominant light source to maintain the desired ambiance.
Consistency Across a Series of Portraits:
Maintain consistency in the balance between flash and ambient light when photographing a series of portraits.
Fine-tune flash settings to ensure a cohesive and visually appealing collection of images.
Portrait Lighting for Group Photos
In this chapter, we’ll delve into the intricacies of lighting group photos using flash. This involves developing strategies for lighting groups of varying sizes, ensuring consistency in lighting across multiple subjects, and employing techniques to avoid common pitfalls in group portrait lighting.
Strategies for Lighting Groups of Varying Sizes with Flash
Group Size Considerations:
Understand the impact of group size on lighting requirements.
Tailor your flash setup based on the number of individuals in the group to ensure even illumination.
Positioning Multiple Lights:
Experiment with multiple flash units strategically positioned to cover the entire group.
Use a combination of key, fill, and backlighting to achieve a balanced and well-lit group composition.
Modifying Light for Consistent Coverage:
Utilize large modifiers or diffusers to create even and soft illumination across the entire group.
Adjust the height and angle of light sources to minimize shadows and create flattering lighting for each group member.
Creating Consistency in Lighting Across Multiple Subjects
Balancing Flash Power:
Set flash power levels to achieve consistent lighting across all individuals in the group.
Use light meters or test shots to ensure uniform exposure for every group member.
Understanding Group Dynamics:
Consider the arrangement of individuals within the group and their relative distances from the flash source.
Adjust flash settings to accommodate variations in distance and maintain consistent lighting for all subjects.
Harmonizing Color Temperatures:
Pay attention to color temperature consistency when using multiple flash units.
Employ color correction techniques or gels to ensure uniformity in the color of light falling on each group member.
Techniques for Avoiding Common Pitfalls in Group Portrait Lighting
Avoiding Overlapping Shadows:
Position lights to minimize overlapping shadows, especially in larger groups.
Experiment with the placement of individuals to prevent shadows from falling on others within the group.
Preventing Uneven Illumination:
Address issues of uneven illumination, ensuring that every group member receives adequate light.
Adjust flash power, modifiers, and positioning to eliminate hot spots or areas of underexposure.
Managing Reflections and Glare:
Be mindful of reflective surfaces, accessories, or eyeglasses that may cause unwanted reflections.
Adjust the angle and intensity of light sources to minimize glare and ensure clear visibility of each group member.
Key Considerations for Portrait Lighting in Group Photos with Flash:
Communication and Coordination:
Communicate with the group to ensure everyone is well-positioned and visible.
Coordinate with individuals to address any specific concerns related to lighting or positioning.
Flexibility in Lighting Setups:
Be prepared to adapt lighting setups based on the group’s composition and dynamics.
Develop versatile setups that can be modified for different group sizes and arrangements.
Consistency Across Group Series:
Maintain consistency in lighting style and quality when photographing a series of group portraits.
Fine-tune flash settings to ensure a cohesive and visually appealing collection of group images.
Specialized Flash Techniques
In this chapter, we delve into specialized flash techniques that add a layer of creativity and uniqueness to your photography. From capturing intricate details in macro photography to freezing motion with high-speed sync and exploring the enchanting world of light-painting, these techniques will open new dimensions in your photographic repertoire.
Macro Photography with Flash
Macro photography offers a unique and intimate perspective on the world, capturing the intricate details of small subjects. This section focuses on the challenges specific to macro photography, providing techniques to effectively use flash in illuminating small subjects without overpowering them, and offering tips for achieving sharp and well-lit macro images with controlled lighting.
Understanding the Challenges of Lighting in Macro Photography
Macro photography presents distinct challenges, primarily due to the close proximity to the subject. Understanding these challenges is crucial for successful macro flash photography:
Limited Depth of Field: Macro photography often involves working with extremely shallow depth of field. Flash can help illuminate the subject uniformly, allowing for increased depth and clarity.
Reduced Working Distance: The close working distance in macro photography limits the positioning of lights. Flash provides a compact and flexible solution to introduce controlled lighting.
Subject Sensitivity: Small subjects can be sensitive to strong light. Proper flash techniques ensure that the subject is illuminated adequately without causing harm or disturbance.
Techniques for Using Flash in Macro Photography
Diffusion and Softening: Attach diffusers or modifiers to the flash to soften and diffuse the light. This helps eliminate harsh shadows and create a more flattering and natural look.
Off-Camera Flash: Use off-camera flash to introduce directional lighting. This technique allows for creative shadow play and highlights the textures of the subject.
Fill Flash: Combine ambient light with fill flash to balance the exposure. This technique ensures that the subject is well-lit while maintaining the ambient lighting of the background.
Adjusting Flash Power: Macro subjects may require lower flash power to avoid overexposure. Experiment with flash power settings to achieve the desired lighting intensity.
Tips for Achieving Sharp and Well-Lit Macro Images with Controlled Lighting
Stabilization: Use a sturdy tripod to eliminate camera shake, ensuring sharp images, especially in low-light conditions.
Manual Focus: In macro photography, manual focus is often preferred for precision. Take your time to focus accurately on the most critical areas of the subject.
Focus Stacking: For increased depth of field, consider focus stacking by combining multiple images with different focus points in post-processing.
Balancing Ambient Light: Pay attention to ambient light and adjust flash power accordingly. Balancing the two sources of light can result in a more natural and visually pleasing image.
Experiment with Angles: Explore different angles and positions for the flash to highlight specific details and textures of the subject creatively.
Freezing Motion with High-Speed Sync
The ability to freeze motion in photography is essential for capturing dynamic and fast-paced scenes. This section focuses on the limitations of standard flash sync speeds, introduces the principles and applications of high-speed sync (HSS), and provides techniques for effectively freezing fast-paced action with flash in various scenarios.
Exploring the Limitations of Standard Flash Sync Speeds
Sync Speed Constraints: Standard flash sync speeds are typically limited to a specific shutter speed (e.g., 1/200 or 1/250 seconds). Beyond this speed, the camera’s shutter may block part of the frame during exposure, resulting in unevenly lit images.
Challenges in Outdoor Lighting: Shooting in bright outdoor conditions can be restrictive due to the limitations of standard sync speeds. To achieve balanced exposures, photographers may need to use small apertures, limiting creative control over depth of field.
Understanding the Principles and Applications of High-Speed Sync
Overcoming Sync Speed Limitations: High-speed sync (HSS) technology enables flash units to synchronize with the camera at shutter speeds beyond the standard limit. This allows photographers to use larger apertures, control depth of field, and shoot in bright conditions without compromising exposure.
Pulse and Strobe Technology: In HSS, the flash emits a series of rapid pulses or strobes during the entire duration of the exposure. This ensures even illumination across the frame, eliminating issues associated with the shutter blocking part of the image.
Techniques for Freezing Fast-Paced Action with Flash in Various Scenarios
Sports and Action Photography: Utilize high-speed sync to freeze the motion of athletes or fast-moving subjects. This technique allows for crisp and well-lit images, even when using a fast shutter speed to capture the action.
Environmental Portraits: Incorporate HSS to capture dynamic portraits in outdoor settings. This is particularly useful when shooting in bright sunlight, allowing for better subject isolation and creative control.
Dance and Performance Photography: Freeze the motion of dancers or performers using high-speed sync. This ensures sharpness in fast movements and allows for creative exploration of lighting effects.
Creative Use of Shallow Depth of Field: HSS enables photographers to use wider apertures for a shallow depth of field while maintaining proper exposure. This creative use of depth of field can add visual interest and emphasis to specific elements in the frame.
Balancing Ambient Light: Experiment with the balance between ambient light and flash output when using HSS. This technique allows for natural-looking images while still freezing motion in challenging lighting conditions.
Light-Painting Techniques for Unique Effects
Light-painting is a captivating technique that allows photographers to add a touch of magic and creativity to their images. In this section, we’ll explore the art of light-painting, its versatile creative applications, the tools and techniques involved, and provide a step-by-step guide to help you create stunning and surreal images through the enchanting practice of painting with light.
The Art of Light-Painting and Its Creative Applications
Definition of Light-Painting: Light-painting involves selectively illuminating or painting light onto a scene during a long exposure. This technique allows for the creation of ethereal and otherworldly effects.
Creative Applications:
Enhancing Nightscapes: Light-painting can be used to highlight specific elements in a nighttime scene, adding drama and depth.
Creating Light Trails: By moving a light source during a long exposure, you can generate dynamic and abstract light trails.
Illuminating Subjects: Light-painting is an excellent method for selectively illuminating specific subjects in a dark environment.
Tools and Techniques for Adding Light Selectively
Light Sources:
Flashlights: Handheld flashlights with adjustable intensity are commonly used for precise light-painting.
LED Panels: Larger light sources such as LED panels can be employed for broader coverage.
Gels and Filters: Adding colored gels or filters to your light sources can introduce a creative and surreal ambiance.
Modifiers and Tools:
DIY Tools: Create your own light-painting tools using everyday materials, such as cardboard stencils or custom shapes to control light direction.
Fiber Optics: Attach fiber optic brushes to your light source for intricate and delicate light trails.
Camera Settings:
Long Exposure: Light-painting typically requires longer exposure times, ranging from a few seconds to several minutes.
Low ISO: Keep your ISO low to maintain image quality and reduce noise.
Step-by-Step Guide to Light-Painting
Choose the Right Scene:
Select a scene with interesting elements that can be accentuated with light-painting.
Set Up Your Camera:
Mount your camera on a sturdy tripod to ensure stability during the long exposure.
Set a low ISO and choose a small aperture for increased depth of field.
Frame the Shot:
Compose your shot and focus on the elements you intend to paint with light.
Begin the Exposure:
Start the exposure and use your selected light source to paint or highlight specific areas.
Experiment and Refine:
Try different light-painting techniques, movements, and colors.
Refine your approach based on the feedback from the camera’s LCD screen.
Review and Adjust:
Review the initial results and make adjustments to your technique or composition as needed.
Combine Multiple Exposures:
For complex scenes, consider combining multiple light-painted exposures in post-processing to achieve the desired effect.
Using Flash for Texture and Detail Enhancement
Texture and intricate details can add depth and visual interest to your photographs. This section explores the use of flash to enhance texture and details in various subjects, providing techniques for controlled flash application and revealing the beauty of intricate patterns and surfaces. Additionally, case studies will illustrate successful texture enhancement with flash.
Enhancing Texture and Details with Controlled Flash
Identifying Subjects with Intricate Details:
Choose subjects with textures, patterns, or intricate details that you want to emphasize.
Understanding Flash as a Tool for Enhancement:
Flash can be used as a controlled light source to reveal fine details and textures that might be lost in natural or ambient light.
Techniques for Controlled Flash Application:
Employ off-camera flash to create directional lighting that enhances textures.
Experiment with different flash angles to cast shadows, bringing out details and creating depth.
Use diffusers and modifiers to soften the light, preventing harsh shadows that may obscure textures.
Using Flash to Reveal Intricate Patterns and Surfaces
Macro Photography Techniques:
For small subjects with intricate details, such as flowers or insects, use a macro lens.
Position the flash to illuminate the subject without creating harsh shadows.
Product and Still Life Photography:
Enhance the textures of products or still life arrangements by carefully directing the flash to highlight specific details.
Experiment with diffusers to achieve a balance between sharpness and softness.
Architectural Details:
Capture the textures of architectural elements by using off-camera flash to create dimension and reveal intricate patterns.
Consider adjusting flash power to balance ambient light and enhance details.
Case Studies Illustrating Successful Texture Enhancement with Flash
Portrait Photography:
Case study: Using controlled flash to accentuate skin texture in a portrait without causing harsh highlights or shadows.
Nature and Wildlife Photography:
Case study: Employing flash to reveal the intricate patterns on the feathers of a bird without disturbing the natural lighting conditions.
Art and Sculpture Photography:
Case study: Capturing the fine details and textures of sculptures by strategically positioning flash units for controlled illumination.
Textured Surfaces in Urban Environments:
Case study: Enhancing the textures of textured walls or street surfaces in urban photography by carefully applying off-camera flash.
Macro Floral Photography:
Case study: Revealing the delicate details and textures of flower petals using macro techniques and controlled flash.
Creating Dramatic Silhouettes with Flash
Silhouettes can be powerful and evocative elements in photography, and incorporating flash into the mix adds an extra layer of drama and impact. In this section, we’ll explore techniques for using flash to create striking silhouettes, achieving a balance between flash exposure and ambient light for impactful results, and provide tips for choosing the right angles and poses for silhouette photography.
Techniques for Using Flash to Create Striking Silhouettes
Underexposing the Background:
Set your camera to underexpose the ambient light, rendering the background dark or even black.
This creates the foundation for a silhouette, where the subject becomes a dark outline against the brighter background.
Positioning the Flash:
Place the flash behind or to the side of the subject to avoid illuminating the front. This ensures that the subject remains in shadow, forming a clear silhouette.
Adjusting Flash Power:
Experiment with the power of the flash to achieve the desired level of detail in the silhouette. Too much power may fill in the subject, while too little may result in a lack of definition.
Balancing Flash Exposure with Ambient Light for Impactful Results
Setting the Flash Output:
Control the flash output to complement the underexposed background while maintaining the shape and form of the subject.
Understanding the Inverse Square Law:
Consider the distance between the flash and the subject, as the Inverse Square Law dictates that light intensity decreases with distance. Use this knowledge to control the spread of light.
Mixing Flash with Natural Light:
Experiment with different ratios of flash to ambient light to achieve a balance that enhances the drama of the silhouette.
Tips for Choosing the Right Angles and Poses for Silhouette Photography
Emphasizing Distinctive Shapes:
Choose subjects with clear and recognizable shapes that will be visually interesting even in silhouette.
Experiment with poses that emphasize the subject’s distinctive features.
Dynamic Poses and Angles:
Encourage dynamic poses that create interesting shapes and lines.
Experiment with shooting from different angles to find the most compelling composition.
Utilizing Environmental Elements:
Incorporate environmental elements that complement the silhouette, such as interesting architecture or natural surroundings.
Experiment with backlighting to create a halo effect around the subject.
Considering Negative Space:
Use negative space to enhance the impact of the silhouette. Ensure there is enough space around the subject to highlight its shape.
Flash Techniques for Water Droplet Photography
Water droplet photography presents a mesmerizing canvas for capturing the beauty of transient moments. In this section, we’ll explore how controlled flash techniques can enhance the details and freezing motion in water droplet photography. We’ll delve into specific techniques and tools to achieve stunning images that freeze the elegance of each droplet in time.
Capturing the Beauty of Water Droplets with Controlled Flash
Understanding the Challenge:
Water droplet photography requires precise timing to capture the ephemeral shapes and patterns created by falling or colliding droplets.
Role of Controlled Flash:
Controlled flash provides the necessary illumination to freeze motion, allowing for sharp and detailed images of the water droplets.
Synchronization with Droplet Release:
Synchronize the flash with the moment the droplets are released or collide. This ensures that each droplet is illuminated at the peak of its motion.
Techniques for Freezing Motion and Enhancing Details
Fast Flash Duration:
Use a flash unit with a fast duration to freeze the motion of fast-falling droplets. This ensures that each droplet is sharply captured without motion blur.
Multiple Flash Units:
Employ multiple flash units to provide consistent and directional lighting. This helps reveal the intricate details and textures of the water droplets.
Diffusion for Soft Lighting:
Attach diffusers or modifiers to the flash to soften the light, preventing harsh shadows and creating a more aesthetically pleasing illumination of the droplets.
Experimenting with Color Gels:
Add a creative touch by using color gels on the flash units. Experiment with different colors to enhance the mood and atmosphere of your water droplet images.
Tools and Setups for Achieving Stunning Water Droplet Images
Droplet Release Mechanism:
Use a controlled mechanism, such as a dropper or a controlled water source, to release droplets consistently. This ensures predictability for capturing specific moments.
Backdrop Selection:
Choose an appropriate backdrop or surface to complement the water droplets. A reflective or colorful background can add visual interest to the images.
Macro Photography Equipment:
Employ macro lenses or extension tubes to capture the fine details of the water droplets. Get close to reveal intricate patterns and textures.
Sturdy Tripod and Remote Shutter Release:
Use a sturdy tripod to maintain stability during long exposures. A remote shutter release helps eliminate camera shake when capturing the droplets.
High-Speed Photography Setup:
Configure your camera for high-speed photography by adjusting settings such as shutter speed, aperture, and ISO to freeze the fast-paced action.
Adjusting Flash Power:
Experiment with flash power to achieve the desired balance between ambient light and controlled flash illumination. This allows for a natural look while ensuring the droplets stand out.
Using Flash in Astrophotography
Astrophotography offers a breathtaking canvas for capturing the wonders of the night sky, and the strategic use of flash can elevate your images by illuminating foreground elements and adding depth. In this section, we’ll explore techniques for incorporating flash into astrophotography setups, providing tips for balancing flash with long-exposure techniques and enhancing the overall visual impact of your night sky images.
Techniques for Incorporating Flash into Astrophotography Setups
Foreground Illumination:
Use flash to selectively illuminate foreground elements, such as trees, mountains, or structures, against the dark backdrop of the night sky.
Balancing Flash with Ambient Light:
Achieve a balance between flash and ambient light by adjusting the flash power. This ensures that the foreground is illuminated without overpowering the natural darkness of the night sky.
Directional Lighting:
Position the flash strategically to create directional lighting and emphasize specific elements in the foreground. This adds depth and visual interest to the overall composition.
Illuminating Foreground Elements and Adding Depth to Night Sky Images
Choosing the Right Flash Equipment:
Opt for a powerful external flash with adjustable power settings to provide flexibility in controlling the amount of light emitted.
Gels for Creative Effects:
Experiment with color gels on the flash to introduce creative effects. This can add warmth or cool tones to the foreground, enhancing the overall mood of the image.
Multiple Flash Units:
Use multiple flash units to achieve even lighting across a larger foreground area. This is particularly useful when capturing expansive landscapes under the night sky.
Tips for Balancing Flash with Long-Exposure Astrophotography Techniques
Understanding Long-Exposure Settings:
Configure your camera for long-exposure astrophotography by using a slow shutter speed to capture the movement of stars and celestial objects.
Maintaining Dark Sky Conditions:
Ensure that the flash does not contribute excessive light pollution to the sky. Use lower flash power settings or direct the flash away from the sky to maintain dark sky conditions.
Timing and Syncing:
Synchronize the flash with the camera’s shutter release to capture the flash at the optimal moment during the long exposure. Experiment with timing to achieve the desired effect.
Bracketing Exposures:
Implement exposure bracketing by capturing multiple shots with varying flash power and ambient light conditions. This provides options during post-processing to choose the most visually appealing balance.
Safety Considerations:
Be mindful of the impact of artificial light on the night environment, and adhere to principles of responsible astrophotography to minimize light pollution.
Combining Multiple Flash Techniques
In this chapter, we explore the realm of creativity by combining various specialized flash techniques. By experimenting with a fusion of approaches, photographers can create multi-layered and visually intricate images that push the boundaries of traditional flash photography. This chapter delves into the art of combining multiple flash techniques for unique effects, providing insights into the creative process and offering case studies that showcase the limitless possibilities of this approach.
Experimenting with a Combination of Specialized Flash Techniques
Identifying Complementary Techniques:
Select specialized flash techniques that complement each other in terms of lighting styles, moods, or intended visual effects.
Layering Techniques for Depth:
Experiment with layering different flash techniques to add depth and complexity to your images. This may include combining on-camera and off-camera flash, or mixing ambient light with controlled flashes.
Incorporating Creative Elements:
Introduce creative elements, such as color gels, diffusers, or reflective surfaces, to enhance the overall visual impact of the combined techniques.
Creating Multi-Layered and Visually Intricate Images
Foreground-Background Interplay:
Explore the interplay between foreground and background elements by employing different flash techniques for each. This adds depth and interest to the composition.
Texture and Detail Enhancement:
Combine techniques aimed at enhancing texture and details with those focusing on freezing motion or creating silhouettes. This results in images that are both sharp and visually captivating.
Dynamic Lighting Scenarios:
Experiment with dynamic lighting scenarios, such as using on-camera flash for the main subject while incorporating off-camera flash to illuminate surrounding elements. This creates a visually engaging scene.
Case Studies Showcasing the Creative Potential
Nighttime Portrait with Light-Painting:
Case study: Combining on-camera flash with light-painting techniques to create a dynamic nighttime portrait with selectively illuminated elements.
Macro Photography with Water Droplets and Silhouettes:
Case study: Integrating flash techniques for water droplet photography with those for creating silhouettes, resulting in visually intricate and compelling macro images.
Astrophotography with Environmental Lighting:
Case study: Combining flash techniques in astrophotography by illuminating foreground elements with controlled flash, adding depth and visual interest to night sky compositions.
Portrait Photography with Specialized Lighting Styles:
Case study: Experimenting with a combination of classic portrait lighting setups, high-key and low-key techniques, and on-camera flash to achieve a diverse and visually stunning portrait portfolio.
Outdoor Environmental Flash Photography:
Case study: Showcasing the creative potential of using flash in outdoor environments by combining techniques for overcoming harsh sunlight, capturing golden hour magic, and introducing off-camera flash for dramatic effects.
LightCraft is more than just a guide; it’s a journey into the world of photography where light becomes your ultimate artistic tool. Whether you’re a beginner looking to demystify flash photography or an experienced photographer wanting to take your skills to the next level, this book will serve as your companion on the path to mastering the craft of light in photography. Let the adventure begin.